[Punkapocalyptic ]The miniature development process
Remember, visit our Indiegogo campaign!!!
Although we would like it to be otherwise, developing a miniature for you to have it in your hands is a really long and tedious matter. Here we will try to explain to you, step by step, the whole process.
The creative team gathers a first time to exchange ideas that could be interesting or cool for a new miniature. It is then when our illustrator, Marco Paraja, starts to make some early and quick sketch to have a base from which work further at home towards a more concrete concept. Thus, the first miniature concept art is born.

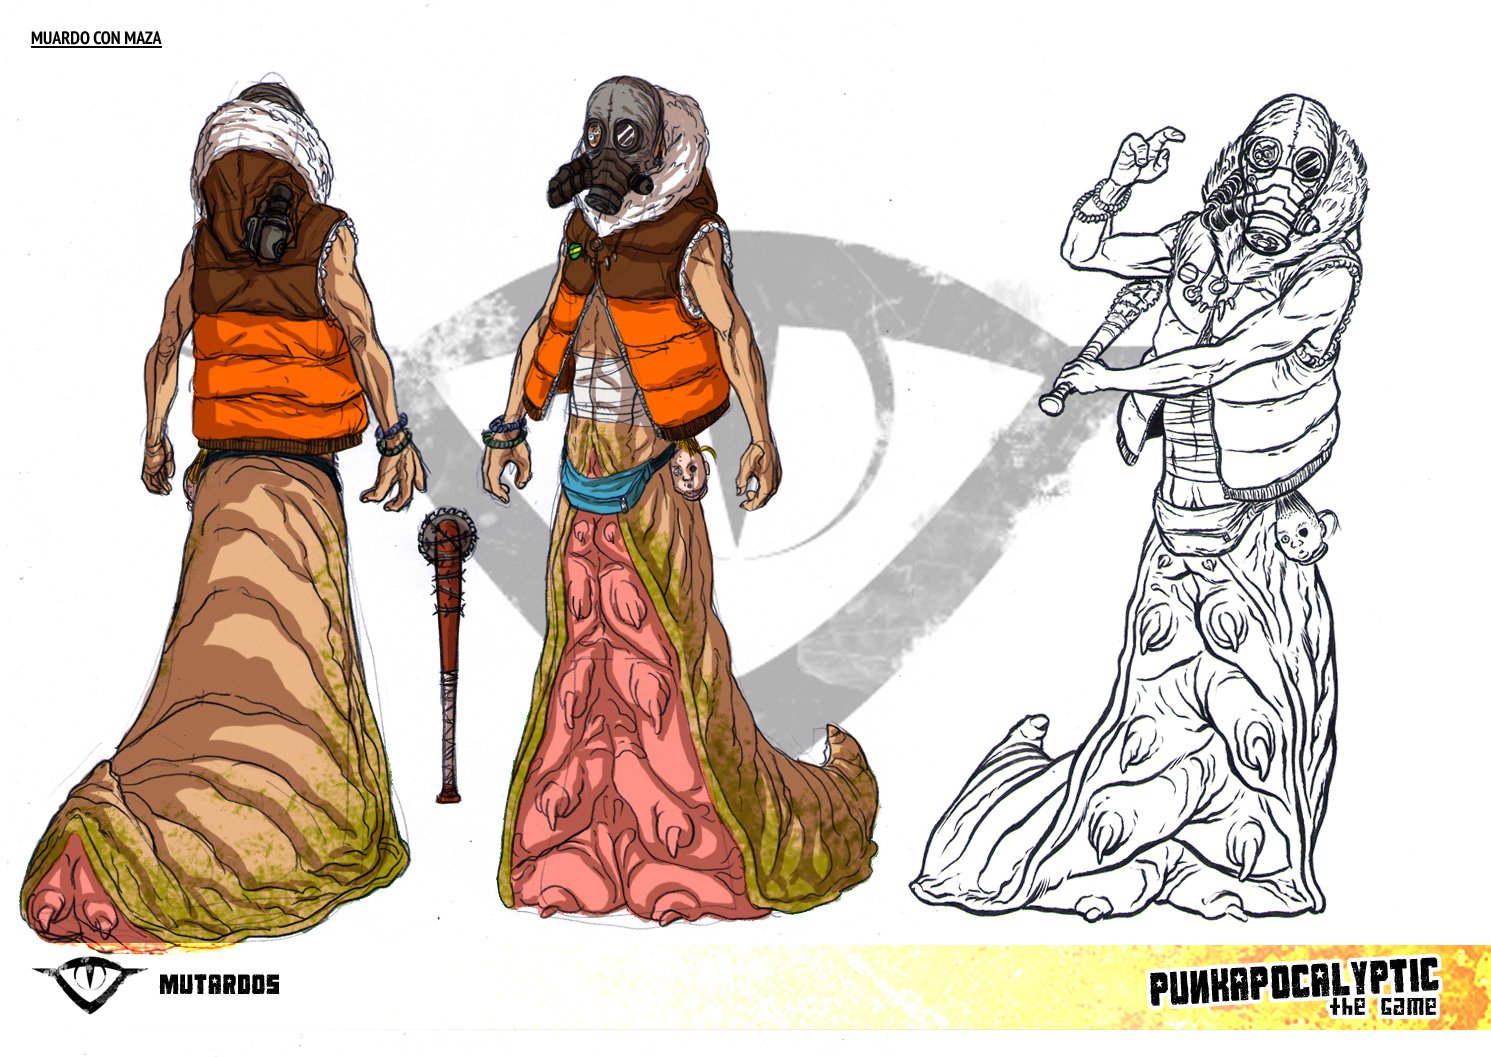
In one of our meetings we decided to make a Mutard with slug body, and this was the first sketch produced.
After this first sketching process, we discuss again any changes or improvements we see fit until we reach the final concept art. This step includes the desired pose of the miniature to serve as a guideline for the modeller, as well as some color views to help remark its volumes and features for both the modeller and the painter.

The final concept art has much more details in it.
This final concept art is then sent to the modeller. He can choose to stick to it completely, or give some ideas of his own, maybe sending us a new sketch with some variations or showing us an early stage of his work with the changes made.

This modeller, Leonardo Escovar, suggested a slight change in the pose of the miniature, with the idea of making it more dynamic and solid. He wanted to use the slug tail to make a coil or spiral that went with the general movement of the figure.
Once the idea is crystal clear, the modeller will do his work until the miniature is done. He usually keeps us updated through the whole process, sending us some WIP pictures to check that everything goes as expected.

The final sculpture.
After checking that the cutting of the pieces is correct to start the moulding process, the miniature is sent to the BigChild Creatives team, who is responsible for the mass production and painting stage.

An early copy of the miniature.
With these first “masters” of the miniature, the BigChild crew chooses one of them and starts the painting process. As happened with the modelling process, we get regular feedback about the progress of this stage to check if everything suits our taste. Once the painting process is finished, they send us some studio pictures made against a blank background, to help cut the figure for several purposes (such as putting it in the inlay card, and the like).

The final miniature picture.
Once the final picture we want to use is chosen, our graphic designer starts to… well, design the inlay card that will go inside the blister, using a template he had already prepared and discussed with the rest of the Bad Roll staff.

The final inlay card.
Once everything is done, all that remains is waiting for the batch copies of the miniature and putting them in the blisters, ready to be sold to the public.
