
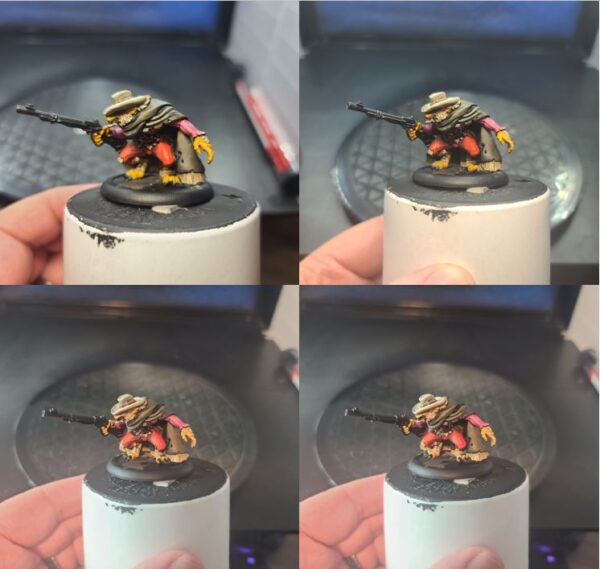
Riot Quest: Painting The Wolf With No Name
by Charles Foster III
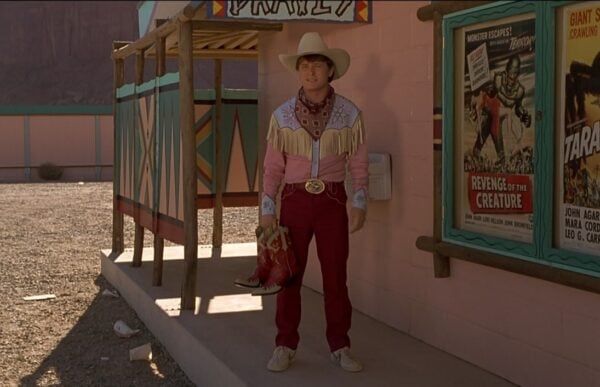
“Great Scott! Marty, you’re going to have to do something about those clothes. You walk around town dressed like that, you’re liable to get shot.” – Emmett “Doc” Brown, Back to the Future 3
I’ve been on a bit of a movie kick lately while working on projects. This past week, I happened to be watching Back to the Future 3 while assembling my Wolf with No Name. Then it hit me: I was originally going to try something with Clint Eastwood or Doc Holliday for the Wolf, but the outfit Michael J. Fox wears in the Old West is perfect, so I decided to re-create Marty McFly. With that being said let’s grab our paint, crank Huey Lewis and the News to eleven, and get to work.
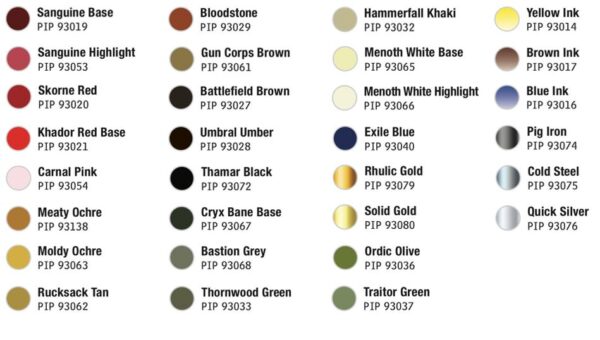
Colors Used
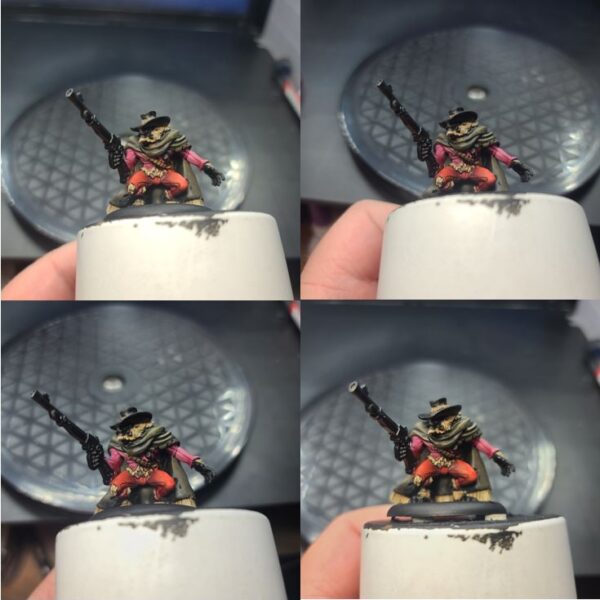
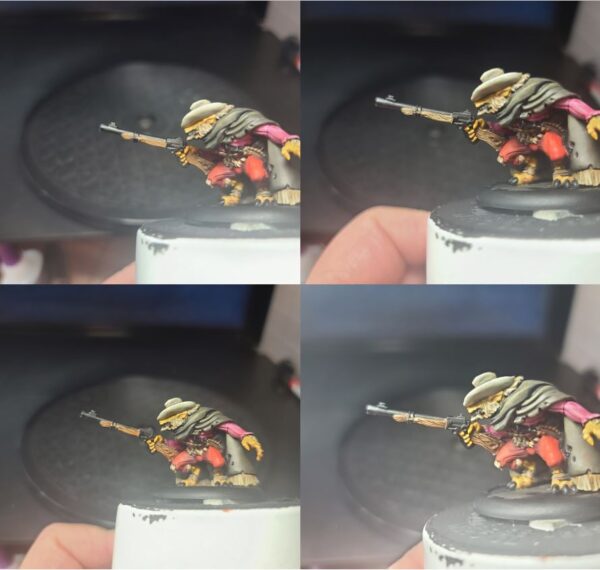
Shirt
Step 1) For this model, I think it will probably be best to try and work from inside the model out. This is my density. So, I’ll start off by basecoating the shirt area Sanguine Highlight mixed with Carnal Pink.
Step 2) Next, using Sanguine Highlight, I add in the first shade.
Step 3) For the final shade on this area, I’ll apply Sanguine Base in the darkest areas.
Step 4) I then apply Carnal Pink as the first layer of highlight.
Step 5) To really get the color I’m looking for, I’ll mix Carnal Pink with Menoth White Highlight and apply this to the highest raised areas.
Pants
Step 1) Pants? Where we’re going, we don’t need pants. But you ought to have ’em, I guess, so it’s time to tackle them. Start off with a solid basecoat of Skorne Red.
Step 2) To add in some definition to the area, apply some shade with Sanguine Base.
Step 3) Start your highlighting with Khador Red Base.
Step 4) For a final highlight, mix Khador Red Base with Menoth White Highlight and apply to the highest raised edges.
Poncho
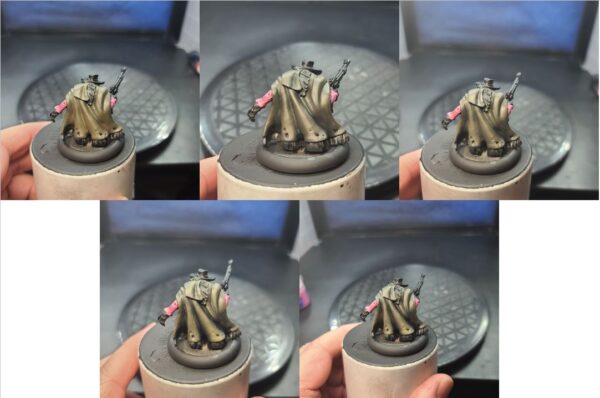
Step 1) I start the poncho off by laying down a basecoat of Thornwood Green. If it is a little patchy in some areas, that’s okay for getting back in time.
Step 2) Next, I add a little bit of shadow to the poncho by using Cryx Bane Base.
Step 3) For a second shade, use Thamar Black.
Step 4) Start your highlights by using Traitor Green.
Step 5) Add some final highlights using Ordic Olive.
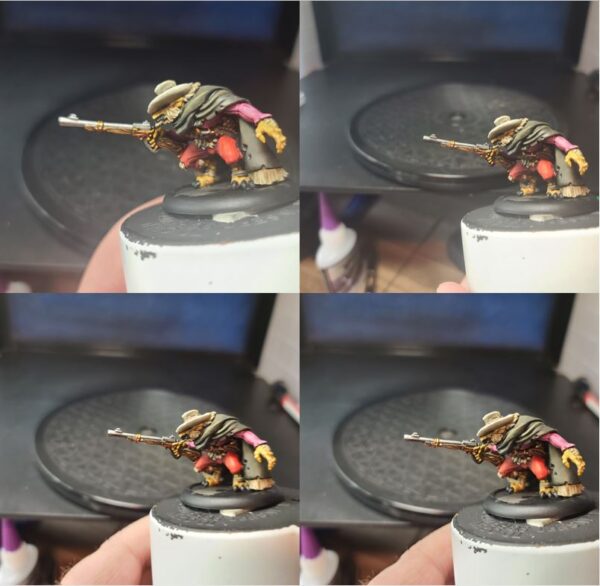
Poncho Threads
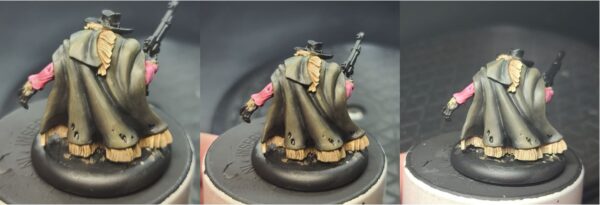
Step 1) Apply a solid and opaque basecoat to the area in Hammerfall Khaki.
Step 2) Shade the area using Gun Corps Brown.
Step 3) Add a second layer of shading with Bastion Grey.
Step 4) Highlight the area with a mixture of Hammerfall Khaki and Menoth White Highlight.
Leather
Step 1) Basecoat any leather areas with Gun Corps Brown.
Step 2) Shade the area using a little Battlefield Brown.
Step 3) Next, add a second shade: mix a small amount of Exile Blue to the Battlefield Brown from the previous step. Be careful not to go overboard when mixing as Exile Blue, as it can easily overpower the Battlefield Brown and shift the color tone too heavy of blue. And that’s heavy.
Step 4) For the final shade, add a few drops of Thamar Black to the previous mixture and pick out any cuts or areas of separation to define the look of the leather.
Step 5) Mix some Rucksack Tan and Gun Corps Brown in a 2:3 ratio and apply as the first highlight.
Step 7) Apply Hammerfall Khaki as the final highlight.
Hat
Step 1) It’s your hat, Wolfy. Something’s got to be done about your hat. So, let’s basecoat the area in Menoth White Base. Use a couple of thin layers of paint to ensure a smooth, solid basecoat with absolutely no patchiness.
Step 2) Thinly shade the area with Cryx Bane Highlight.
Step 3) Apply additional shading using Bastion Grey.
Step 4) Add some Thornwood Green sparingly to the deepest recesses as final shading.
Step 5) Apply a strong highlight of Menoth White Highlight, blending it for a smooth transition. Some painters may prefer to apply this highlight in multiple layers, mixing it with Menoth White Base to achieve the blending.
Skin
Step 1) For the skin color, I start off with a basecoat of Meaty Ochre.
Step 2) I shade the skin with Gun Corps Brown.
Step 3) For our first highlight, I start with Rucksack Tan.
Step 4) For the final highlight, I’ll use some Moldy Ochre. Isn’t he a dream?
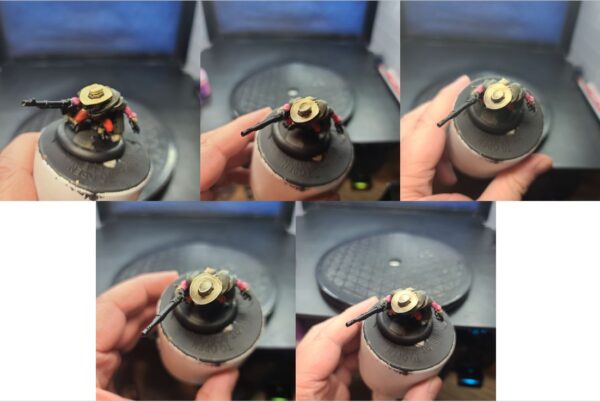
Wood Stock
Step 1) Basecoat the wood in Gun Corps Brown.
Step 2) Paint the wood texture using Menoth White Base.
Step 3) Mix a small amount of Yellow Ink and Bloodstone into Brown Ink and blend this mixture over the texture. The blending concentrates the ink toward the butt of the gun, creating an appealing gradient. Otherwise, I’m afraid it’s just too darn loud.
Step 4) Add a little Blue Ink to the previous mixture and use this to apply a final shading by blending the ink the same way as the previous layer.
Yellow Metal
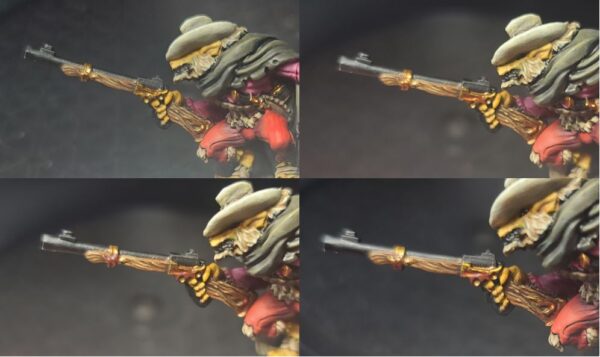
Step 1) Create a solid basecoat with multiple layers of Rhulic Gold.
Step 2) Mix Brown Ink and Yellow Ink together with Rhulic Gold and apply the resulting color to the model as shading.
Step 3) Add a final layer of shading with a mixture of Umbral Umber, Sanguine Base, and Brown Ink.
Step 4) Use Solid Gold for highlight, then coat the model with matte sealant.
Step 5) Mix Solid Gold and Cold Steel together for the final, shining highlights, Daddy-o.
Silvers
Step 1) Apply a solid basecoat of Pig Iron to the steel areas.
Step 2) I use a mixture of Greatcoat Grey, Battlefield Brown, and Pig Iron to shade the model.
Step 3) Add a dot of Thamar Black to a mixture of Brown Ink and Blue Ink for the final shading.
Step 4) Highlight the figure with Cold Steel, then coat the model with some matte sealant.
Step 5) Add 1.21 gigawatts of final, shining highlights with Quick Silver.
Basing

Step 1) It’s finally time for the power of love: a base. Add in some sand and ballast with some Elmer’s white glue and let it dry completely.
Step 2) Water down a little bit of Bloodstone and apply across the base material to let it soak in.
Step 3) Once this is dry, I drybrush on a little bit of Rucksack Tan.
Step 4) I drybrush on one final highlight of Menoth White Base.
Step 5) Glue on some static grass.
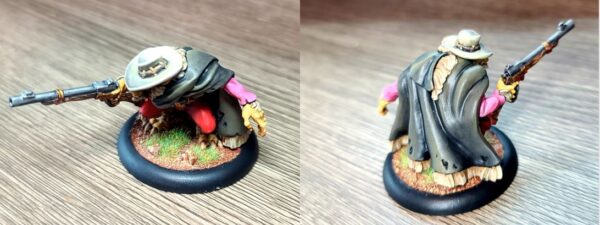
There you have it! Our Wolf with No Name is now ready rustle up some grub from my next game of Riot Quest. Join me next time when we take on The Living Covenant. Now it’s time to make like a tree and get outta here!
The post Riot Quest: Painting The Wolf With No Name appeared first on Privateer Press.