Riot Quest: Painting Pe(s)ts – Pt 2
by Charles Foster III
AdeptiCon week! We are just days away from another amazing convention, which, of course, means I’m way behind on painting deadlines. I’ve only got a few more hours to pump out the rest of the Pe(s)ts models before we get on a plane, so let’s go!
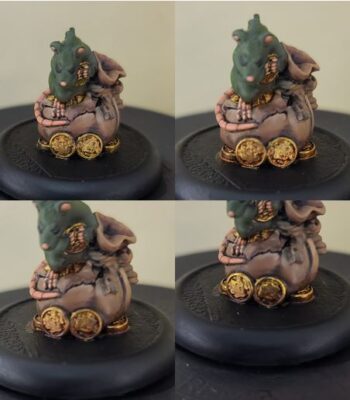
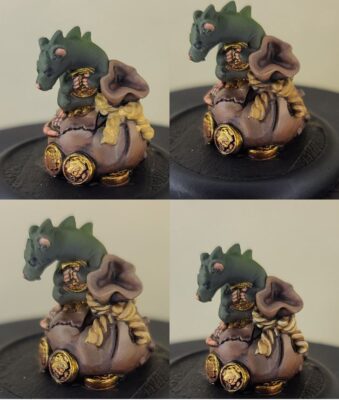
Devil Rat
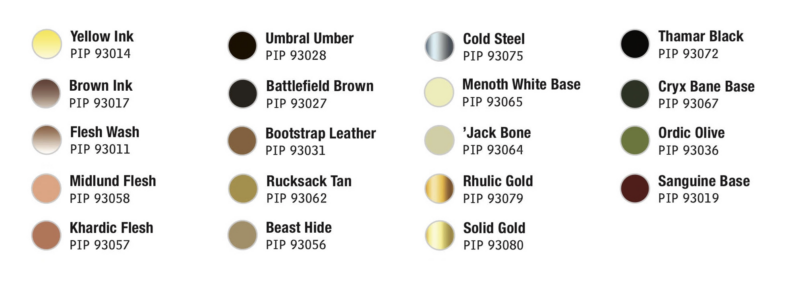
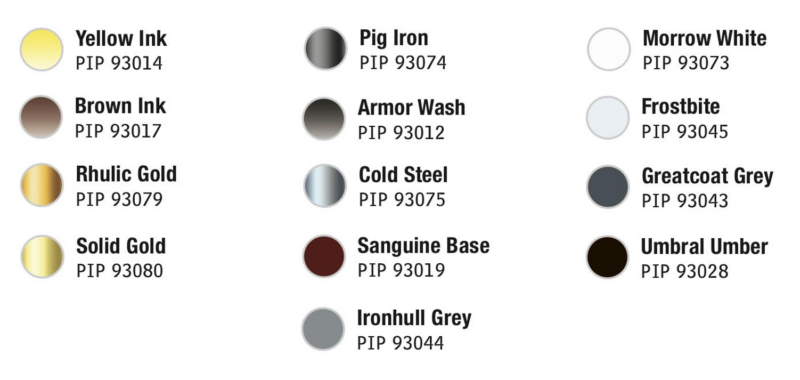
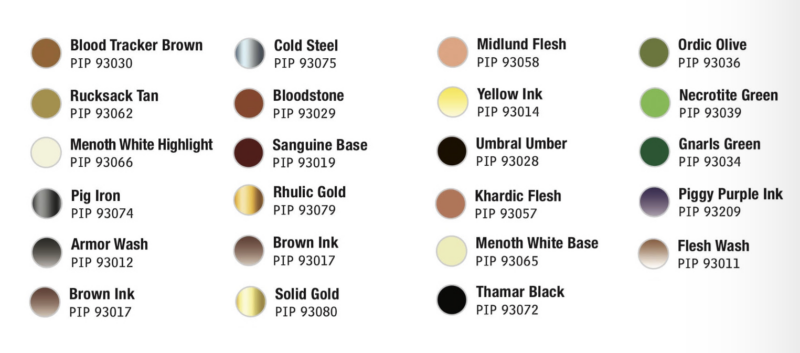
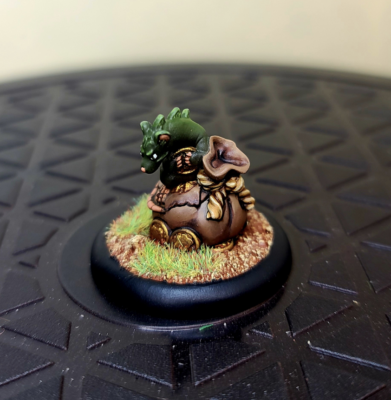
Devil Rat Colors Used
To start, all of the models get a base Black Primer.
Skin Tones
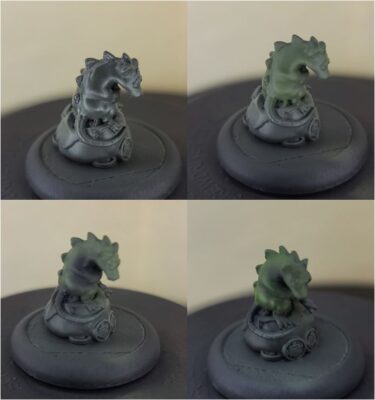
Step 1) There is a lot to do, so let’s get that airbrush out and airbrush on some Cryx Bane Base for the skin.
Step 2) Next, I add a layer by airbrushing on some Ordic Olive.
Step 3) The color didn’t quite get to where I wanted it to be, so I mix in more Ordic Olive and airbrush on another layer.
Step 4) I need to add some shadows back in, so I airbrush Thamar Black into the shadows.
Step 5) For a final highlight, I apply some Ordic Olive to the raised areas and spine fins.
Feet, Tails, and Fleshy Bits
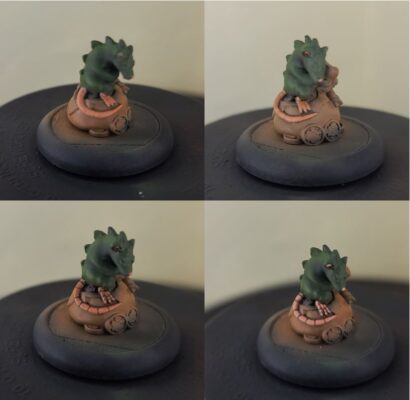
Step 1) Basecoat the areas in Khardic Flesh.
Step 2) Thin out Flesh Wash with water in a 6:1 ratio of water: Flesh Wash and apply over the entire area.
Step 3) To really make the darkest areas stand out, add an additional shade of Battlefield Brown, making sure to pay attention the areas along the tail in order to show each separate section.
Step 4) Apply a first highlight using Khardic Flesh. Be sure to leave some of the areas of wash from the previous steps showing through.
Step 5) Add a final highlight using Midlund Flesh.
Leather
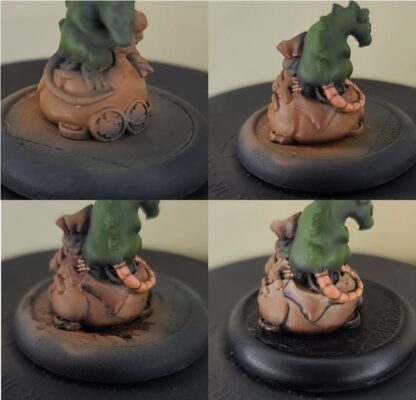
Step 1) I start with a basecoat of Bootstrap Leather. To speed up the process, I just lay this down with the airbrush before painting on the tail and fleshy bits.
Step 2) For the first layer of shading, I mix Brown Ink with Bootstrap Leather to make a wash and apply it to the recesses.
Step 3) To really define the leather, I make a final shade using Brown Ink with a small amount of Thamar Black. I use this color to define the deeper shadowed areas and to create separation from the other areas on the bag.
Step 4) Next, I mix a 50:50 ratio of Bootstrap Leather and Beast Hide, and then I apply this as my first highlight.
Step 5) Finally, add ’Jack Bone to the previous mix and use this to add line highlights to the edges and raised areas.
Gold
Step 1) I am really a sucker for how good the gold looks in the Menoth painting tutorials we’ve done over the years, so I suggest using this on all of the gold areas on these models. Start by using multiple thin layers to create a solid basecoat of Rhulic Gold.
Step 2) Next, mix Brown Ink and Yellow Ink together with a drop of Rhulic Gold and apply the resulting color to the model as shading.
Step 3) To really get this color to that aged look, add a final layer of shading with a mixture of Umbral Umber, Sanguine Base, and Brown Ink.
Step 4) For the first highlight, use Solid Gold.
Step 5) After the model has been sealed with a matte finish, mix some Solid Gold with Cold Steel for the final highlight.
Teeth and Rope
Step 1) I basecoat the area with Rucksack Tan.
Step 2) Next, I create some definition by mixing water with Brown ink and Umbral Umber to create a wash and apply it over the area.
Step 3) To reclaim some of the base color, I use Rucksack Tan as a layer highlight, leaving some of the previous step showing through beneath.
Step 4) Finally, I apply the final highlight using Menoth White Base to bring it all together.
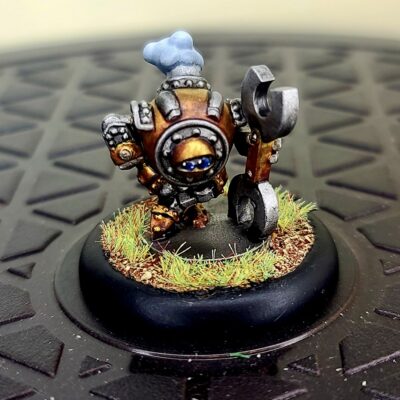
Halfjack
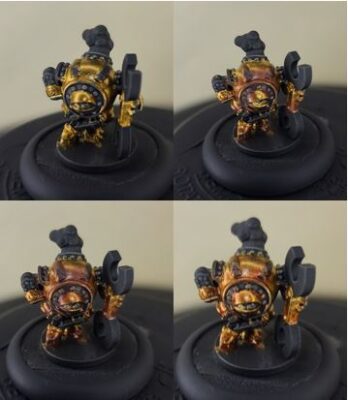
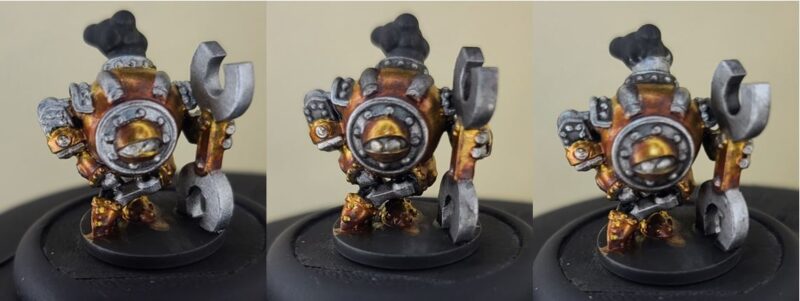
Tah-dah! So, now…on to the Halfjack!
Halfjack Colors Used
Gold
Step 1) Just like the gold coins on the Devil Rat, I create a solid basecoat with multiple layers of Rhulic Gold.
Step 2) Just as before, I mix some Brown Ink and Yellow Ink together with Rhulic Gold and apply the resulting color to the model as shading.
Step 3) For the final shade, I go with a mixture of Umbral Umber, Sanguine Base, and Brown Ink.
Step 4) Let’s brighten up the model by using Solid Gold for the first highlight.
Step 5) After the model is sealed with a matte finish, I return with Solid Gold and Cold Steel mixed together to reclaim some of the shine that has been lost to the sealant.
Silver
Step 1) Since we’re going for speed today, I will cut some corners and keep the white metals pretty simple. I start by using some Pig Iron as a basecoat.
Step 2) Next, I use watered-down Armor Wash to create some quick shades.
Step 3) Once the Armor Wash has completely dried, I use Cold Steel as quick highlighting.
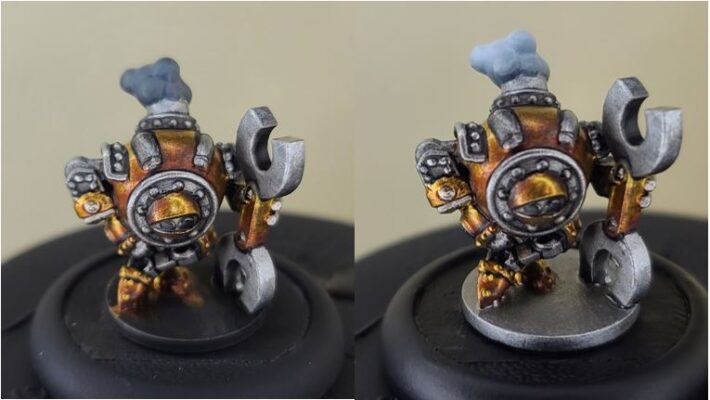
Smoke
Step 1) I start by brushing on a basecoat of Greatcoat Grey for the smoke coming out of the top.
Step 2) To add a quick highlight, I airbrush a mixture of Ironhull Grey, Morrow White, and Frostbite.
Next up: the Argus Pup!
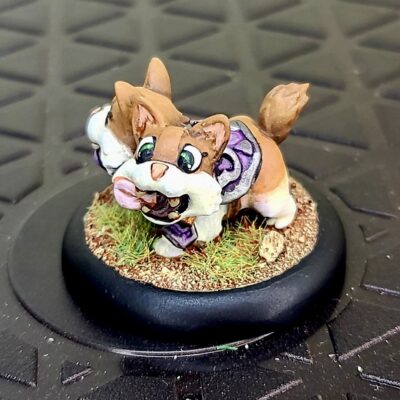
Argus Pup
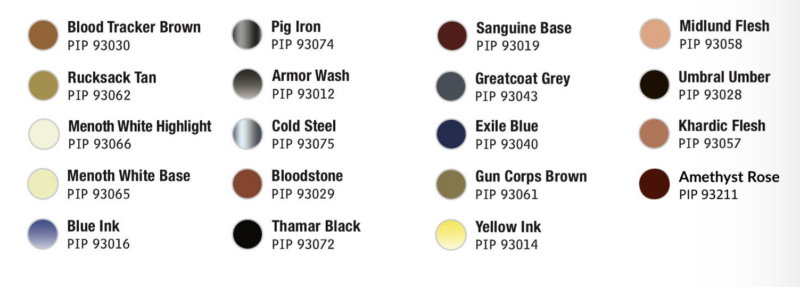
Argus Pup Colors Used
Fur
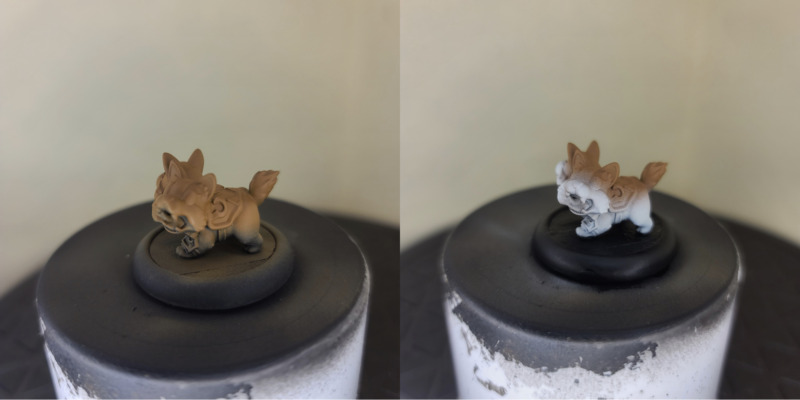
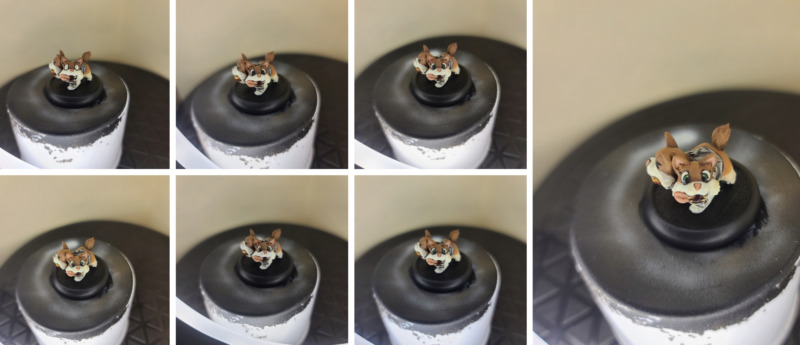
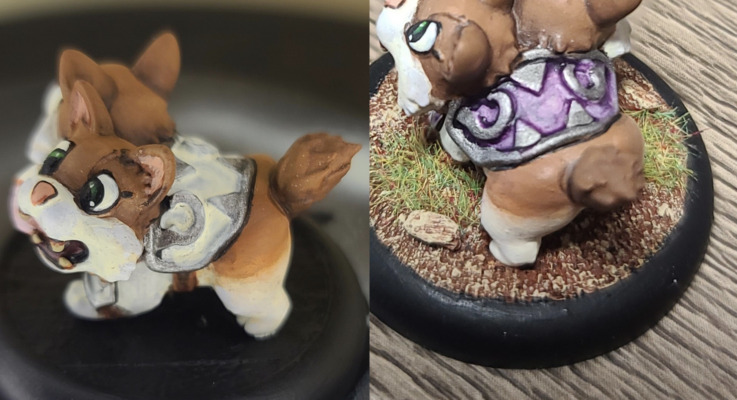
Step 1) I really like corgis, but sadly my dog allergies will forever prevent me from having one as a pet, so here is the opportunity to add one to my mini’s collection. I start by mixing an even amount of Bloodtracker Brown and Rucksack Tan and airbrush this color across the top of the model.
Step 2) For the lower half, I airbrush on Menoth White Highlight.
Silver
Step 1) For the armor on the back, start by basing the area using Pig Iron.
Step 2) Next, to create some shade, apply watered-down Armor Wash.
Step 3) After the wash has completely dried, use some Cold Steel to create highlights.
Gold
Step 1) Yep, same gold formula as the two earlier Pets. Create a solid basecoat with multiple layers of Rhulic Gold.
Step 2) Mix Brown Ink and Yellow Ink together with some Rhulic Gold and apply the resulting color to the model as shading.
Step 3) Add a final layer of shading with a mixture of Umbral Umber, Sanguine Base, and Brown Ink.
Step 4) Use Solid Gold for highlighting, then coat the model with a matte sealant.
Step 5) Mix Solid Gold and Cold Steel together for the final, shining highlights.
Tongue, Ears, and Nose
Step 1) For all of the pinkish skin areas, I start by basing those sections in Khardic Flesh.
Step 3) I use Flesh Wash to create a quick and easy shade for the areas.
Step 4) Using Khardic Flesh, I reclaim some of the area, being sure to leave some of the previous steps showing through to define the areas.
Step 5) Finally, using Midlund Flesh, I highlight the area.
Teeth
Step 1) Let’s get those canine teeth going by using Bloodstone for a base.
Step 2) Apply Rucksack Tan as a highlight, making sure to leave a small amount of the Bloodstone showing from the previous step.
Step 3) Add a final highlight of Menoth White Base on the higher areas.
Eyes
Step 1) For the eyes, I start by using Thamar Black to black out the area.
Step 2) Leaving some of the Thamar Black showing from the previous step, I use Menoth White Highlight to draw out the eyeball.
Step 3) I mark out the inner part of the iris using Thamar Black.
Step 4) I think a green iris would look good with the colors we have used so far. I take a little Gnarls Green and define the upper part of the iris.
Step 5) I add a little more definition to the iris by adding in Necrotite Green.
Step 6) To make the eyes reach that almost chibi cuteness, I add a drop of Menoth White Highlight to the colors of the iris.
Step 1) All of my Circle models use a purple inlay/glow on the armor and rocks. I need to keep that theme going, so I water down Menoth White Highlight and apply in the recesses of the armor.
Step 2) Once the previous layer has dried, I water down Piggy Purple Ink and apply it, making sure that some of the Menoth White Highlight shows through.
Whew 3 models down! Next up: the Powder Skiggs!
Powder Skiggs
Powder Skiggs Colors Used
Main Skin Tones
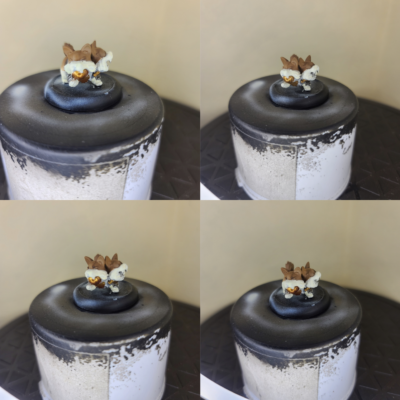
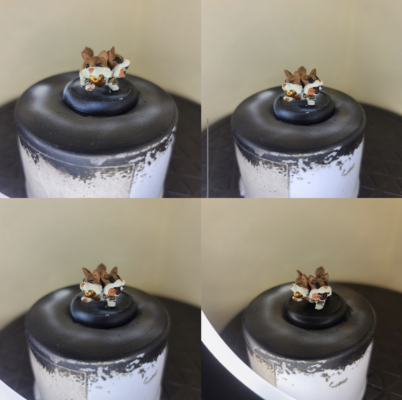
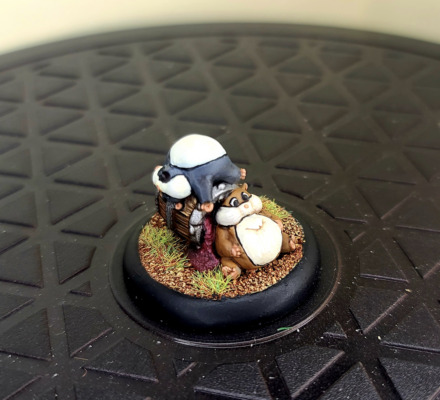
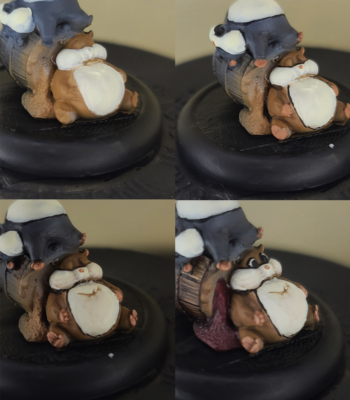
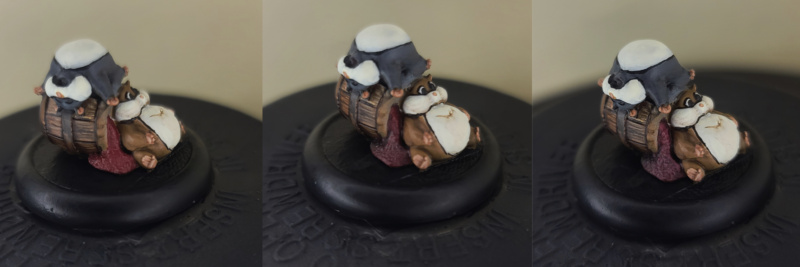
Step 1) There are two Skiggs on this model, and I’m going to paint them in different colors. For the one propped up against the open barrel, I mix Bloodtracker Brown and Rucksack Tan and airbrush on the base layer. For the one lying across the barrel, I airbrush on Greatcoat Grey.
Step 2) For both Skiggs, I airbrush Menoth White Highlight on the stomachs and cheeks, going for that small rodent look.
Step 3) The stomachs and cheeks still look a little weird and blurry to me, so I use Thamar Black to line those areas.
Hands and Ears
Step 1) For all of the pinkish skin areas, start by basing the sections in Khardic Flesh.
Step 3) Use Flesh Wash to create a quick easy shade for the areas.
Step 4) Using Khardic Flesh, I reclaim some of the area, being sure to leave some of the previous steps showing through to define the areas.
Step 5) Finally, using Midlund Flesh, I highlight the area.
Woodgrain
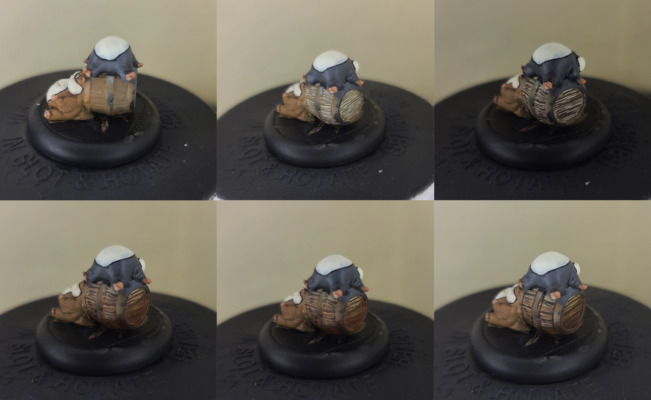
Step 1) Time to tackle the wood grain on the barrel! I start by laying down a nice even basecoat of Gun Corps Brown.
Step 2) I start adding definition to the barrel using Menoth White Base to paint texture lines.
Step 3) To in definition, I go back and add lines with Umbral Umber. Make sure not to go over any of the areas of Menoth White Base and to leave some areas of Gun Corps Brown showing. This will make the colors stand out after we add the next few washes.
Step 4) To give it that wood barrel look, I mix Bloodstone, a drop of Yellow Ink, and Brown Ink in a 3:1:2 ratio. With this color, I add a glaze to the woodgrain.
Step 5) To bring the woodgrain to the level I’m looking for, I’m going to add a single (or even just a half) drop of blue ink to the previous color. Be careful when adding this—P3 Blue Ink has strong pigments and can quickly overpower the previous color. Once mixed, add a final shade to the deepest recesses to finish the wood effect.
Step 6) Add a drop of Thamar Black to the previous mixture and use this to line where the wood panels separate.
Berries
Step 1) Next, on to the barrel where I will be painting berries. I start by basing this area in Amethyst Rose.
Step 2) I mix Sanguine Base and Exile Blue in a 50:50 ratio and apply as a shade to the area.
Step 3) I create a highlight using Amethyst Rose mixed with Menoth White Base and stipple this color on the area to let the “berries” stand out.
With that, it’s time to throw a basing party!
Basing Party
<Base Party image>
Basing
Step 1) Add in some sand and ballast with some Elmer’s white glue and let it dry completely.
Step 2) Water down a little bit of Bloodstone and apply across the base material to let it soak in.
Step 3) Once dry, drybrush on a little bit of Rucksack Tan.
Step 4) Drybrush on one final highlight of Menoth White Base.
Step 5) Glue on some static grass, and you’re done!
Look at that! All six of these adorable Pe(s)ts are completed, and with not a moment to spare, either. Just going to grab some clothes over here… boarding pass…. Hmm… oh yeah, socks are good… and off to the airport! See you all very soon at AdeptiCon. Come check out the Pe(s)ts early by getting in a game in with me at AdeptiCon and tell me which model you think I should paint next!
Make sure you take some time to head over to the link below to sign up to receive notifications when the Riot Quest Board Game goes live!
https://home.privateerpress.com/2022/02/22/riot-quest-board-game-coming-soon-to-kickstarter/
In case you missed it last week and still don’t know, we are currently hosting a competition to get your own card added to the Riot Quest Board Game by taking part in our ongoing contest, Your Gear Here! You now have a chance to leave your own mark of insanity on the Riot Quest Game (which is quite an accomplishment, considering the game in question)! For full details, check out this link below:
https://home.privateerpress.com/2022/03/01/your-gear-here/
Until next time!
The post Riot Quest: Painting Pe(s)ts – Pt 2 appeared first on Privateer Press.

