
Painting Your Tablescapes Tiles – Urban Streets pt. 2
Part 1. Introduction & Materials
Part 2. Urban Streets pt. 1
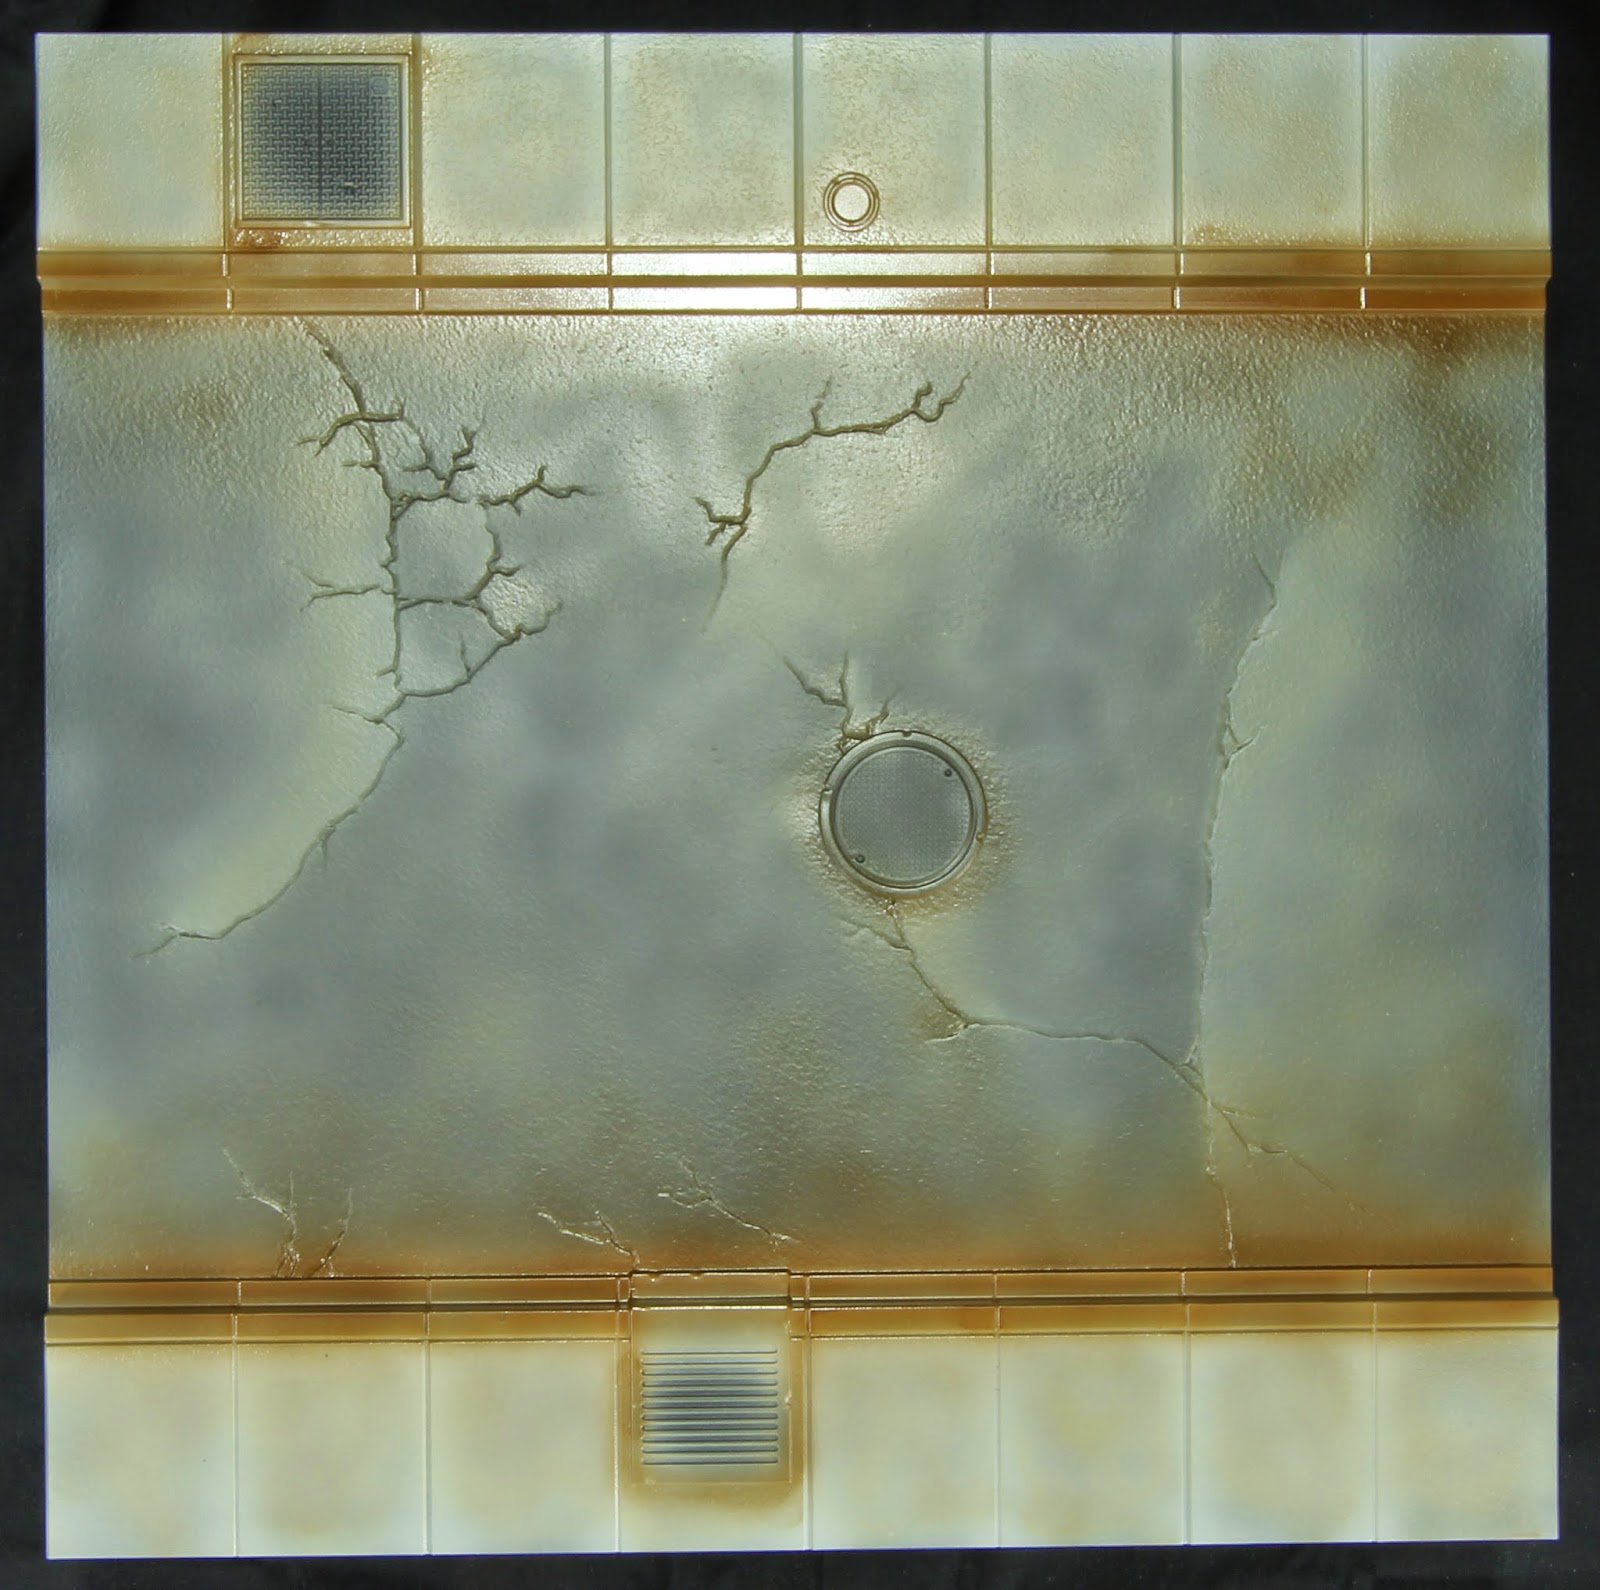
Weathering Begins

(Weathering slowly begins.)
Minitaire Saddle Brown was used in order to color the ledge of the sidewalks. It is also applied along the edges of the street and manholes in order to prepare for weathering. Do not worry about the glossiness of the paint. A coat of matt varnish will be applied later.

(Touch of metallic.)
The various metallic elements were basecoated in a neutral, dark silver color.

(Armor Wash coat.)
A heavy coat of Secret Weapon Armor Wash is applied to the metallic areas. Once again, do not worry about the messiness as we’ll clean it up later. Of course if you are not planning to follow the later steps, a tidier coat should be applied.
This is our first breaking point. You now have a fairly good looking tile. If you are looking for good results with minimal effect, or you do not want to play with oils and pigments, you can simply stop here. I would maybe suggest that you read the segment on the crosswalk path and yellow stripes as it would add an extra level to your tile without requiring more products.

(Oil washes were applied.)
It is now the time to apply oil washes. The procedure is simple: heavily thin down your oil paint, just like you would an acrylic wash. Using a large brush, spread evenly on the selected areas and let dry. This is not acrylic so it will take a while. It takes days for oil paint to properly dry but do not worry, you will not have to wait that long. In fact, as soon as the thinner as evaporated, you can apply a coat of varnish and go on with the next step. You’ll know you’re ready because the oil wash will have lost its shininess.
Two colors were used for this step. Burnt Sienna, a classic color available from any range, was lightly applied on the sidewalks and more heavily around the metallic elements. Note how it ties in with the Miniataire Saddle Brown we previously applied.
Davvy’s Grey was mainly used for lining in this case. The interesting thing with oil paint is that by simply pressing your brush, full with thinned paint, along a crack, the paint will simply flow along it. Once the thinner has evaporated, come back with a clean brush with a touch of thinner to clean the edges. The lining was, as seen, applied in the crack of the pavement to represent the accumulation of dust.
This is the classic moment during which you realise that you had planned a step to be done and that, unfortunately, you forgot about it once you are two steps too late. So time to backtrack and fix this.
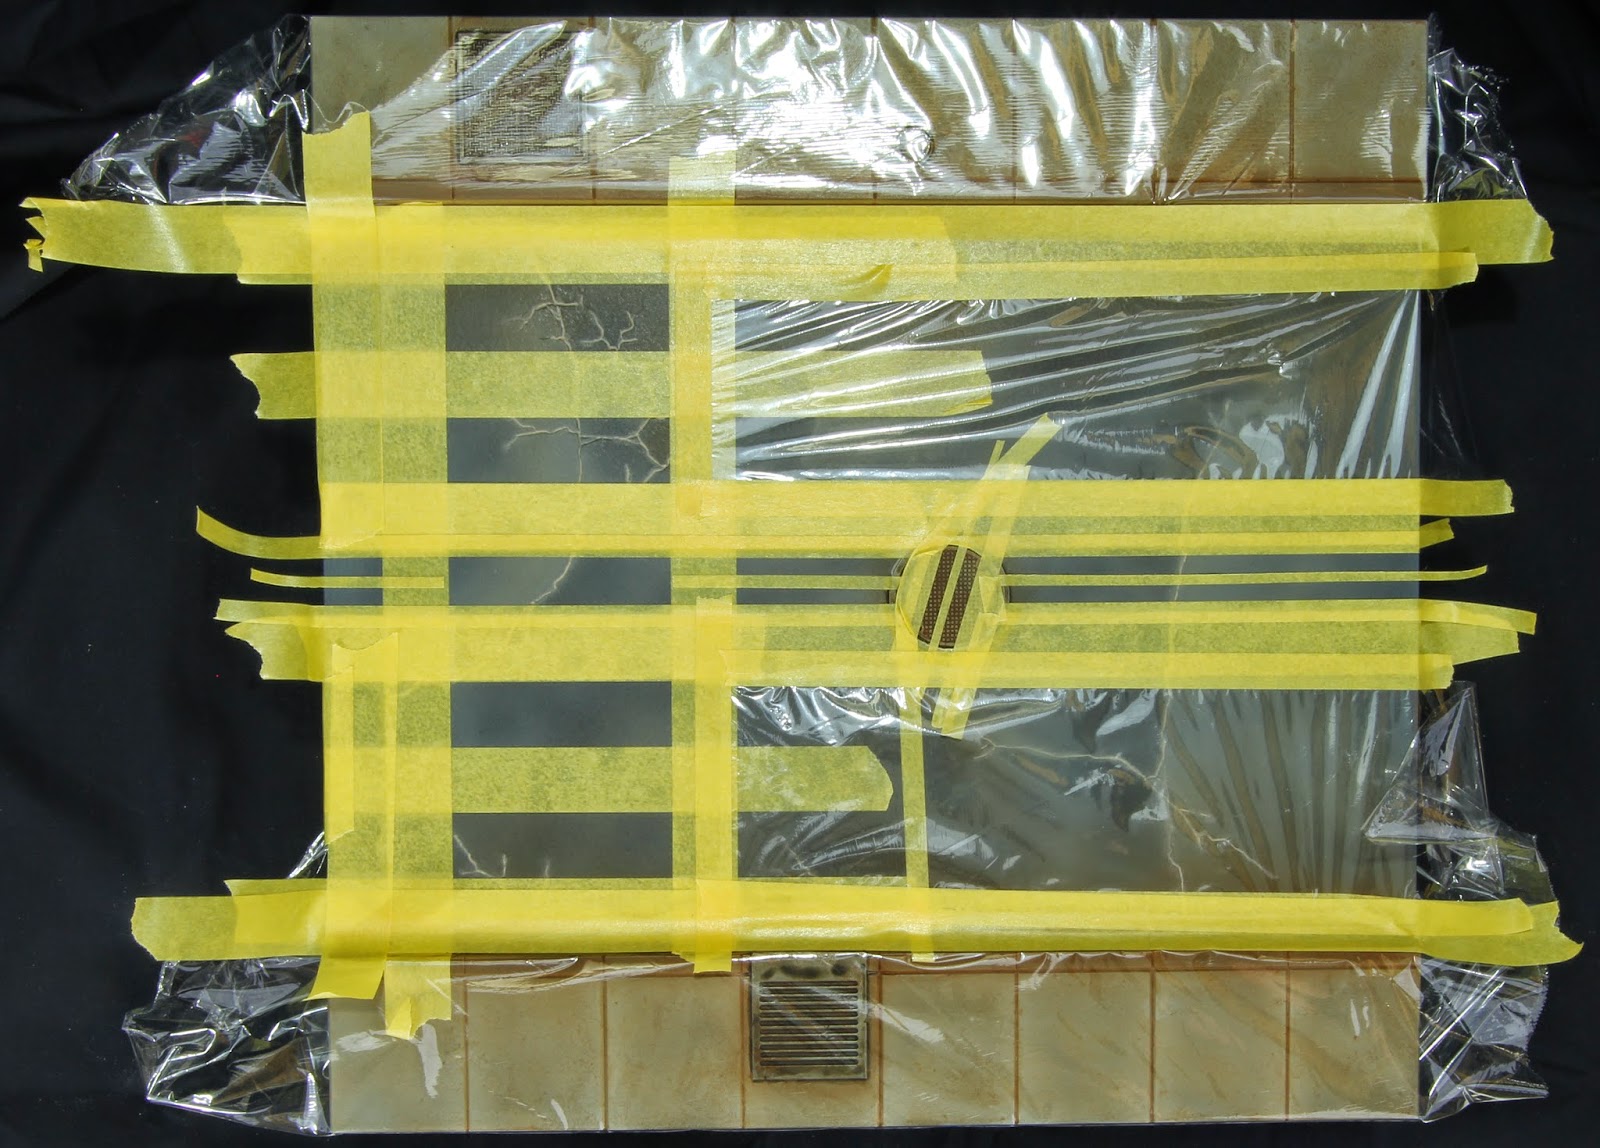

(Masking to include signs.)
As said in the reference section, I want to include a crosswalk path along the street. The classic double yellow lines will also be added at the same time. For this, you simply need to take the ruler out, a pencil for subtle marking and tape everything accordingly. If you have several road sections, it might be a good idea to align them all together in order to ensure that they all fit perfectly.
Pay attention to the stripe on the manhole. I made sure that it was at a different angle. Just like some maintenance was done and the manhole was placed back with no attention given to the stripes. These are the type of details that brings more realism and personality to your work without taking too much extra time.
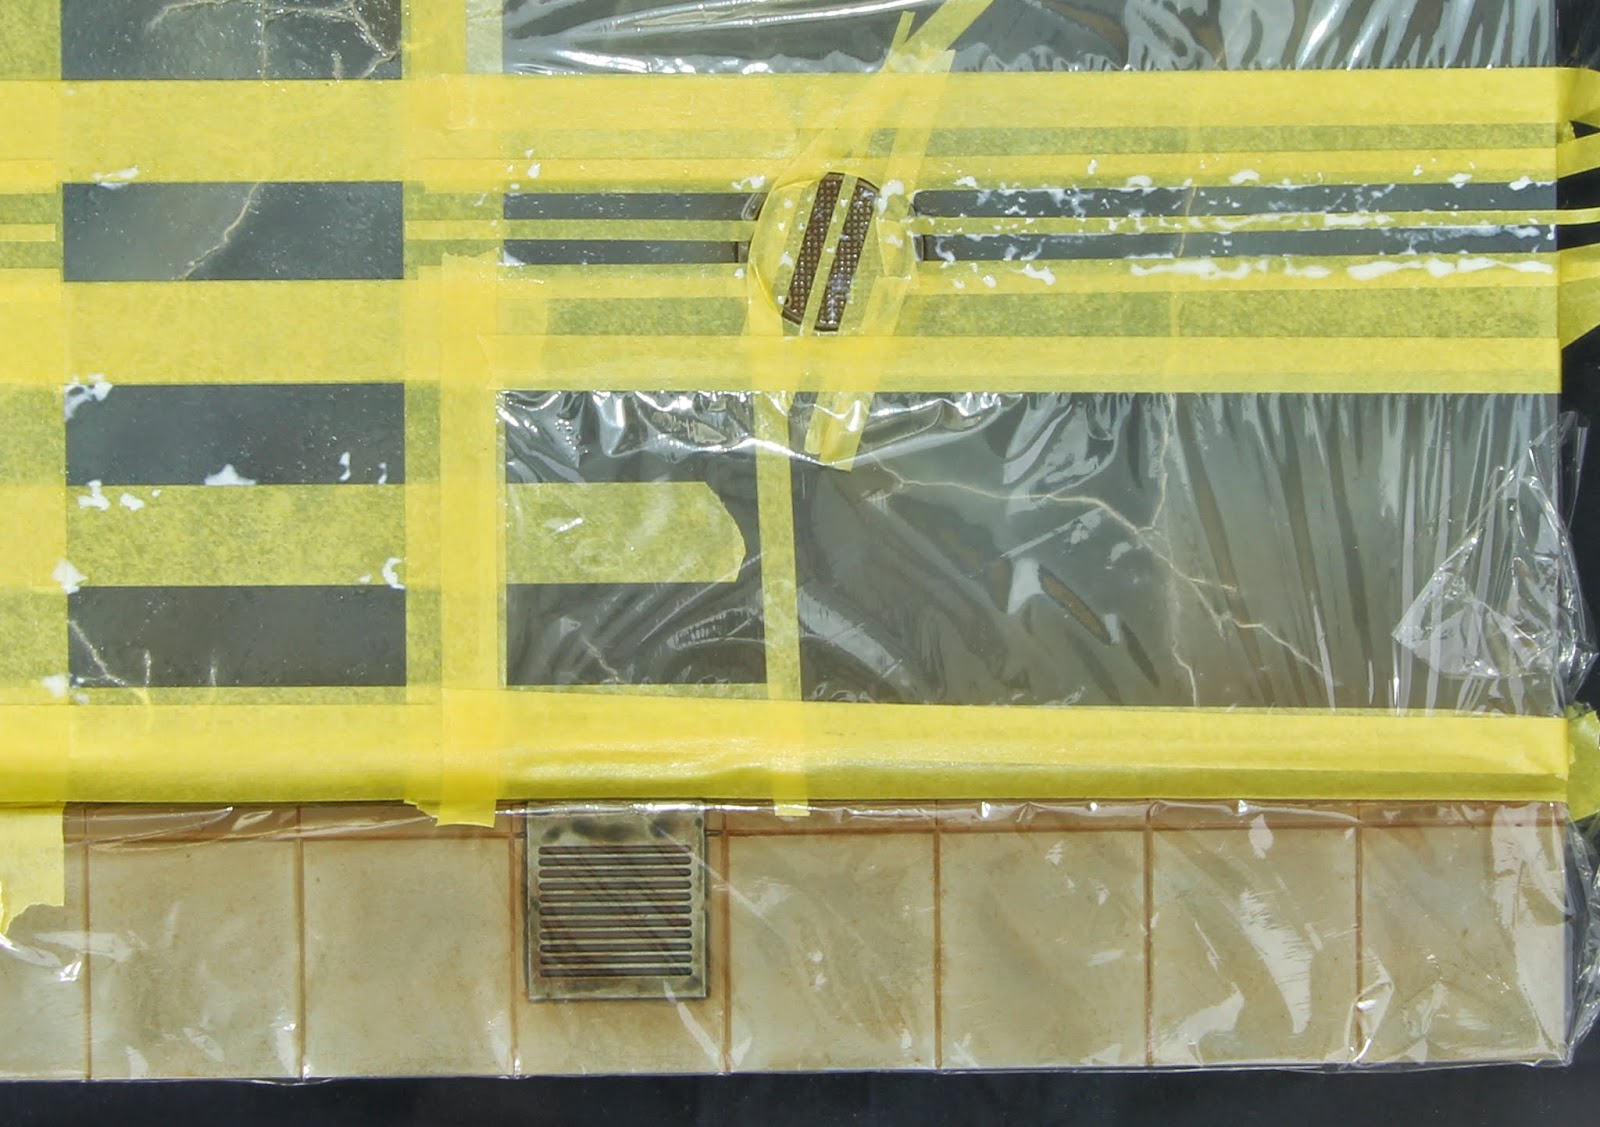

(More flexible masking.)
In order to represent the peeling off and the wear and tear of the stripes, masking fluid is used. It is basically liquid latex, that once dry, you can paint over and then peel of the dry latex to reveal the color underneath.
It is applied with a scour pad, like the ones we used to wash dishes, in order to get that irregular shape. Make sure to remove the extra from the pad first, and then stipple the desired areas. In this case, I wanted to make sure that the corners and edges were the most battered.
I also made sure, using a toothpick, that all the cracks were also protected in order to represent the wear & tear along these, as represented in the reference pictures. In its wet form, the product is white. Once dry, it becomes transparent and now is the time to apply paint on top of it.
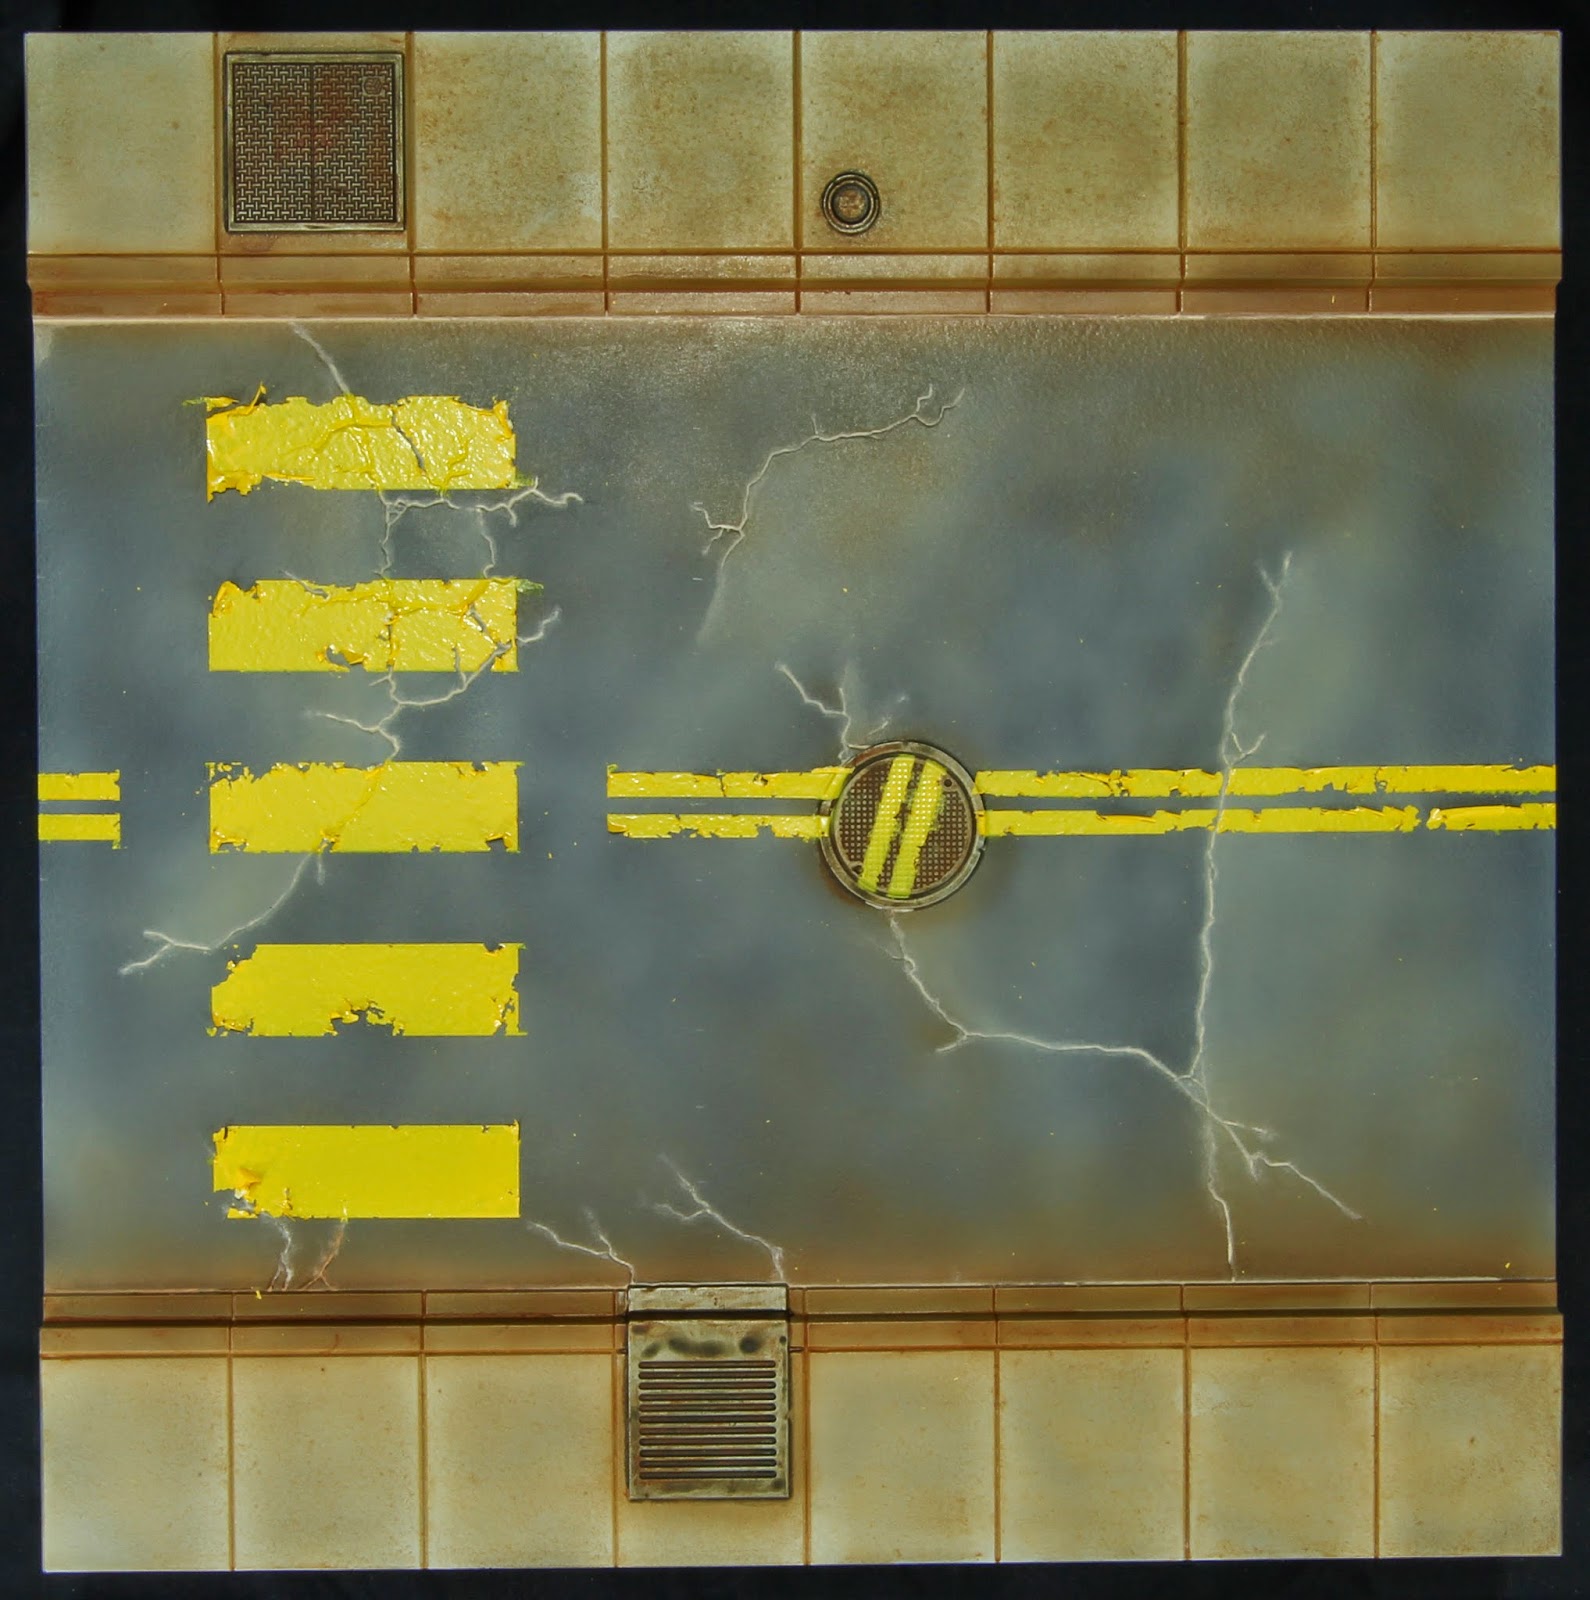

(Yellow lines are airbrushed.)
You can now see the crisp lines produced with the masking. Some of the liquid mask was already peeled off by removing the masking tape. The yellow was Minitaire Craven.
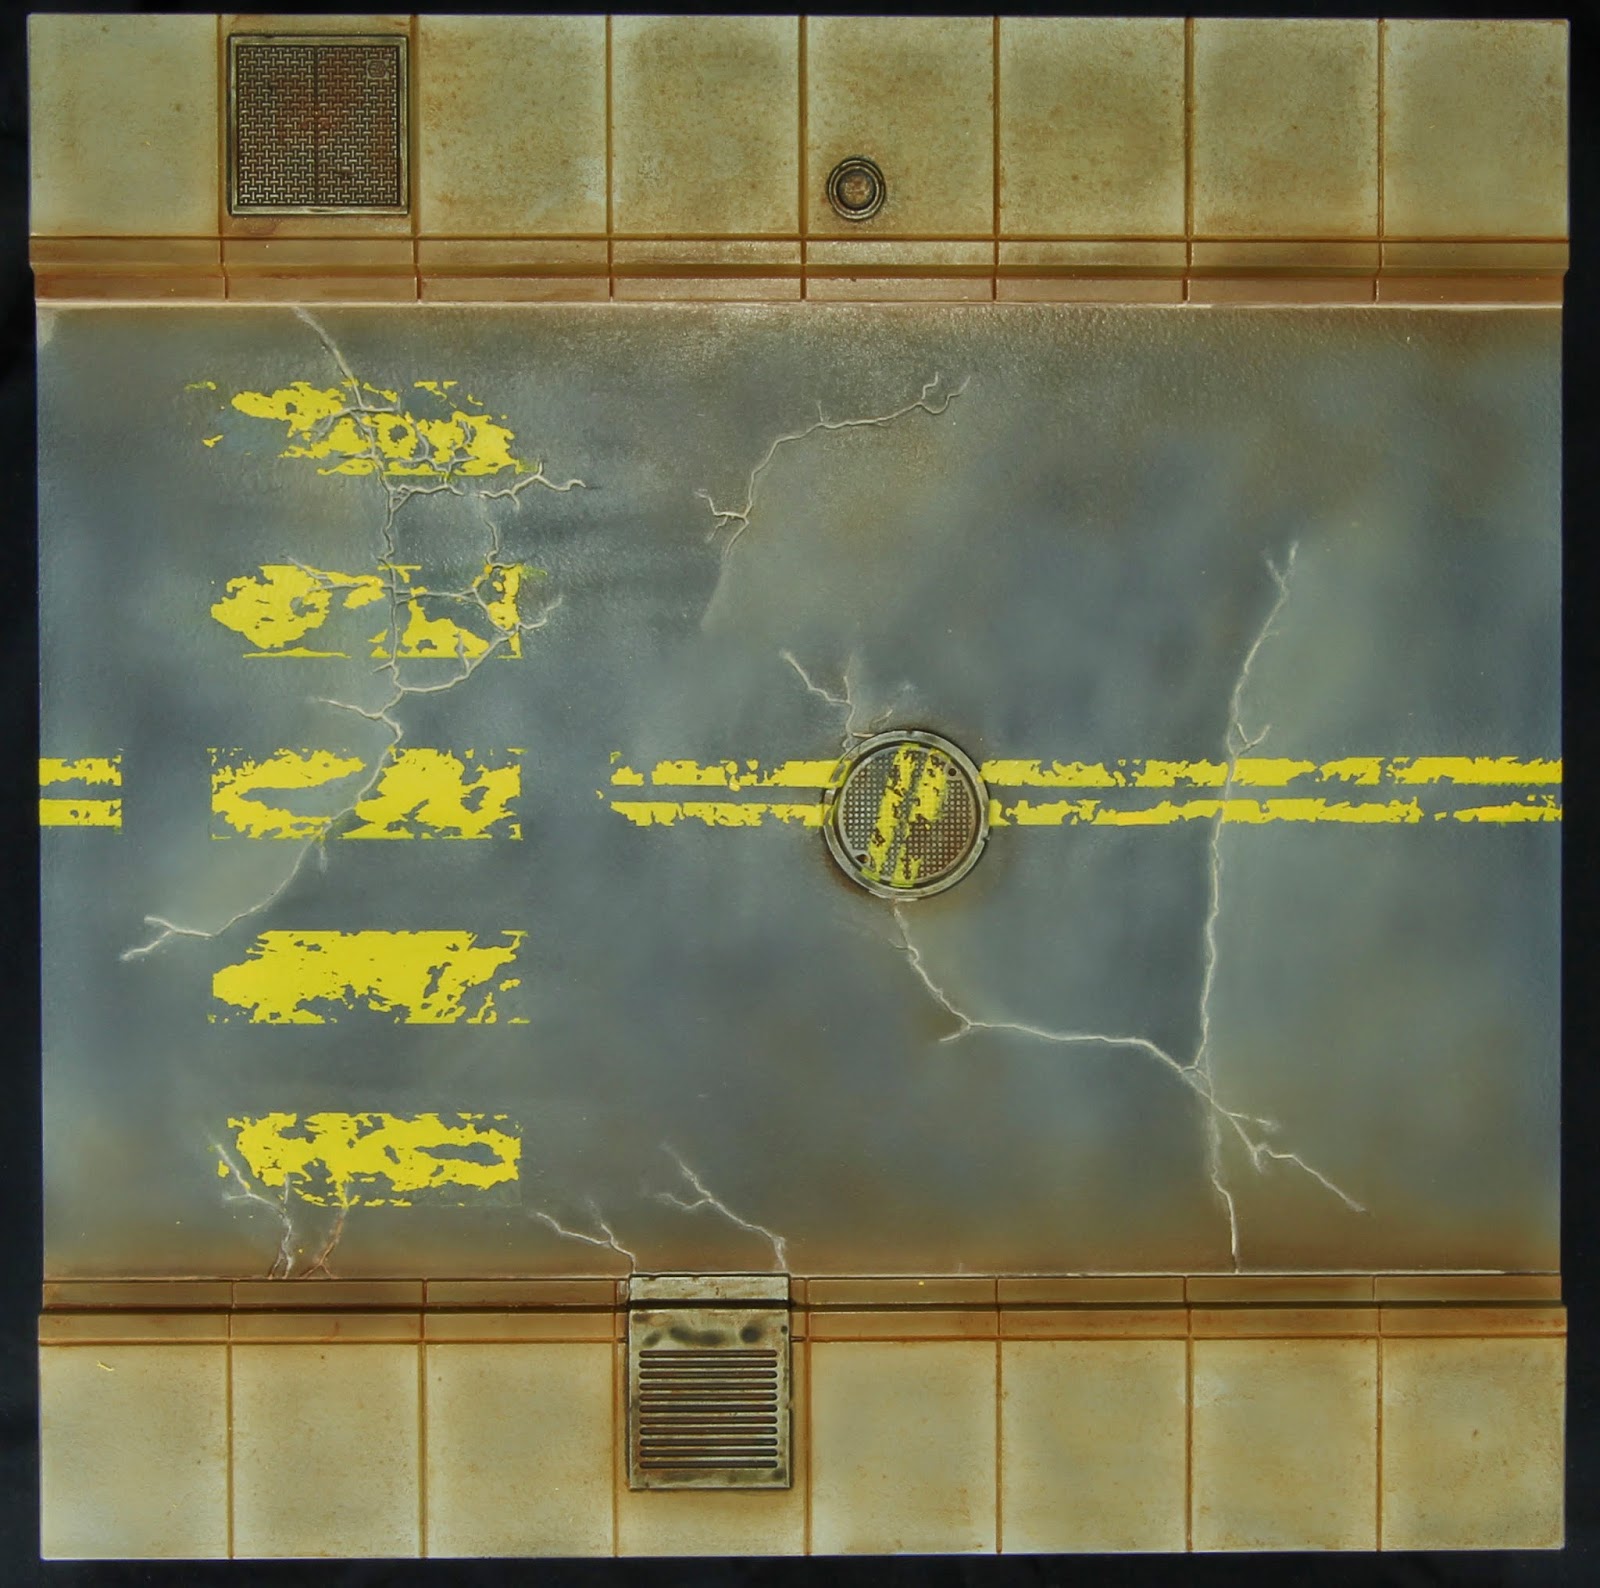

(All the masking fluid removed.)
In order to remove all the masking fluid, simply rub the surface with a pencil eraser. If you want to create a finer scratch pattern, you can use a piece of blister foam that you tore, dip it in you base color, remove the excess and stipple where required.
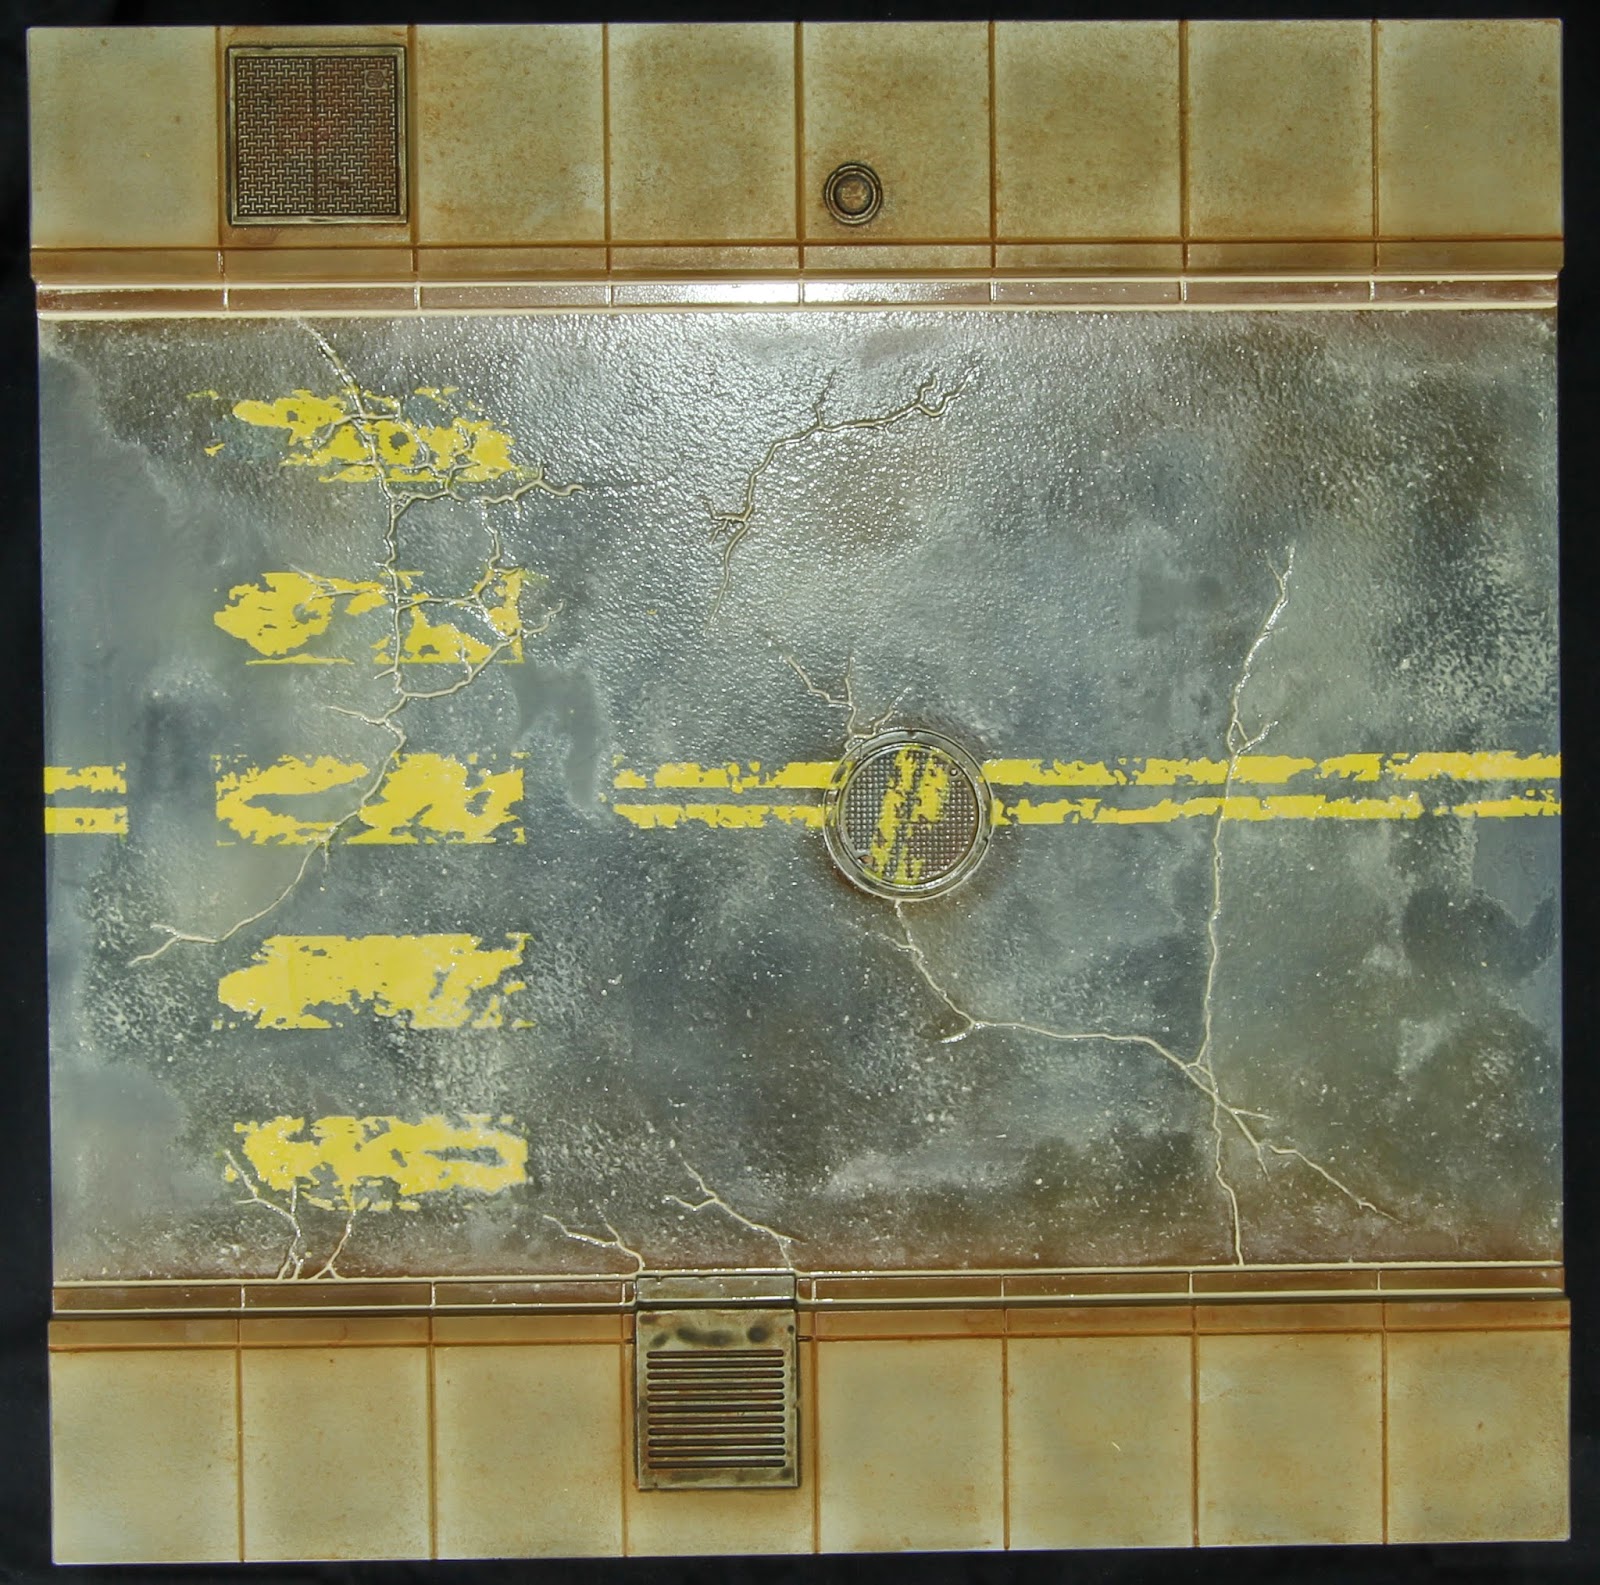

(More oil washes.)
A heavy wash of Davvy’s Grey was applied all over the pavement area. In order to break the brush strokes and removed the excess, the extra was simply absorbed with a paper towel also giving us the stippled texture.


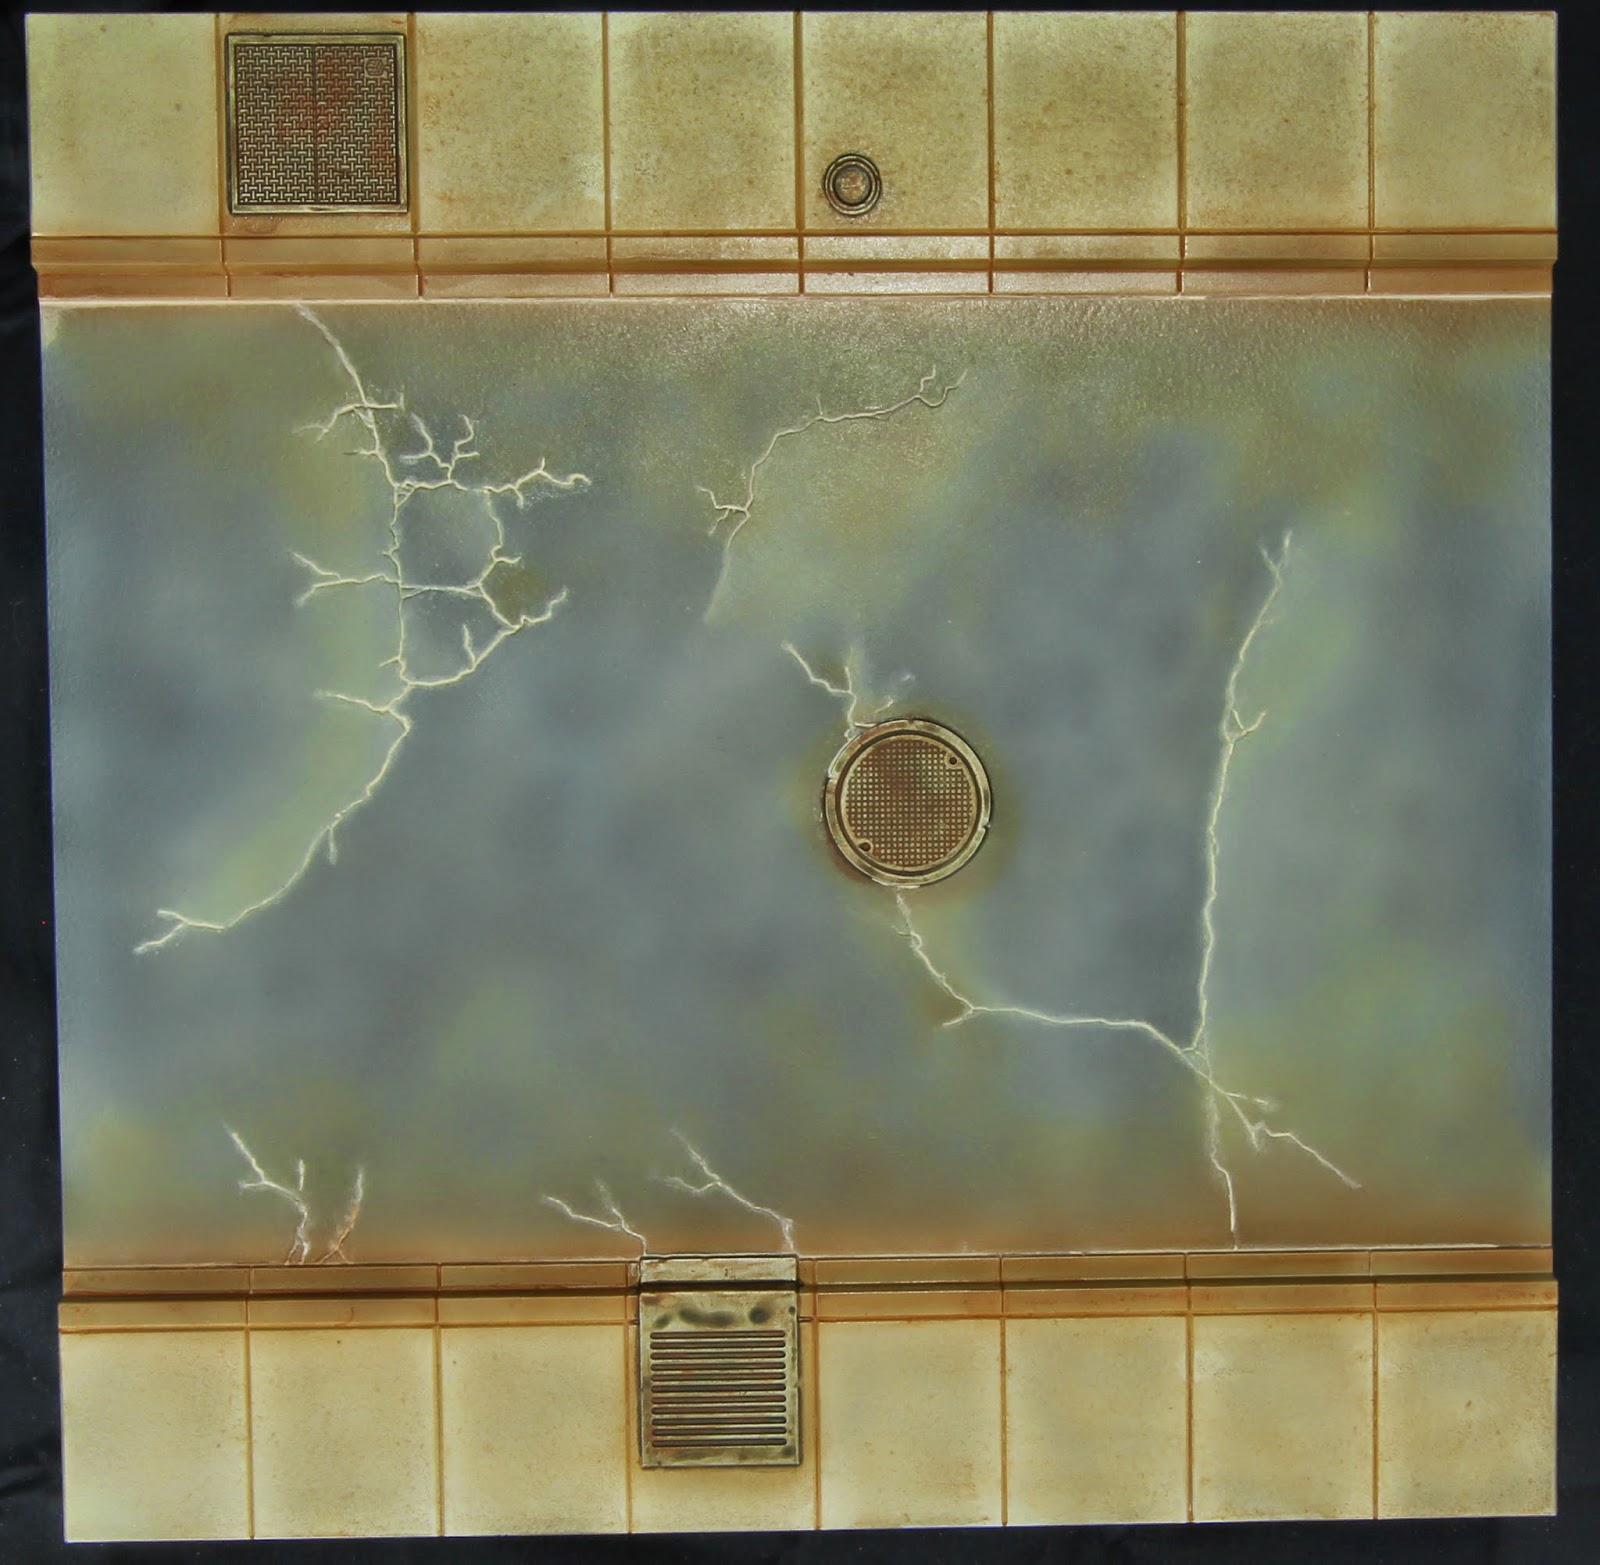
(Once dried.)
Here is the final result of the oil wash once dried. It is giving us a simple and effective dust effect.
This is our second breaking point. As you can see, you now have a very solid looking tile. It is well detailed with an effective dust and weathered effect which did not took too much of your times.
The following steps include dry pigments. It is fairly simple working with this medium but it is time consuming. It will give you that final touch of realism which is definitely not to be neglected but you have to be aware of the time it requires.
Before moving to pigments, or at any point when you decide that you are satisfied with the result, apply a fair coat of matt varnish to protect your tiles. My choice goes to Dullcote from Testor. Make sure to spray in a really well ventilated area or outside.
Dry pigments are one of the basic elements of any paint. Once mixed with a medium, acrylic for acrylic paint or linseed oil for oil paint, you have a regular paint. Pigments are just like a colored dust which make it perfect for weathering. The issue with it is that without a medium, it has no way to stick to the surface or bind together. You will need to apply a pigment fixer in order that these pigments do not disappear with time.
Although it is easy work, the going back and forth between pigments and fixer will mean spending a lot of time on the next few steps, especially when you consider that you have 16 or 24 square feet to cover. It is possible to mix your fixer and pigment together in advance to give you a sort of wash. It will definitely speed up the process but it will limit your control.
Note that you do not have to apply varnish on top of the pigments. The fixer is enamel base and will protect your pigments just like a varnish would.
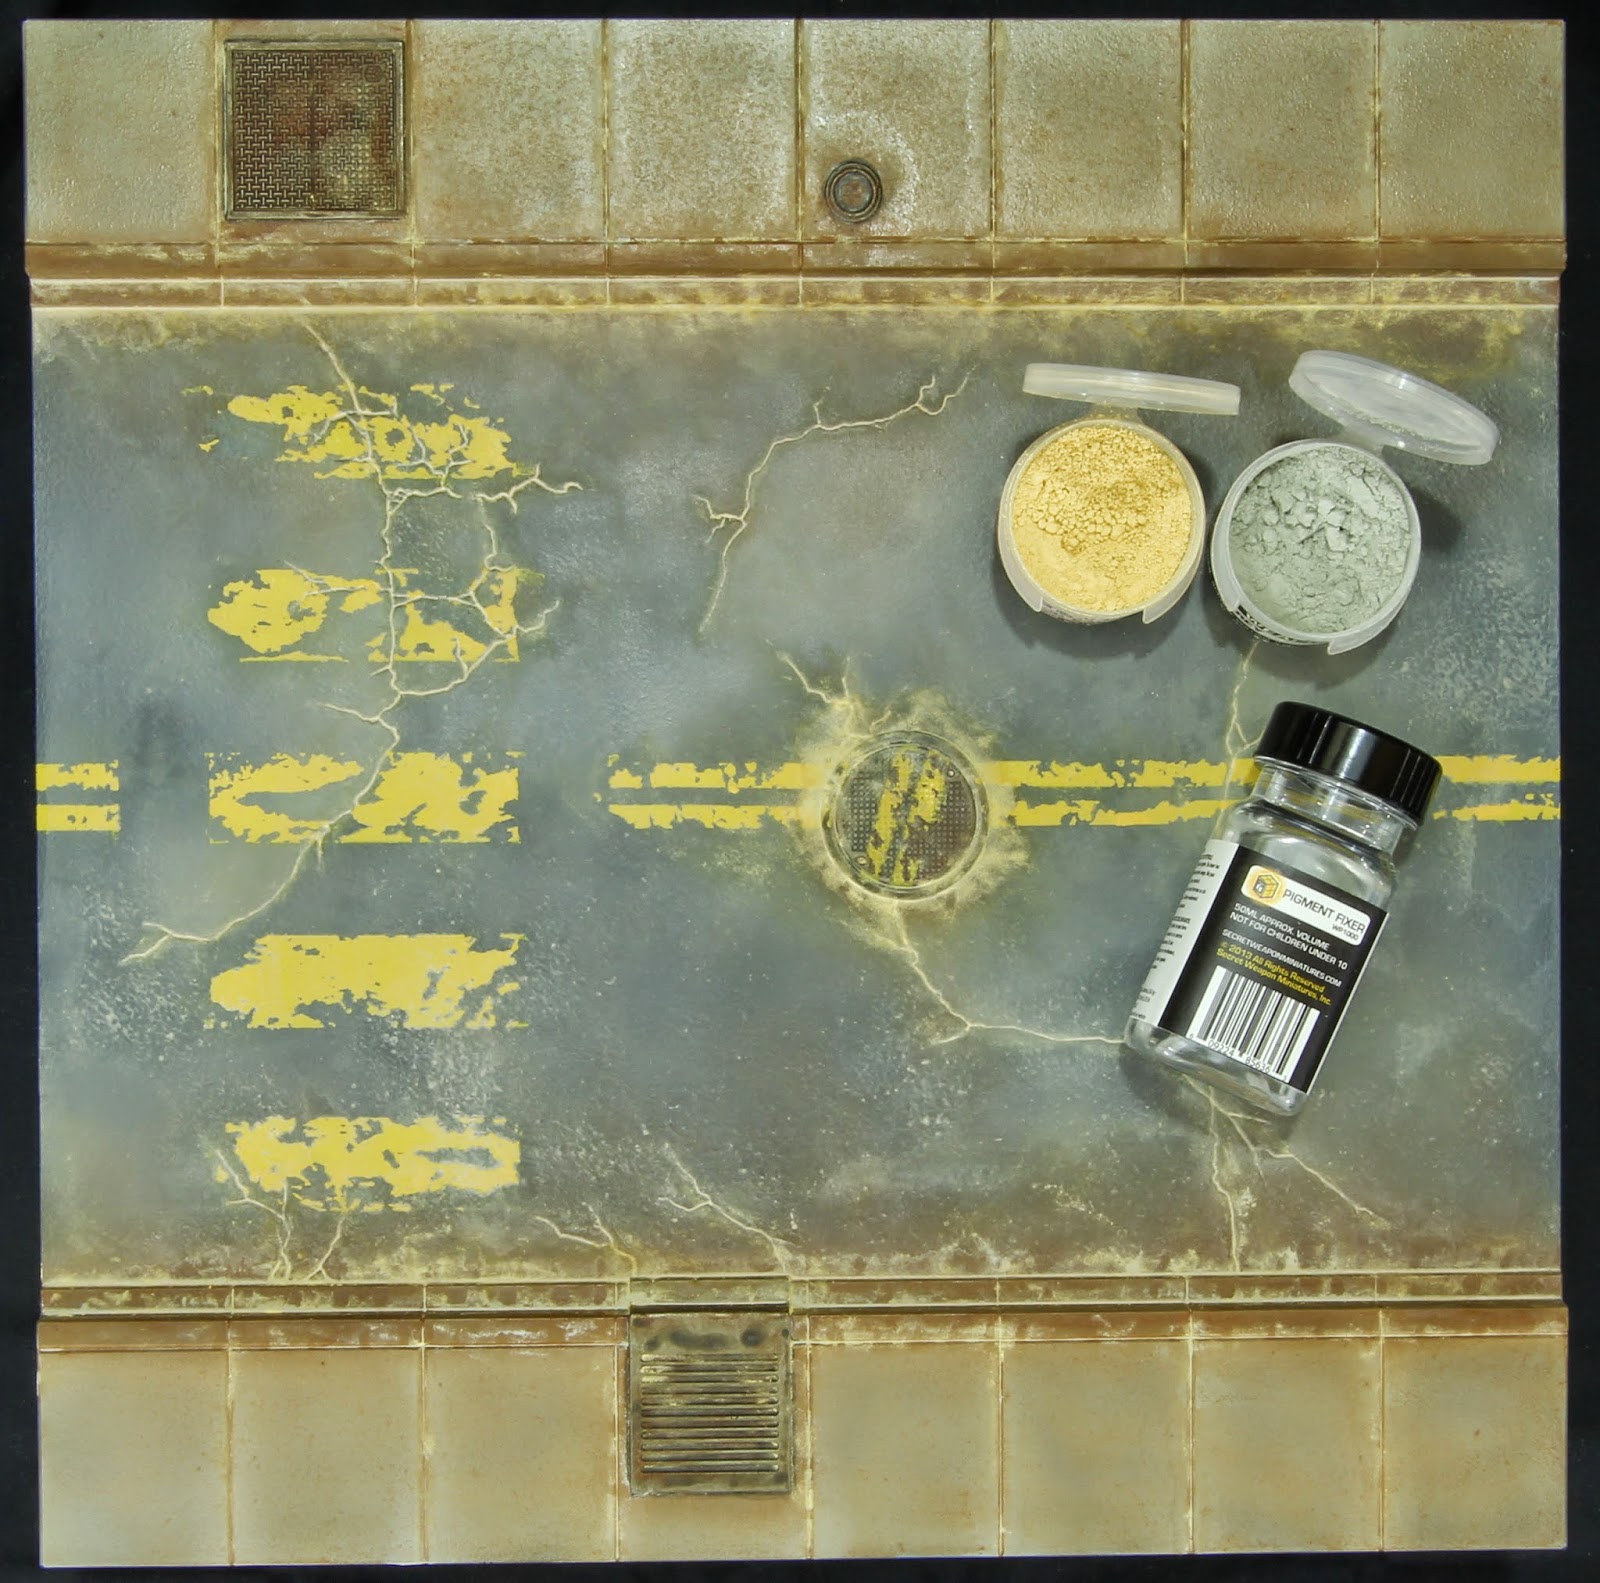

(General dusting.)
Secret Weapon Slate Grey and Burning Sands pigments were used for this step. It was to create a general dusting all over the tile. More effort were put along the cracks in the pavement, in between the sidewalks, along the edges and around the manholes and vents to represent dust accumulation. The pigments should be applied using a hard brush. It will provide enough resistance to rub the pigments on the surface.
When applying the fixer, do not brush it. It will disperse the pigments around and destroy the way you have applied them. Simply make sure that your brush is full of fixer and simply press the tip of your brush in the areas where the pigments have been deposited. You will see these pigments absorb the fixer by capillary action. Note that when the pigments absorb the fixer, all hints of colors will disappear. Do not panic and do not act on it. Once the fixer dries, your colors will reappear. Once dry, you can add more pigments until you obtain the color and texture you require.
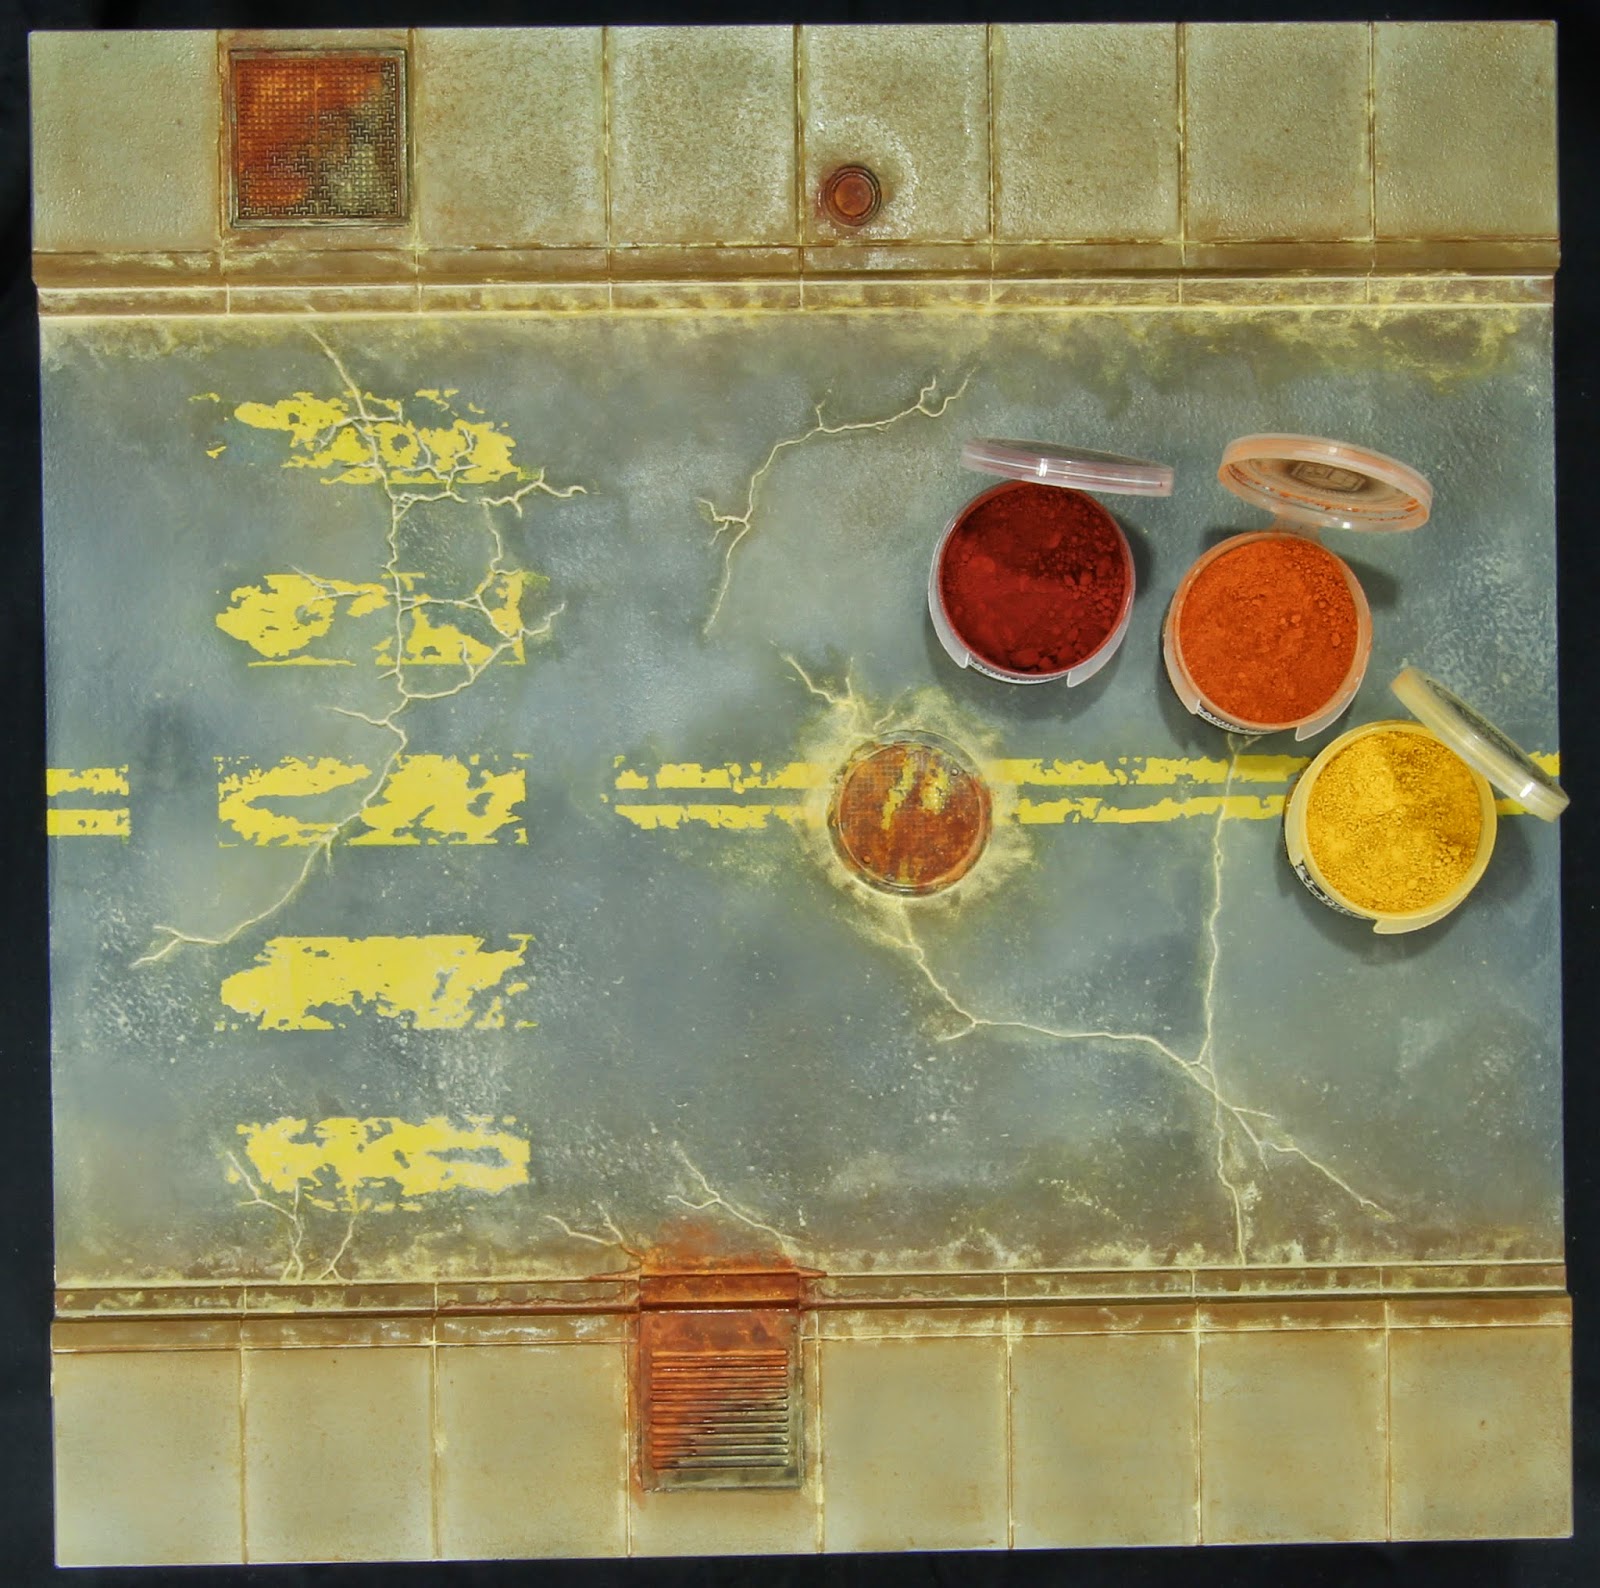

(Rust.)
First, note that this step is not depended on the previous application of pigments as dust. If you do not want to cover your entire board with pigments, as in the previous step, but want to rust it up, simply go ahead.
The key of a good looking rust is to use several colors to recreate that pigmentation. In this case, Dark Yellow, Rust Red and Rust Orange were used in succession to obtain our final result. Make sure it is patchy and irregular. It will give you more realism. So go back and forth with your pigments by stippling them on the surface with a hard brush. Once again, make sure to fix them using the same method as above.
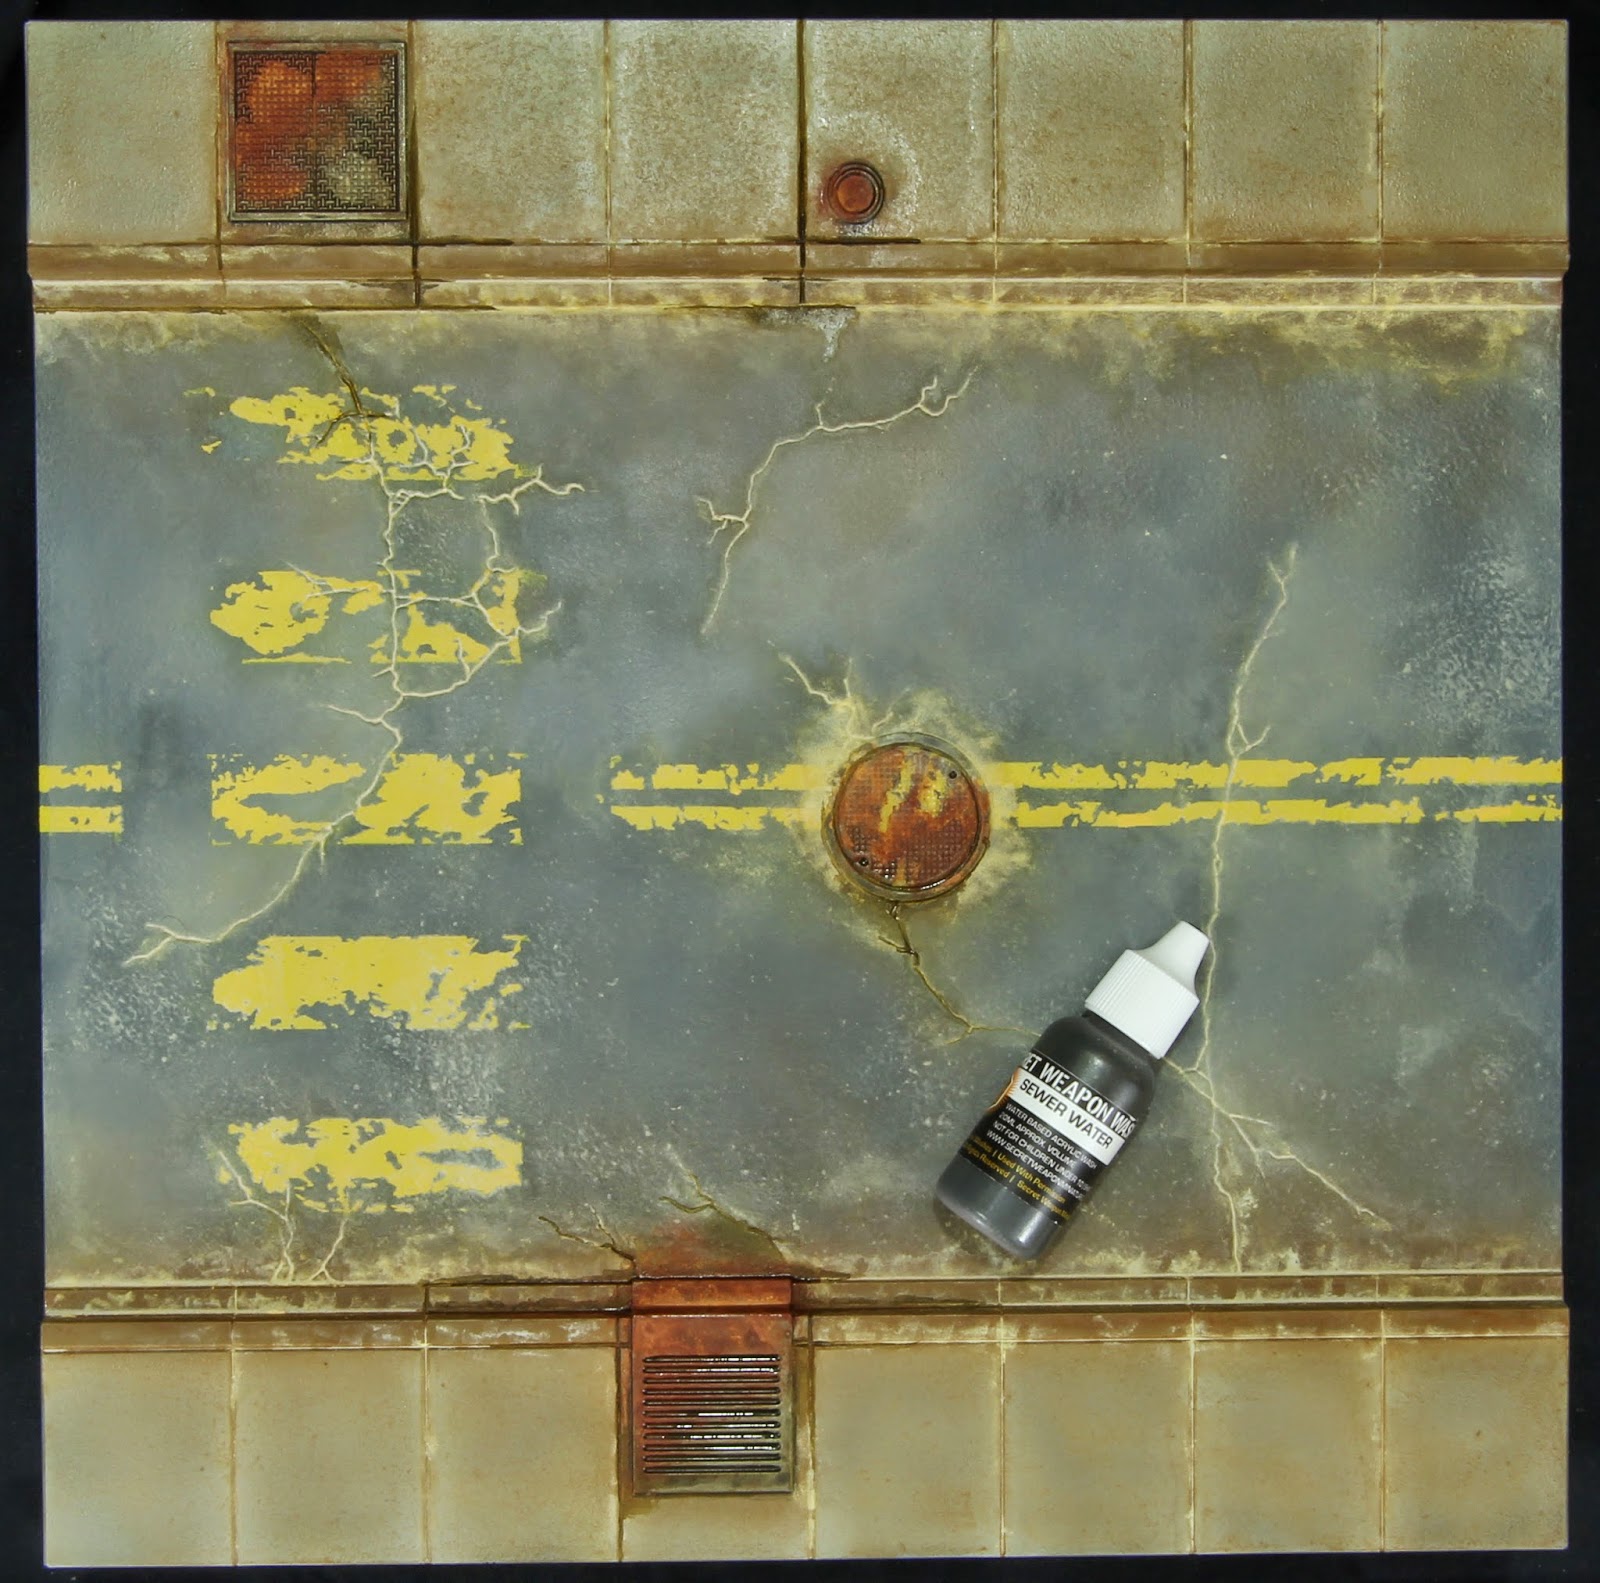

(Some wetness added.)
For our final step, Secret Weapon Sewer Water wash was mixed with gloss varnish to simulate some wetness. The dark green water give us that natural coloring of sewage water and the gloss varnish maintain that wet effect. It is applied in between some of the sidewalks and pavement cracks as well as around the manholes and vents. Make sure to follow a logical path. If it runs down a crack, it will usually go down the ones crossing it. Some puddles were added here and there as well. No need to overdo it. Keep it simple. It will usually look better.
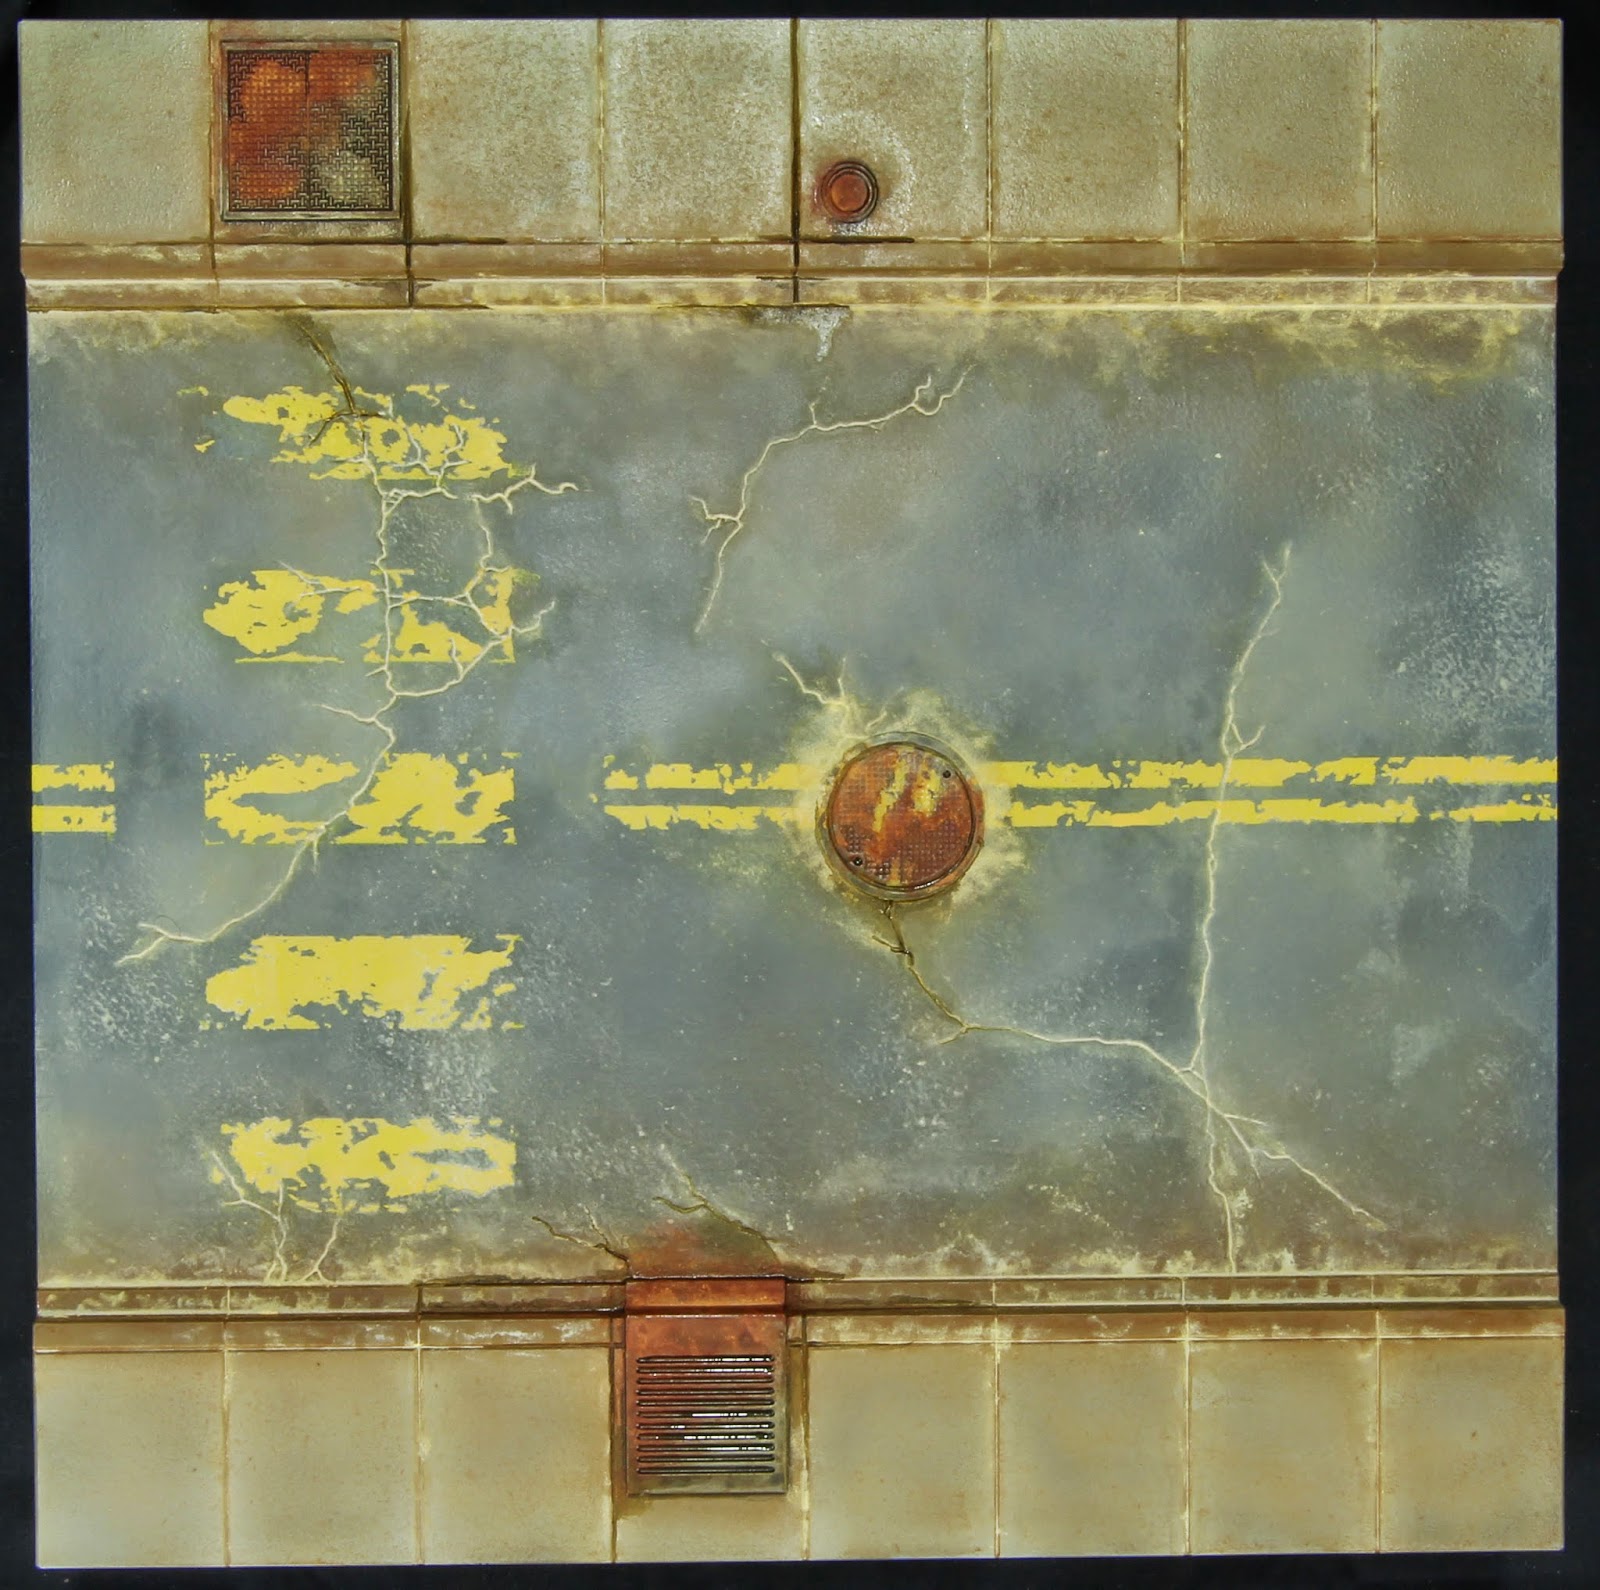

(Completed tile.)
And here we are, we have a completed tile. As initially said, I was aiming at a great looking final result using simple but efficient technique. All the enumerated steps above are easy to use. You simply need to spend the time to do it properly.
Remember that it is your Tablescape set and you are the one deciding how it should look. The colors I have used are in no way obligatory. Chose a palette and a final finish to your liking. If you prefer something that looks cleaner, go lighter with the oils and pigments and concentrate on the airbrushing. There are no limits to the possibilities. So go out for a walk, observe the streets surrounding you or do a Google Image search and once you find a look you like, have fun replicating it.