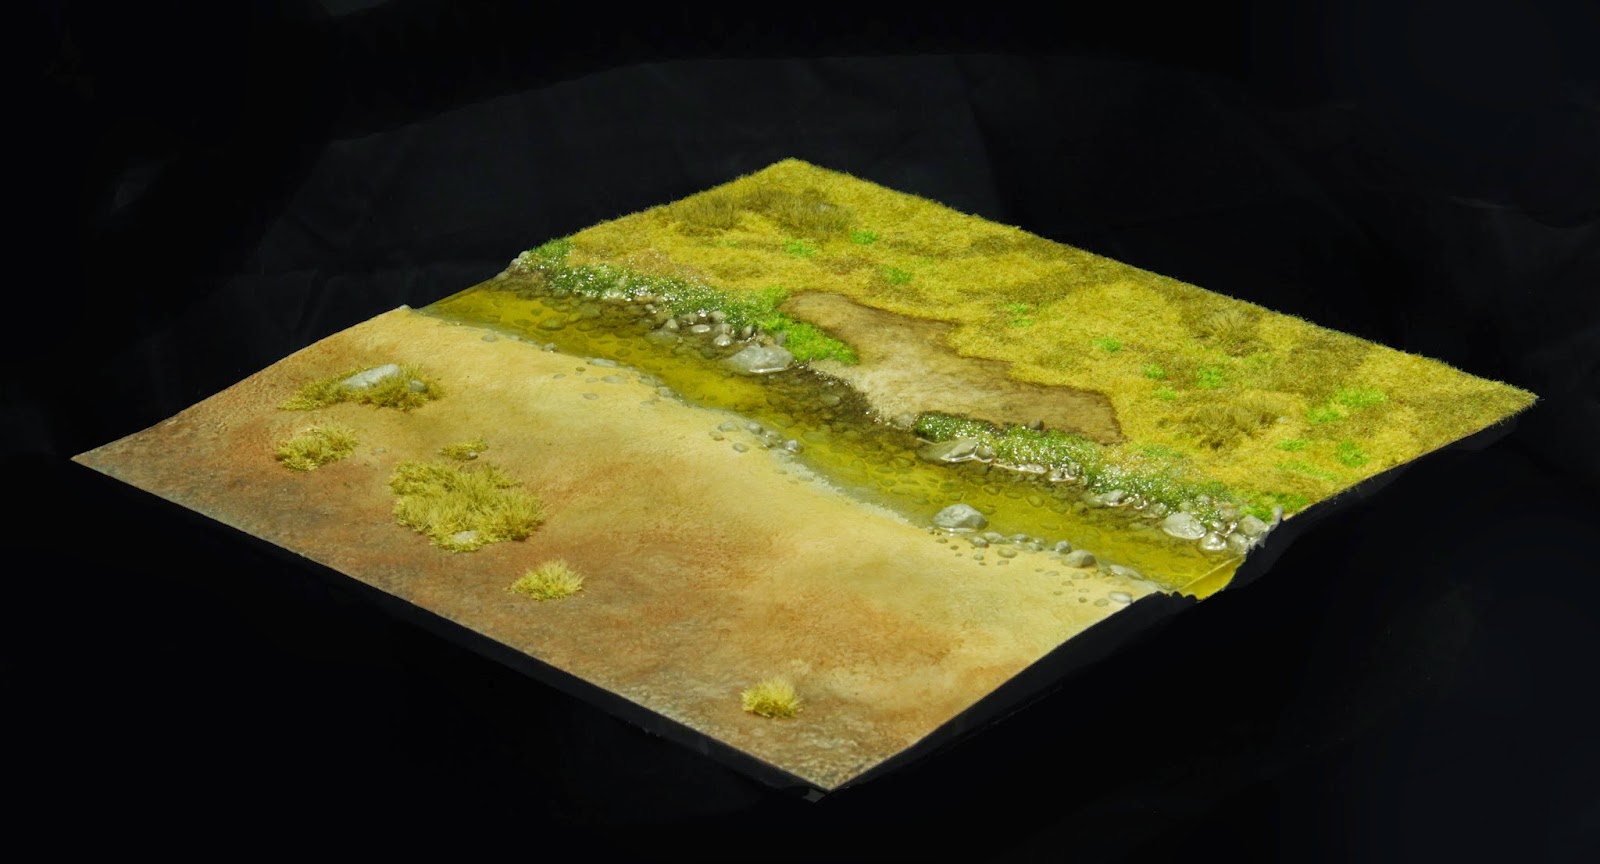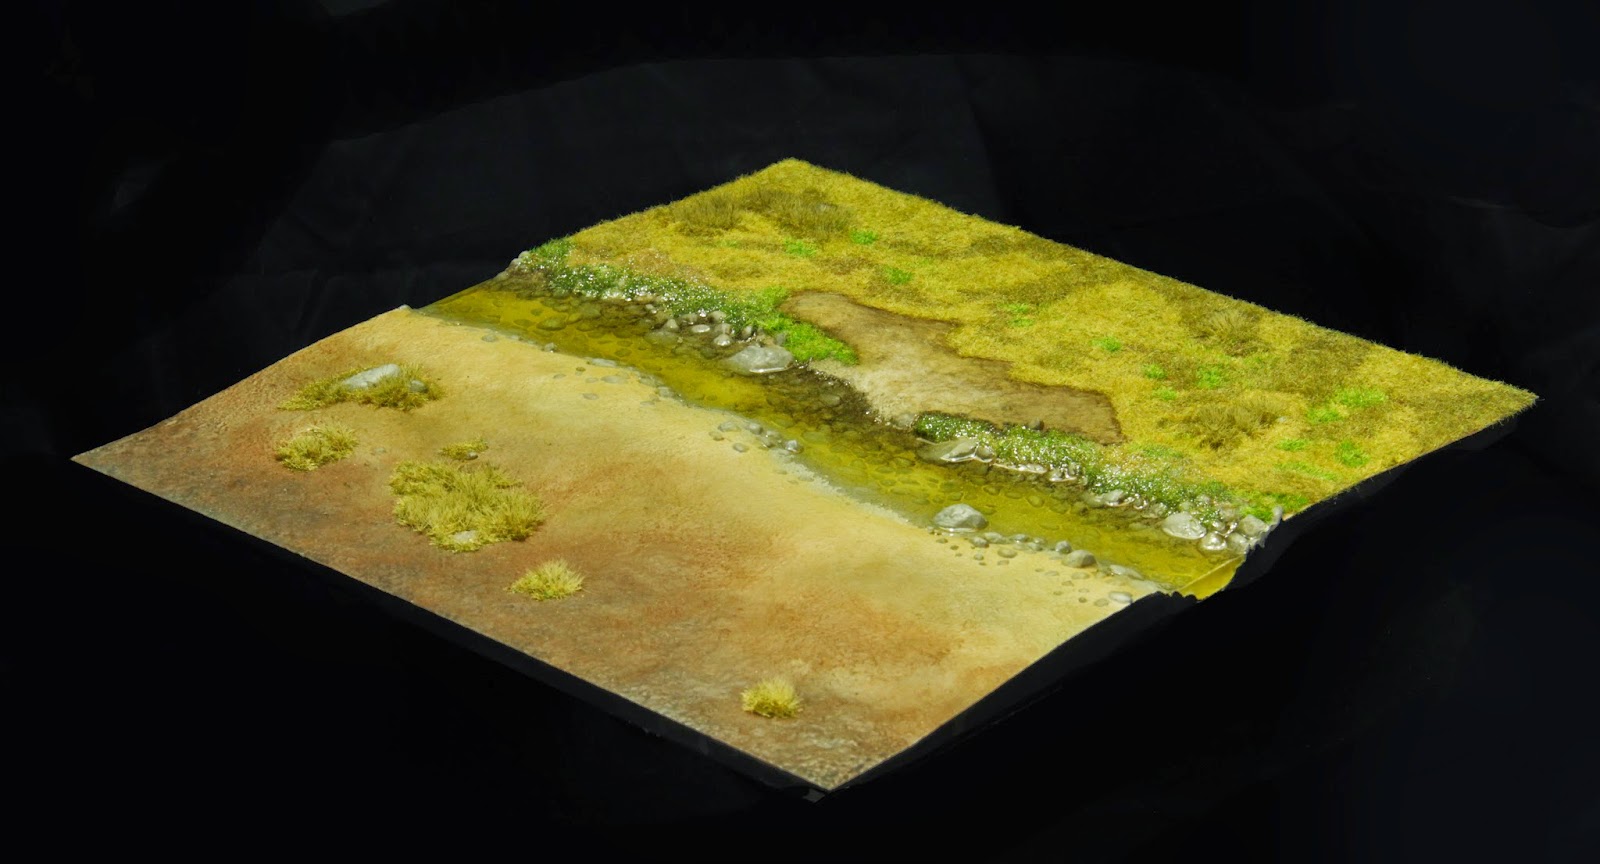
Painting Your Tablescapes Tiles – Rolling Fields
Part 1. Introduction & Materials
The Rolling Fields Tablescapes Tiles can be a tricky one. It is pretty easy to paint streets or rubble and such, and a field is also pretty straightforward, but the way this Tablescapes Tiles set is designed, it can be represented as luscious grass plains or an arid desert. It is literally open to all options. For the purpose of this tutorial, I went both ways. One side will represent grassland and the other, a dryer area.
One of the main criteria to keep in mind when painting your Tablescapes Tiles is to remember that it is for gaming. Miniatures will be placed on the tiles and they need to stand. So, even though you would like high grass, long tall reeds by your river and such, it will not go well with your regiment. You will have to keep it short and manageable. Of course you can use some of these elements but keep them close to features your miniatures will most likely avoid: big rocks, rock formation along the river, ravine and such.
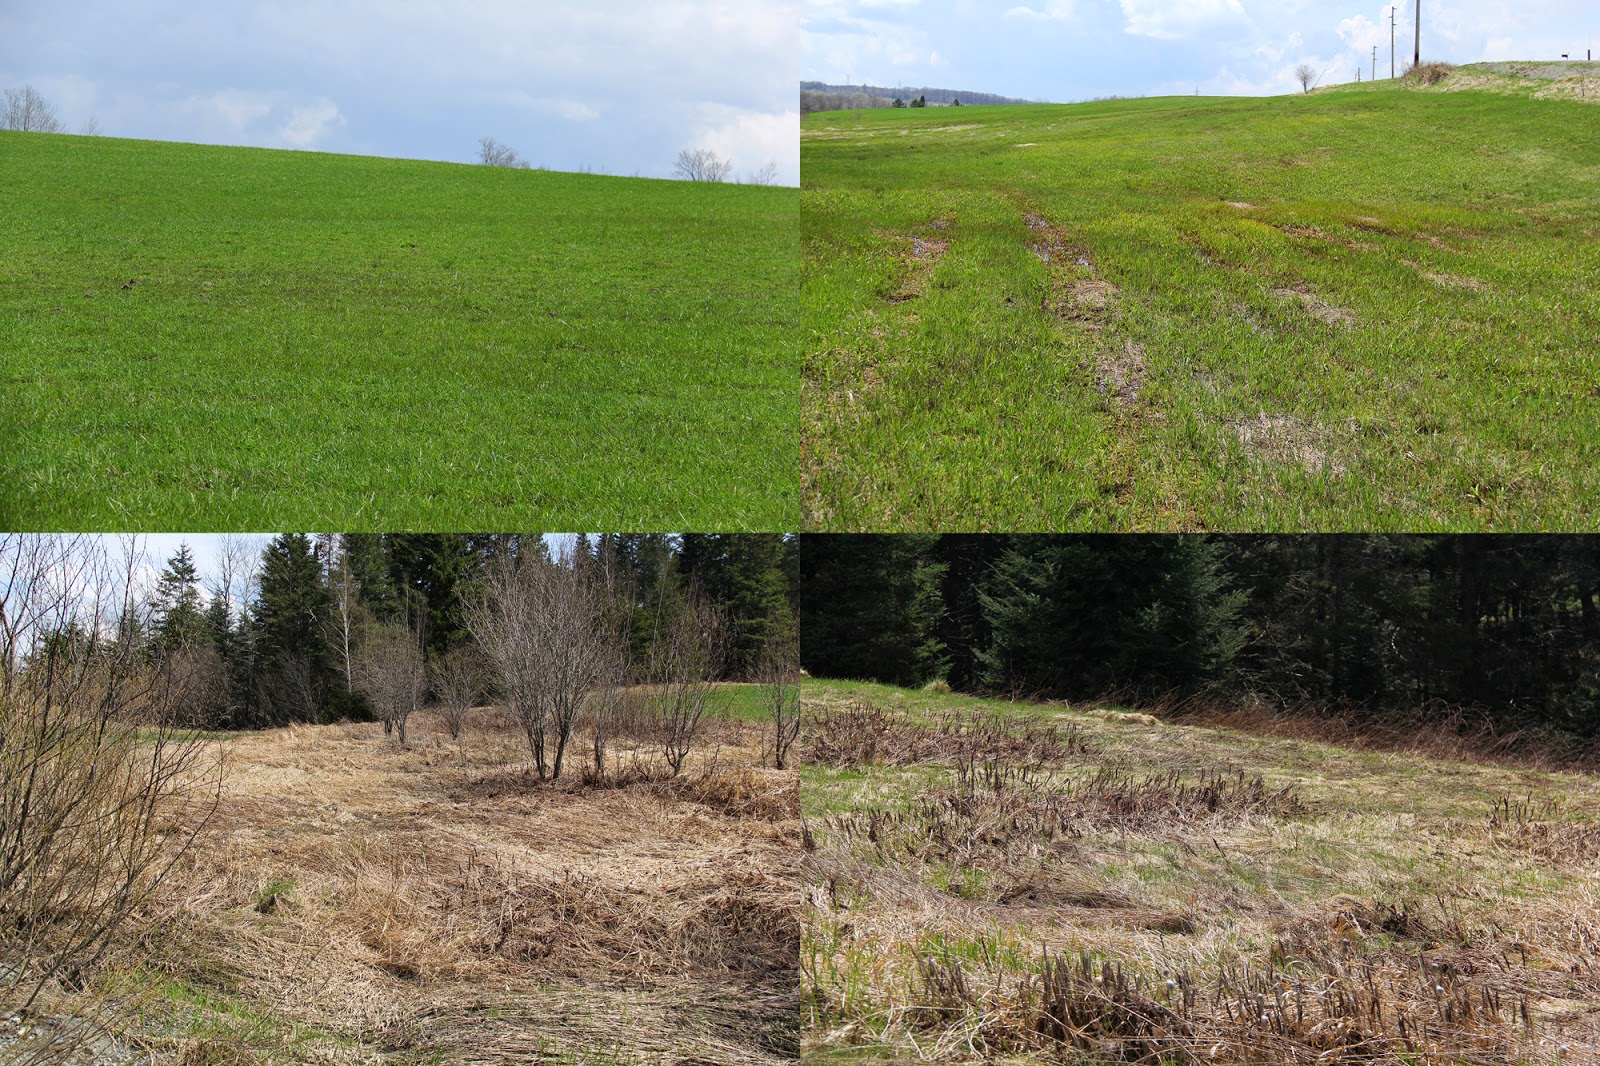
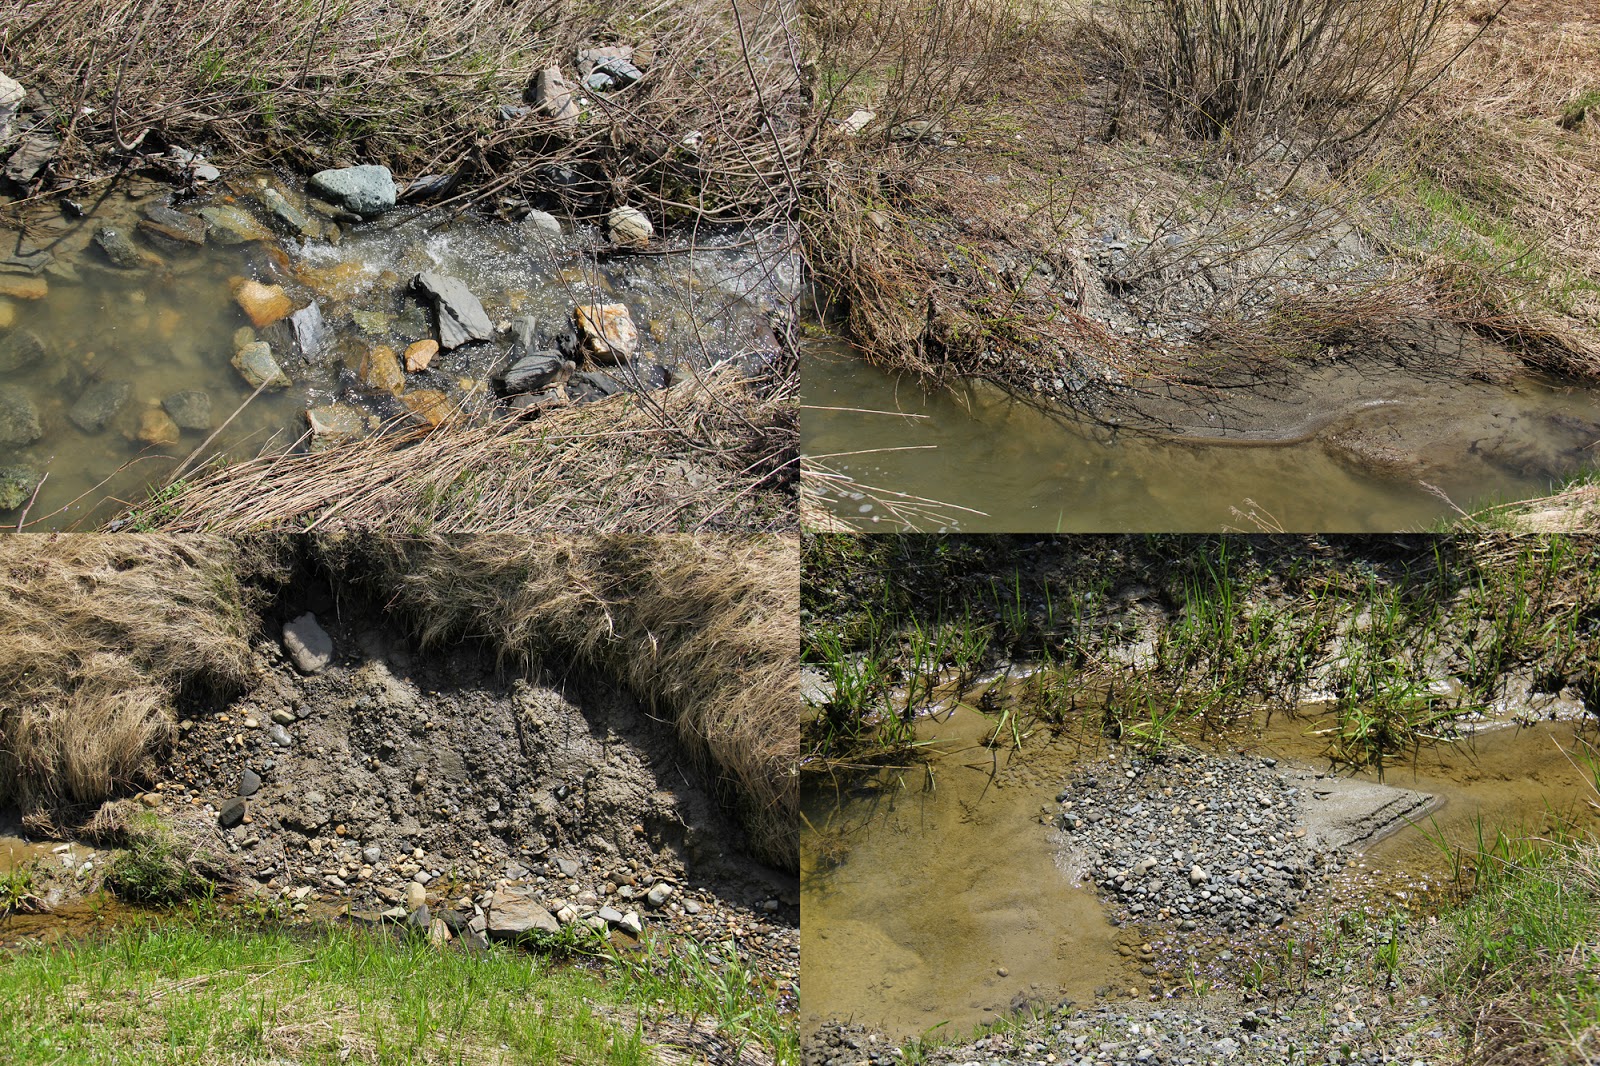
Before going any further, we will look at some reference material. Fields are fairly easy to find. My parents live in the country side, so while visiting them, I had a small photo safari in order to find inspiration. Pictures were taken in spring. The tall grass is still flat to the ground as the snow just left but the young vivid green grass was already emerging.
We can clearly see 4 different types of field in this picture. The upper left is the classic green grass field. It might be a classic, but it is far from being interesting. The upper right example is already much more interesting. The variety of tones makes it already more pleasant and rich. The lower two examples are really inspiring. There is a lot to be done and you can achieve great results working with such pictures. Unfortunately, small trees sparse around the table or taller and ticker vegetation will not combine well with playability. So, although we can use them for some areas on our table, we should avoid mimicking those references in a large scale.
(misterjustin says: remember that Mathieu took all four of those photos near his parent’s home — which means you’ll find very different fields in close proximity to each other.)
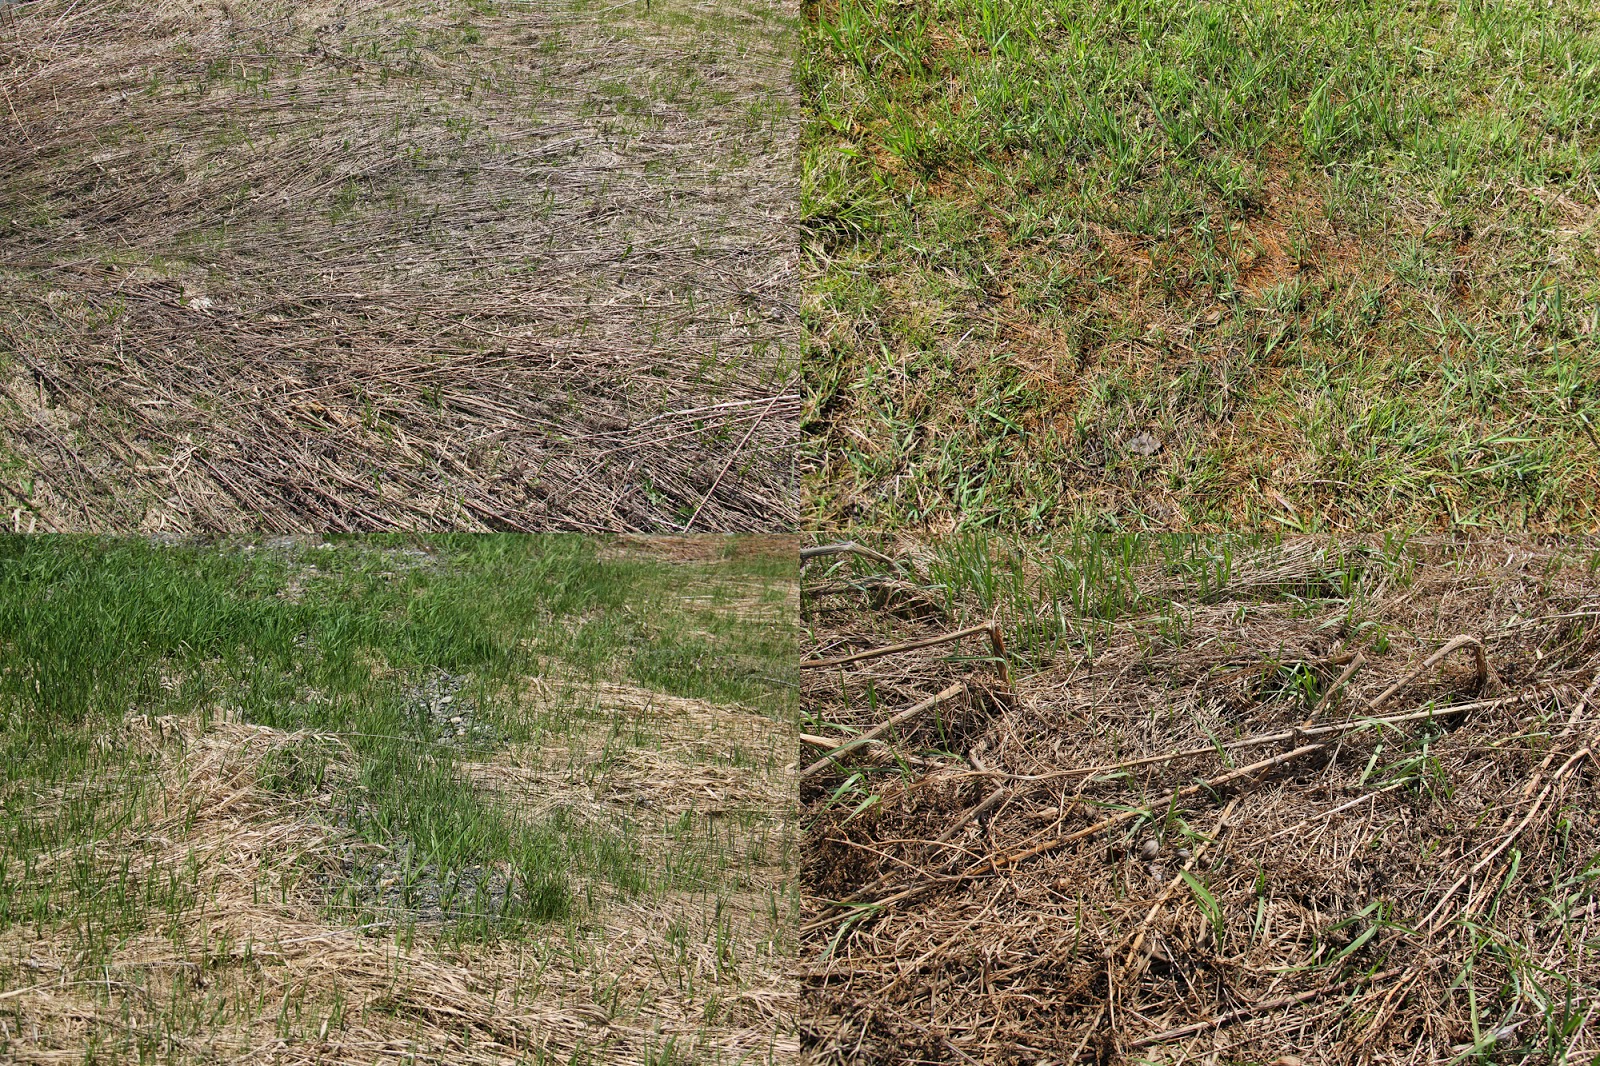
Our next step is to identify ground/grass colors. The following picture gives us four different examples:
You can clearly see the different characteristics from one to the other. The upper left and lower right offer great opportunities in obtaining a great texture on our table. The tall grass are broken at the base and lay flat on the ground which definitely works well for our goal. It is to be noted that, although it is achievable, such a texture would be painstakingly long to realize on a full table.
For the purpose of this tutorial, we will use the upper right and lower left picture, mainly for the colors of the grass.
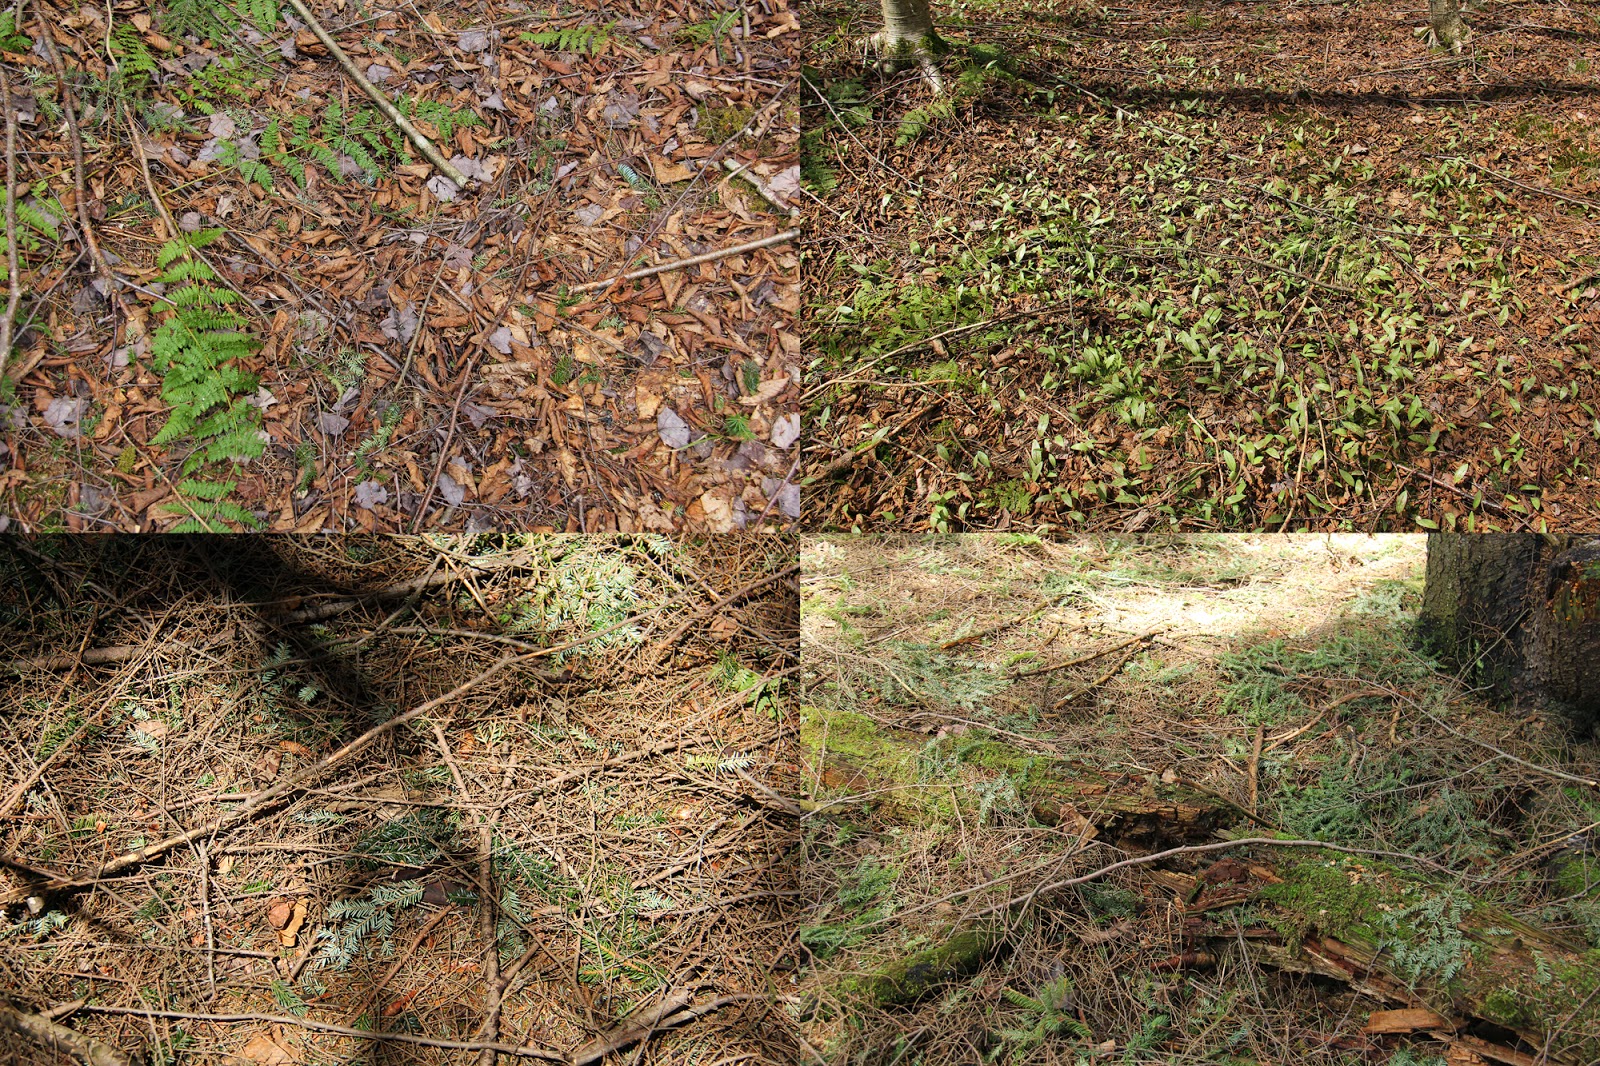
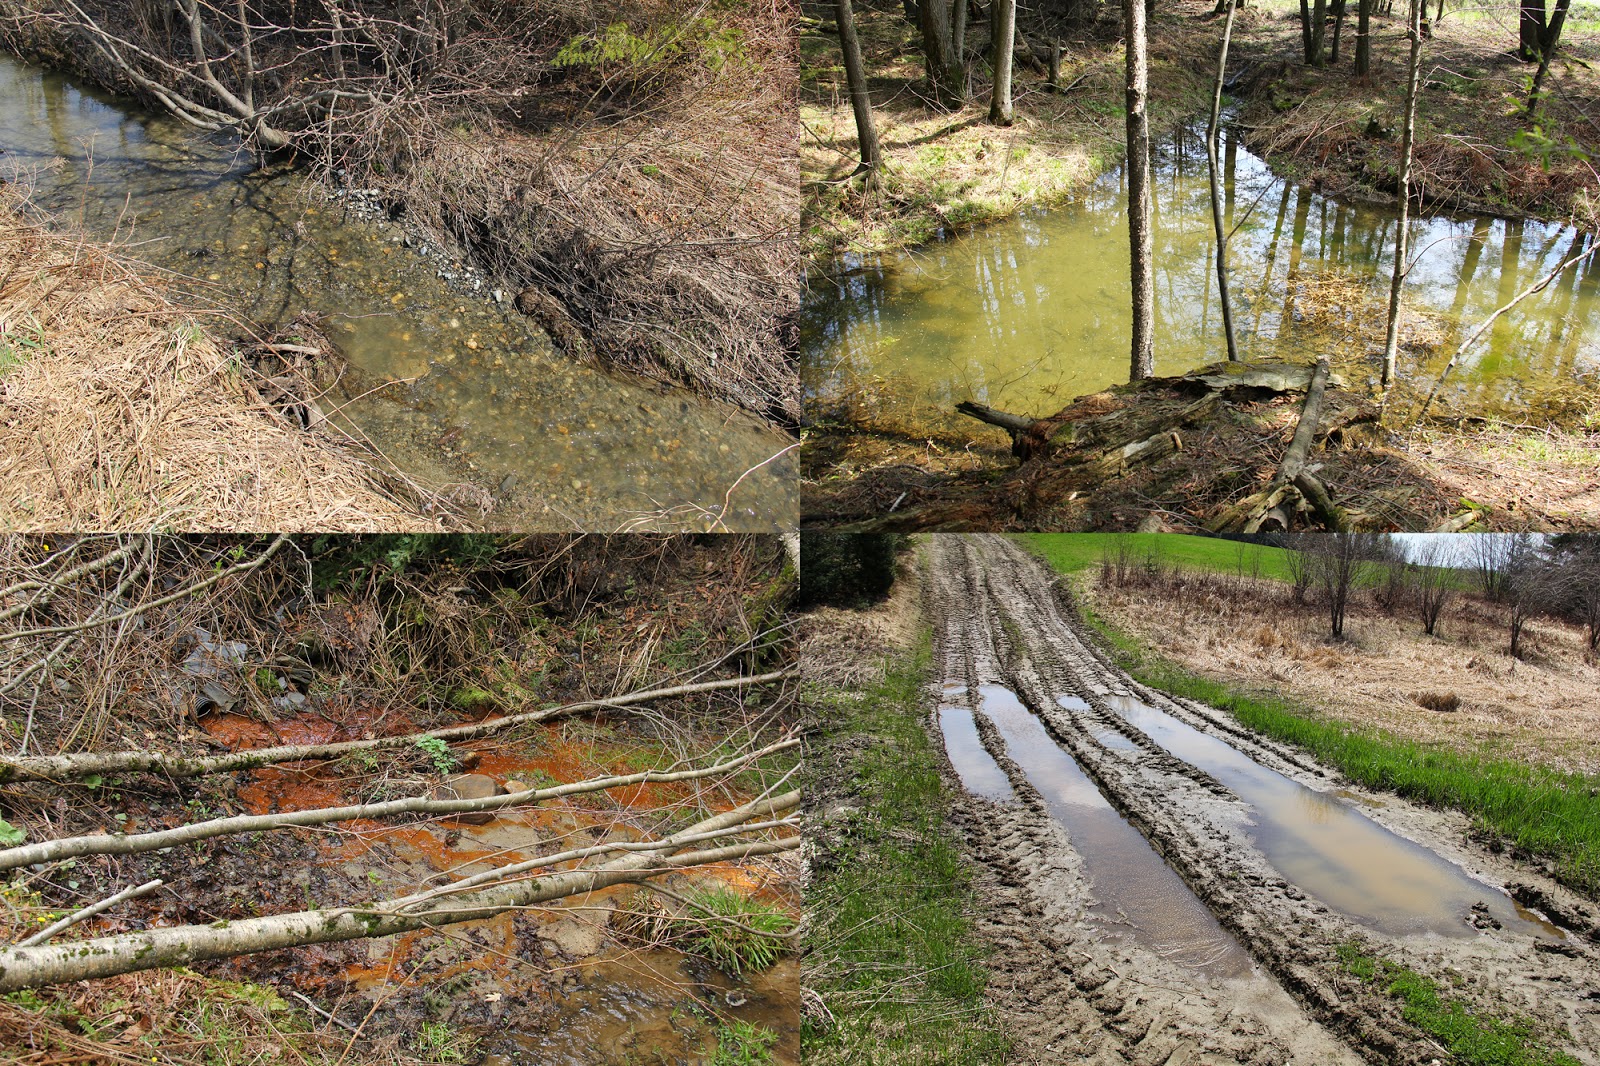
This picture is included for reference only. These ground types were taken in the forest. You could use these as inspiration if your table will include a lot of forest pieces. Once again, the extent of your imagination and skills will determine your limits but mainly the time you want to spend on this endeavor. When it come to basing, as long as you have the right ingredients, skills play only a minor role. But you will need to decide on how long you want to spend on this project. Trying to achieve the result from the above picture could result in a lot of hours spent on this project but will give you incredible results. Decide accordingly.
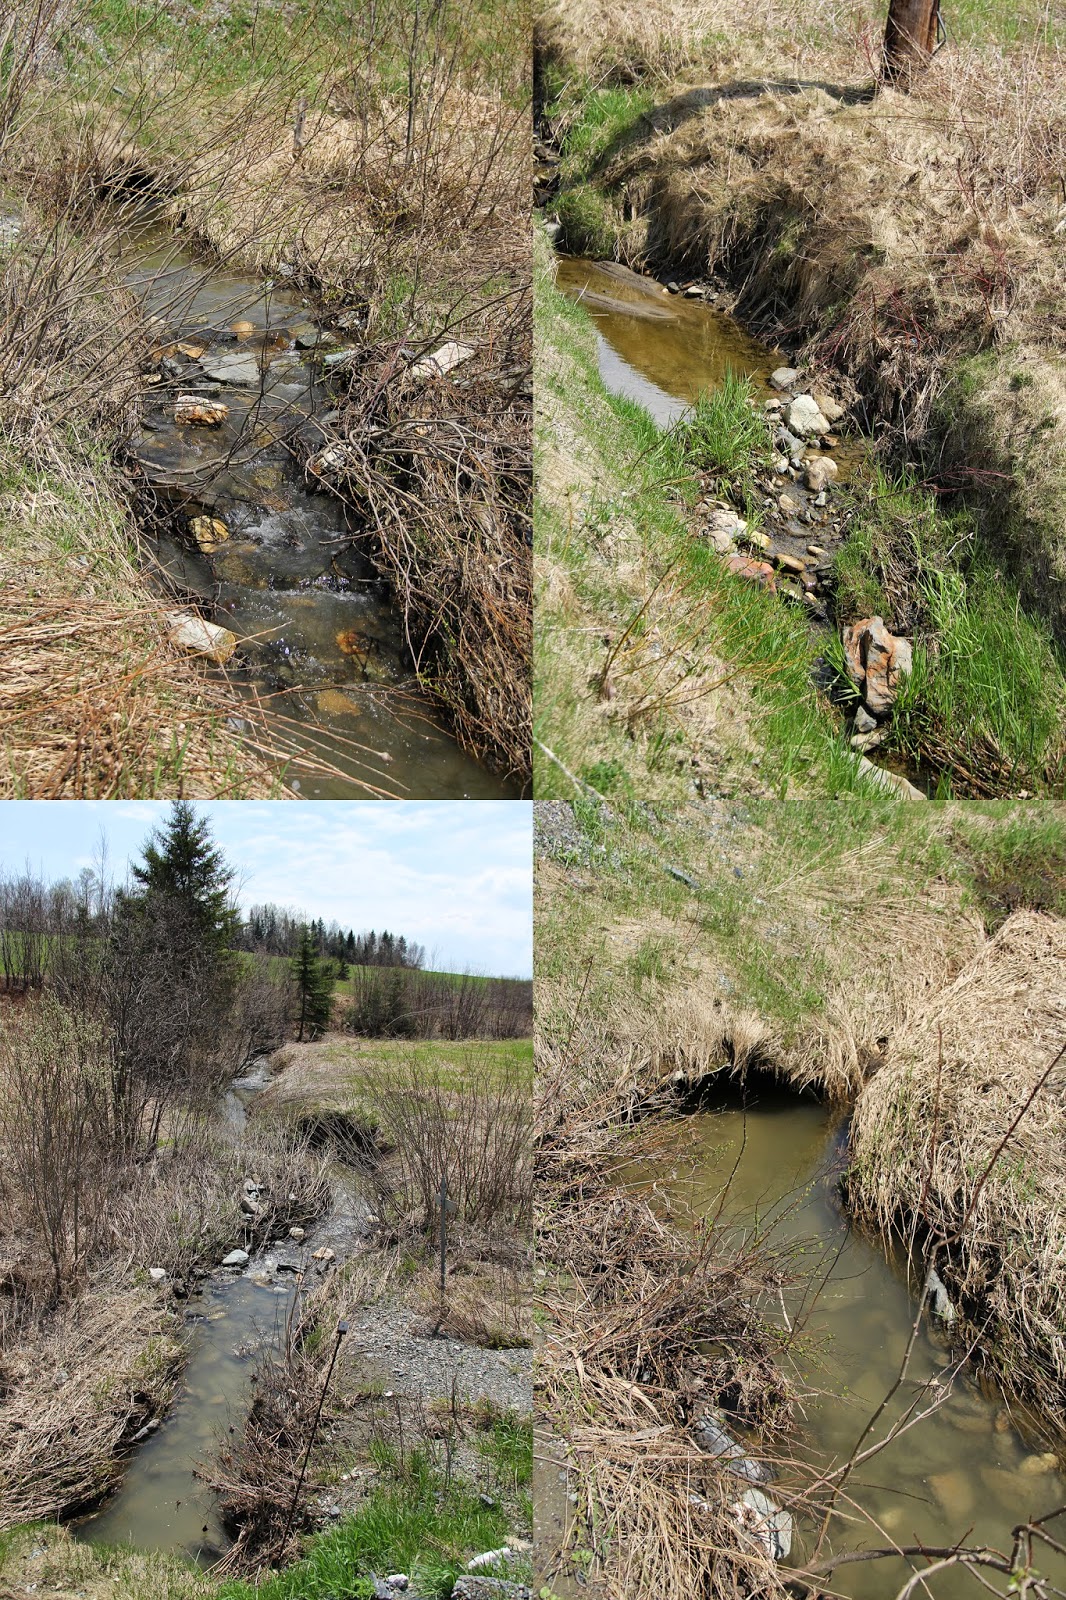
The other principle aspect of our tile is the river, or in this case, the stream. Rivers are tricky, and there are thousands of ways to portray them and various products to recreate them. Each has its own advantages and disadvantages to work with, but that is for later. For now, we will look at streams and their banks.
You can see how the grass and dirt reacts around the stream in these various examples. How in some cases the greenest grass is along the river, how taller rocks in the middle of the stream are matte on top as water simply flows around. Take time to observe the colors of the rocks and dirt, in and around the stream. It is to be noted that streams often dig the ground, so even though the ground is a fertile brown color, the stream will often dig down its way to the level of clay and rock. Greys will have to be used for the river beds in these cases.
The last important element is the color of the water. Once again there are various options depending on the ground, mineral and vegetation around.
A stream with a regular flow will most often be clear unless there is an agent upstream to taint it. Stagnant water will often take a more opaque green or tan color depending on the elements present. The presence of minerals in ground, such as iron, can lead to deep orange coloration. The possibilities are endless. Have fun with them.
And now… the tile.
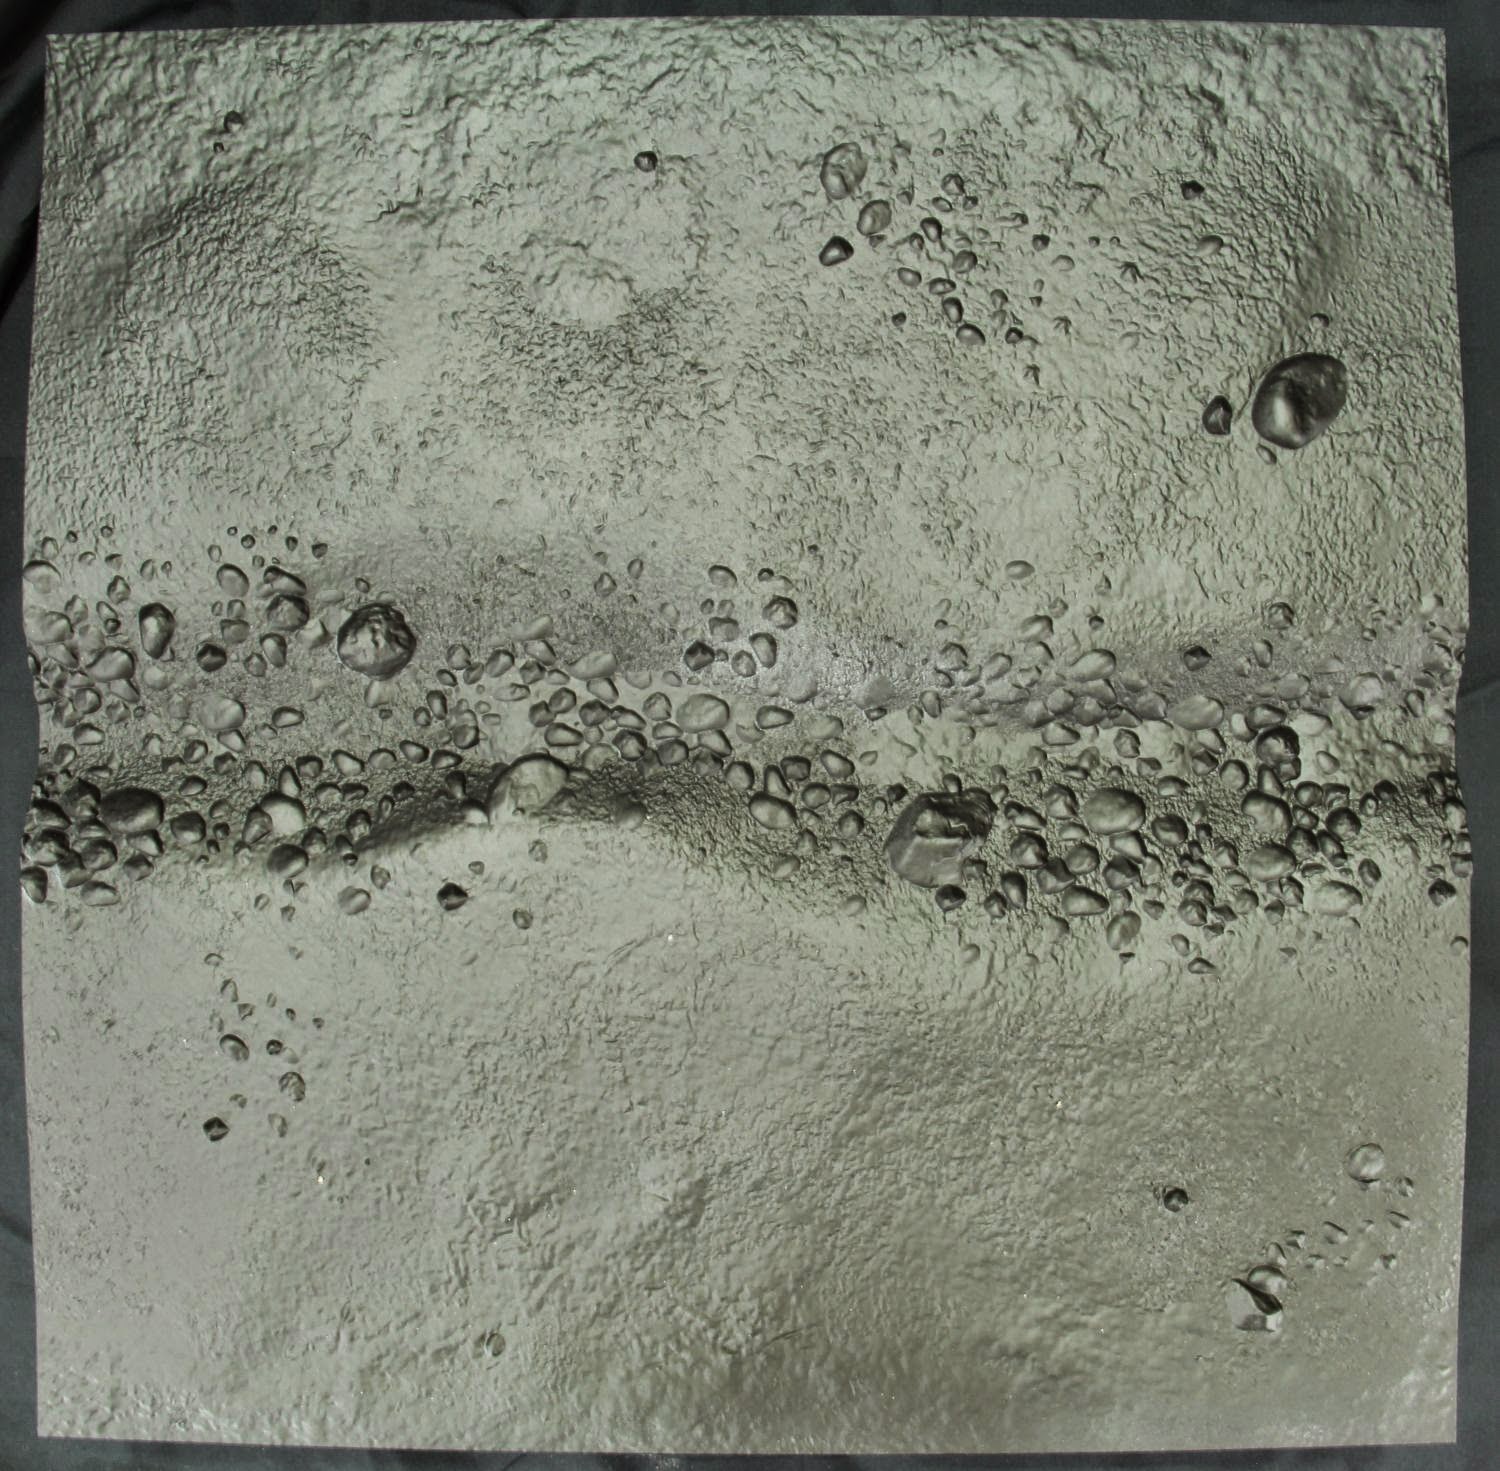
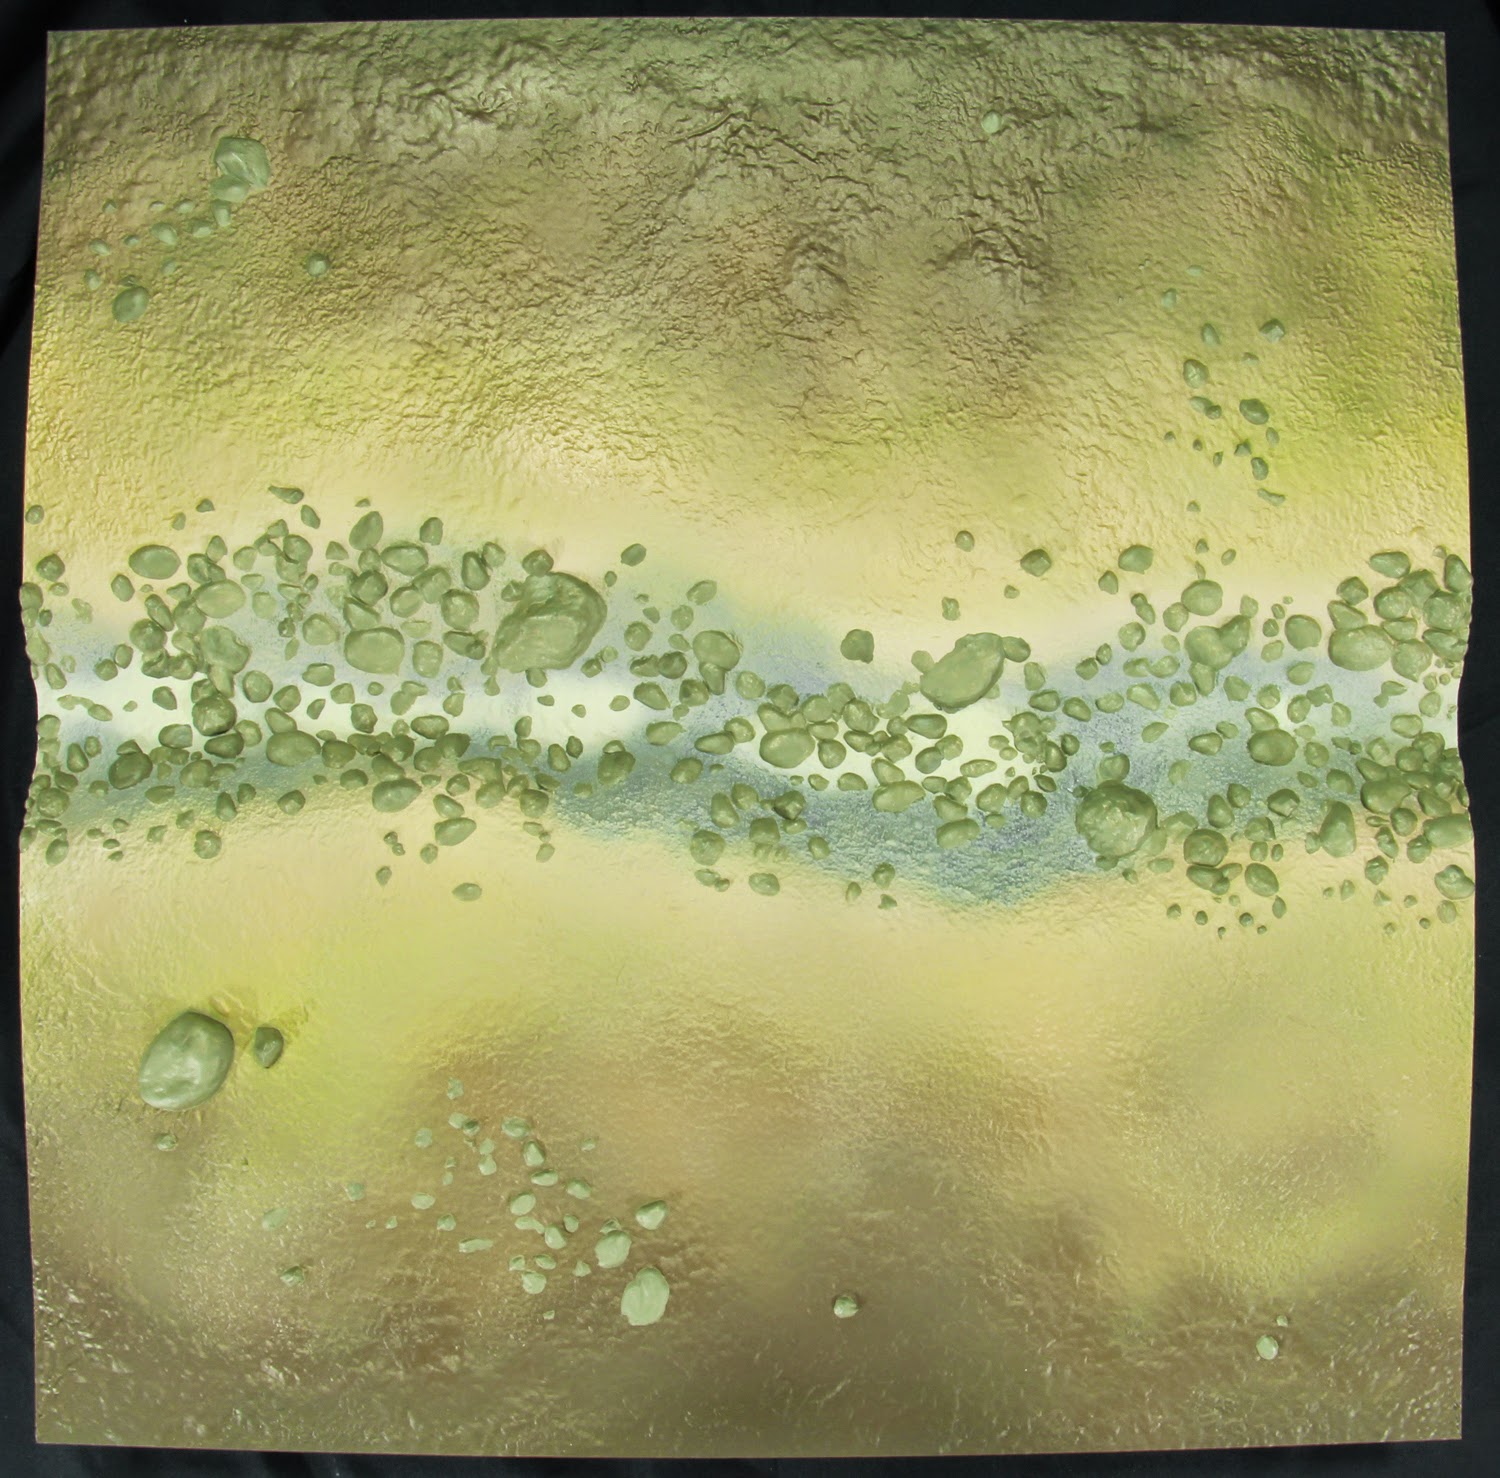
Once again, we will go with a black undercoat. It will allow us to play with the transparency of the paint.
If we observe the various elements, it is pretty straightforward. We have a river running across the tile in the center and a few rock formations here and there. If you are planning a color progressing from the river to the field, as we will, you should draw mark lines on the sides at precise distances so you can make sure that the tiles will be able to connect with one another. As explained in the previous tutorial, in order to make sure that each tiles can easily connect with each other, you need to make sure that any color transition happens at the same intervals. So make sure that every tiles and sides are marked accordingly.
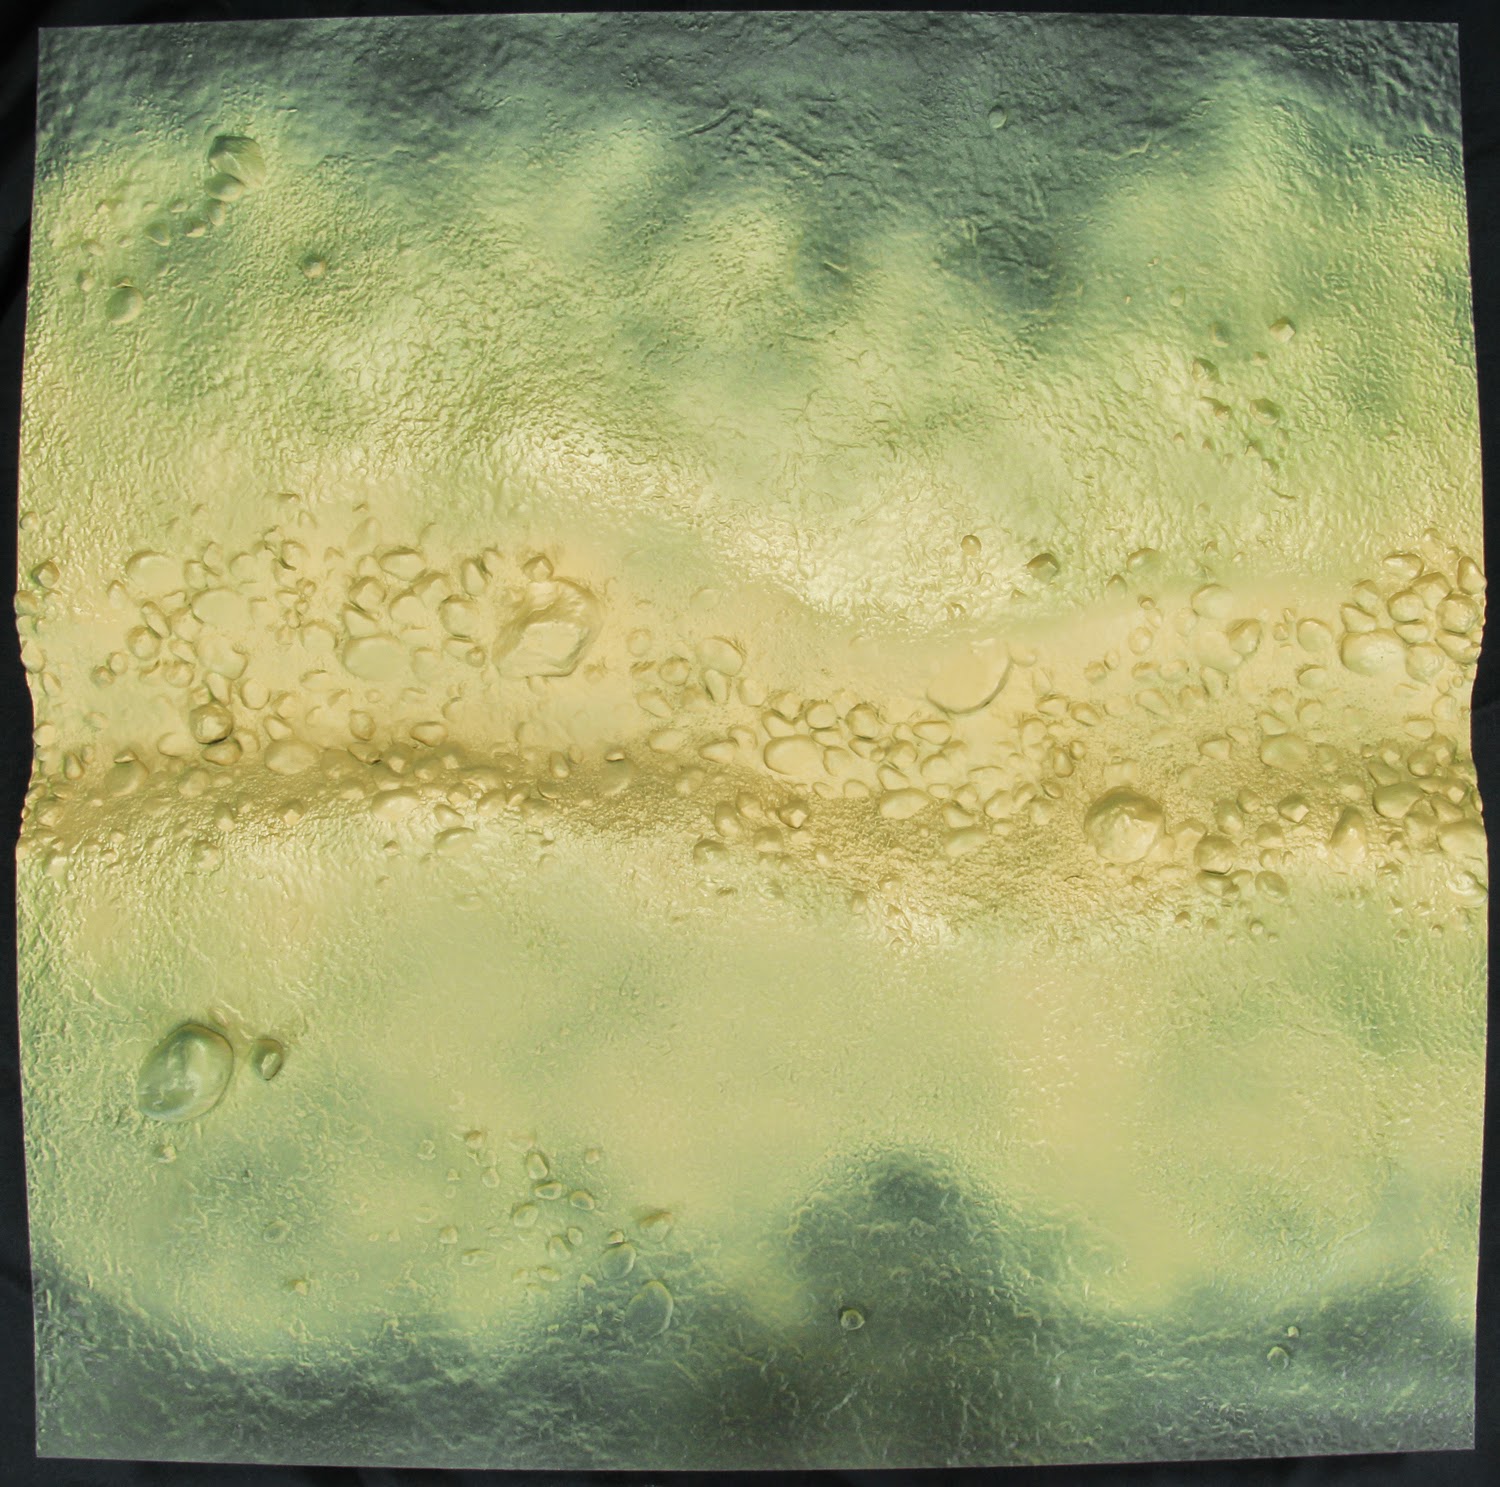
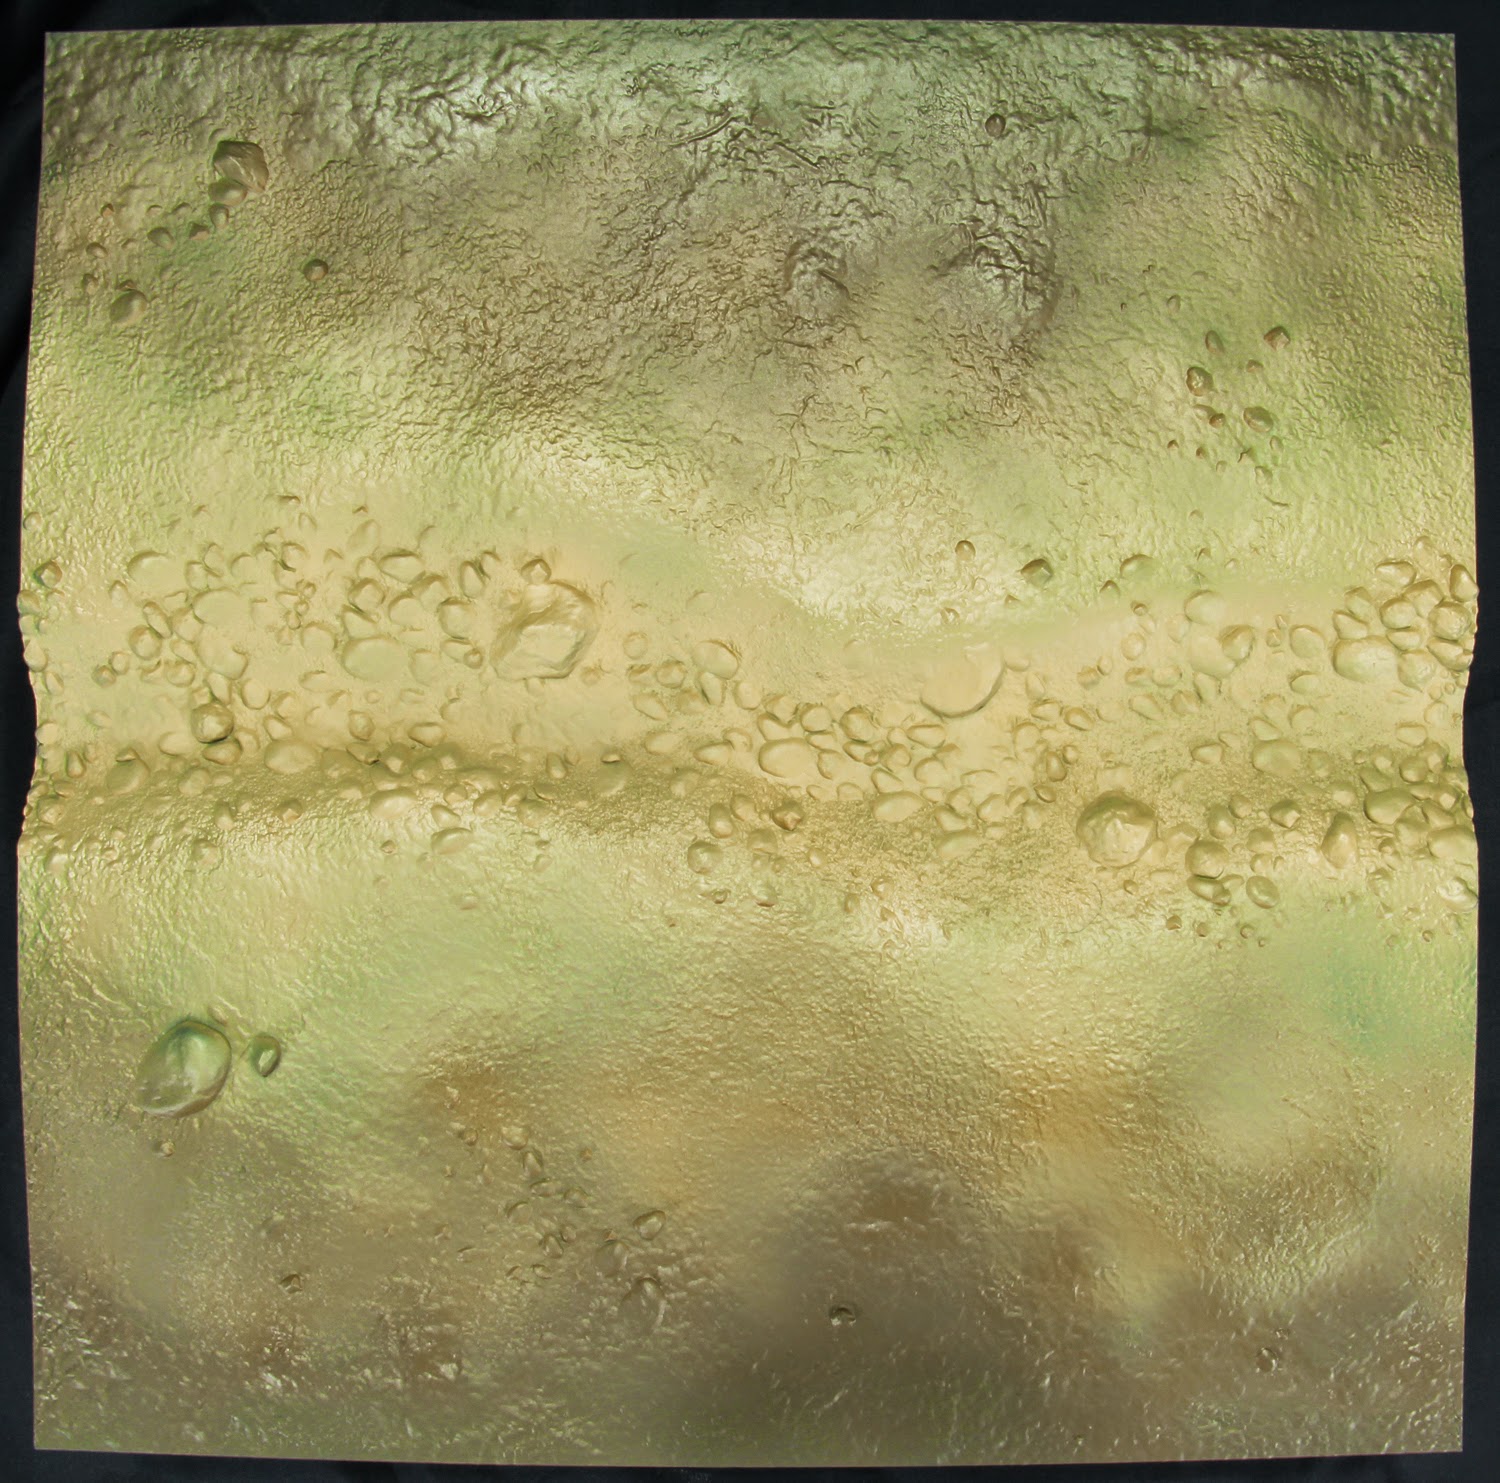
Our first color will be Minitaire’s Earth. It will be applied from the river bed outward. We will keep the outside black as a darker color will be used. We are not looking for a uniform opaque layer. By playing with the transparency of the paint being applied with an airbrush, we can play with tonality without having to use several colors.
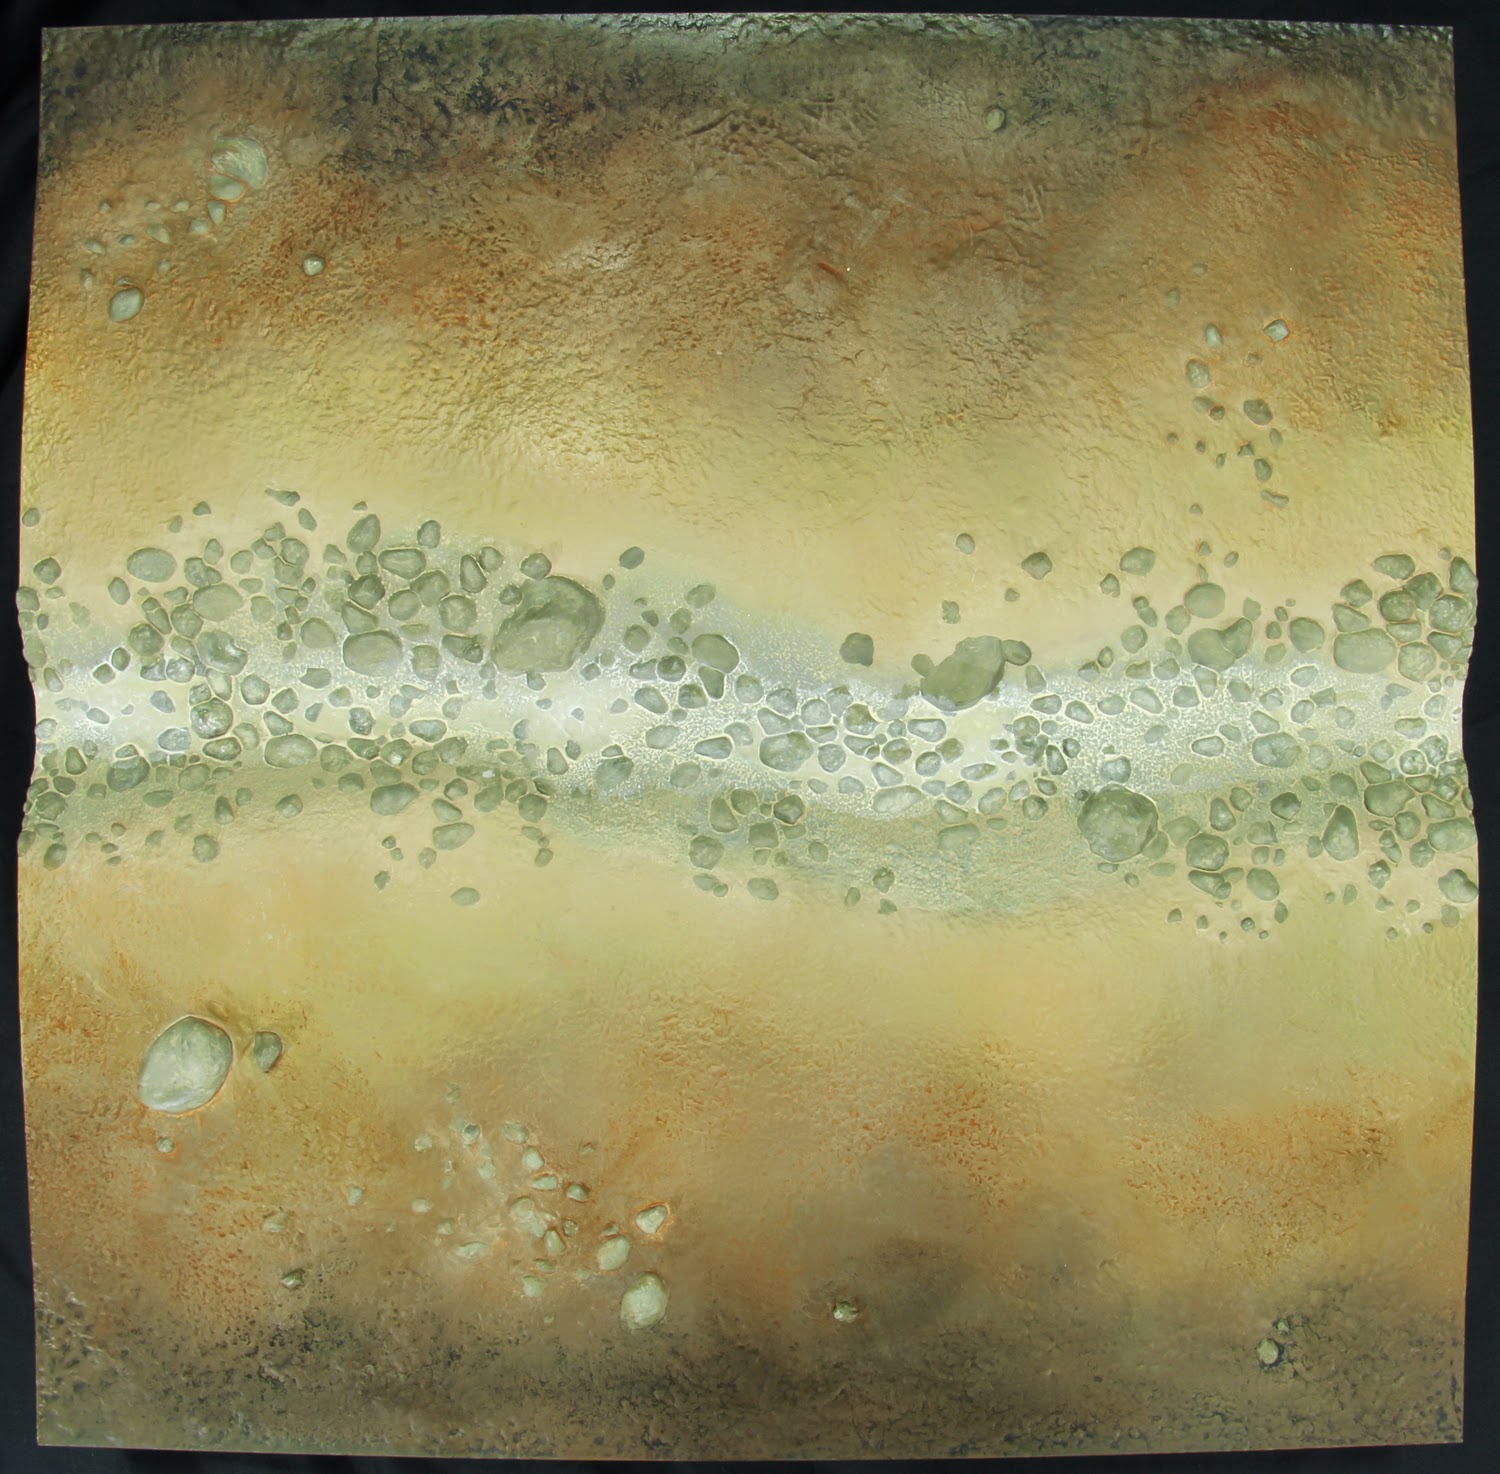
Minitaire’s Cracked Leather is used for our darker color toward the outside. Note the difference of colors between the black undercoat and our initial color. When the Cracked Leather covers the black base, it as a more neutral and darker tone, when it is on top of our initial Earth paint, it takes an orange value. Once again, a simple and quick way to play with tones without too much effort.
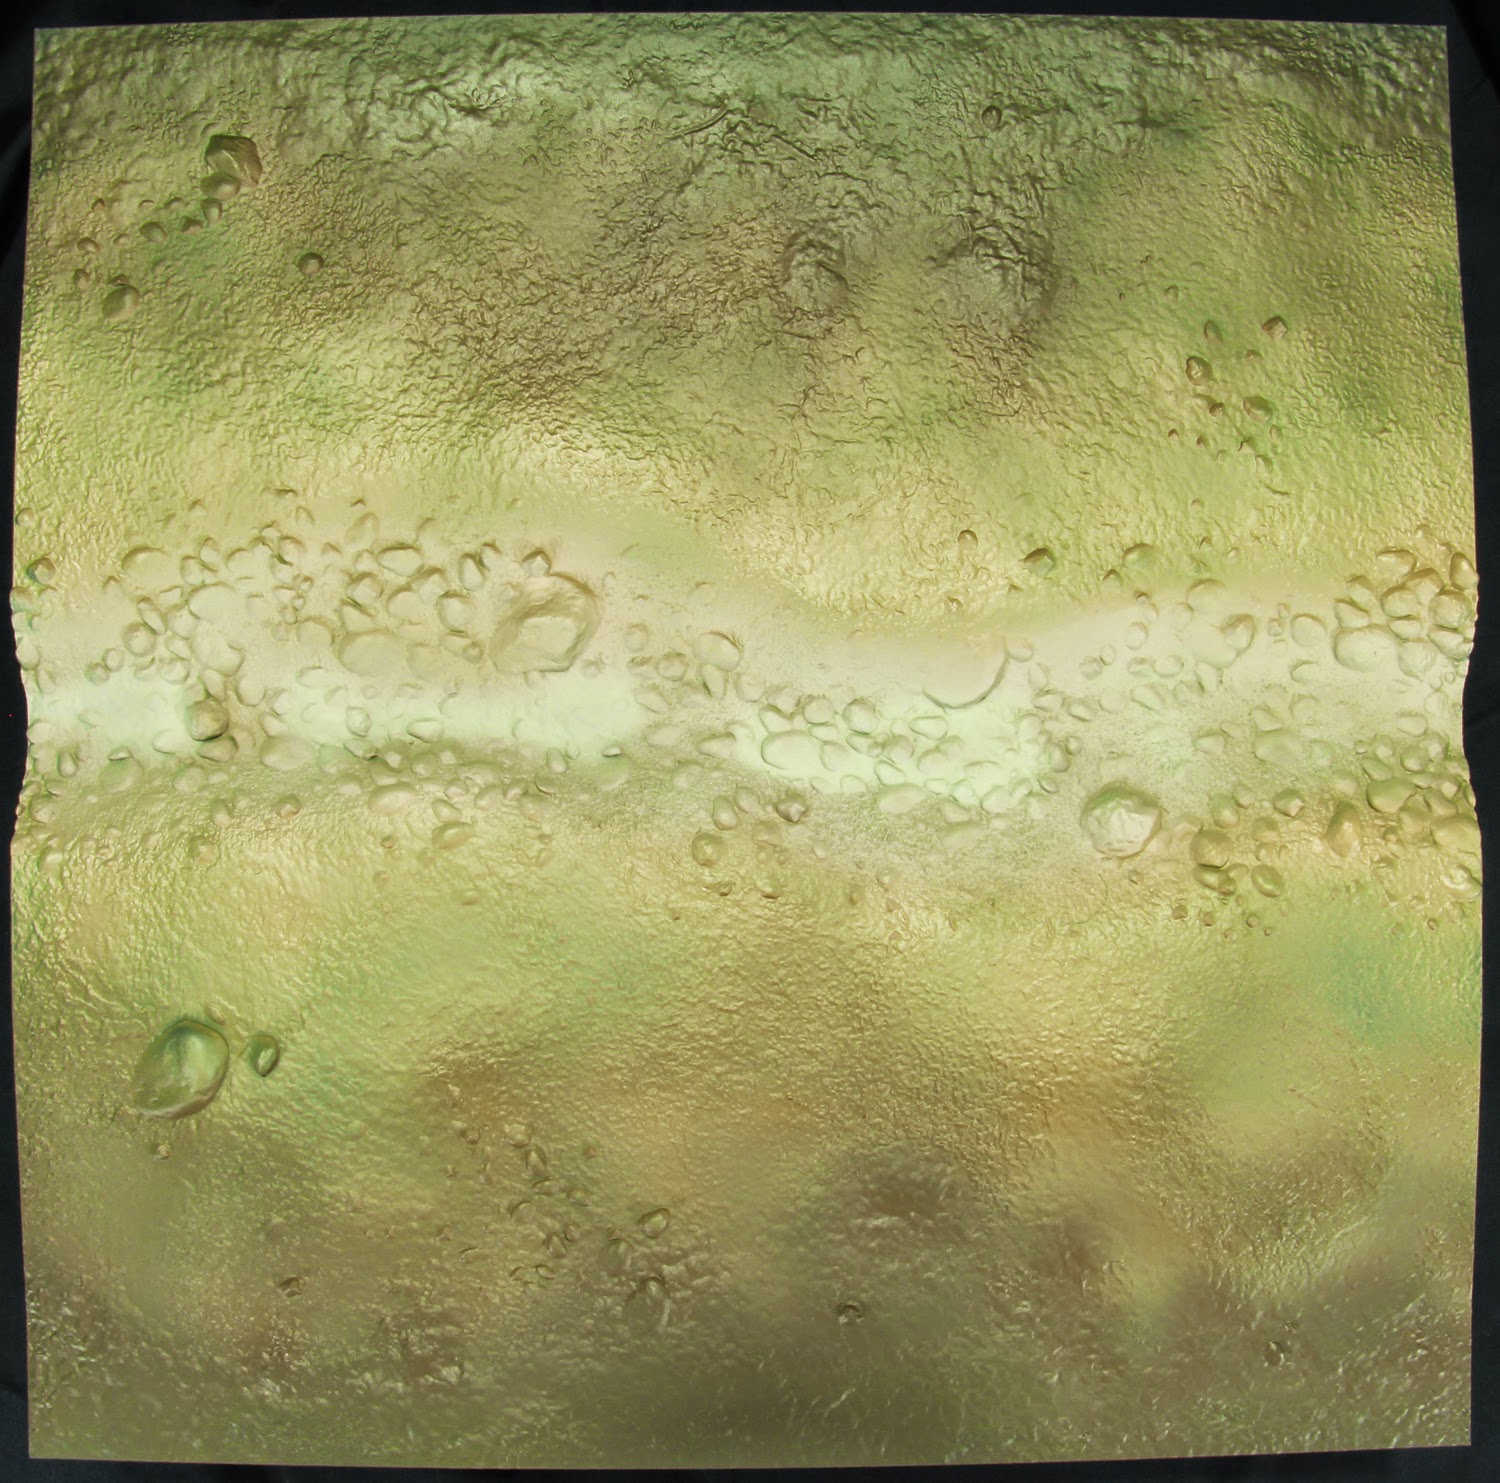
Desolated Beach from Minitaire is used for the stream. It is applied heavily on the areas that looks like clay at the bottom of the stream. Finally, a light filter is applied on the rest of the stream bed and surroundings.
Minitaire’s Concrete Slab is applied in the area of the stream composed mainly of rocks and Minitaire’s Cracked Soil is applied on the banks of the stream and lightly toward the outside. You can now see all the colors used for the soil as well as their transitions. This is where marking on the side the areas of each is important. As previously said, you should mark with a simple pencil the areas of each on the side. This way you can guarantee that from a tile to the other, the grey, tan and brown will all connect together.
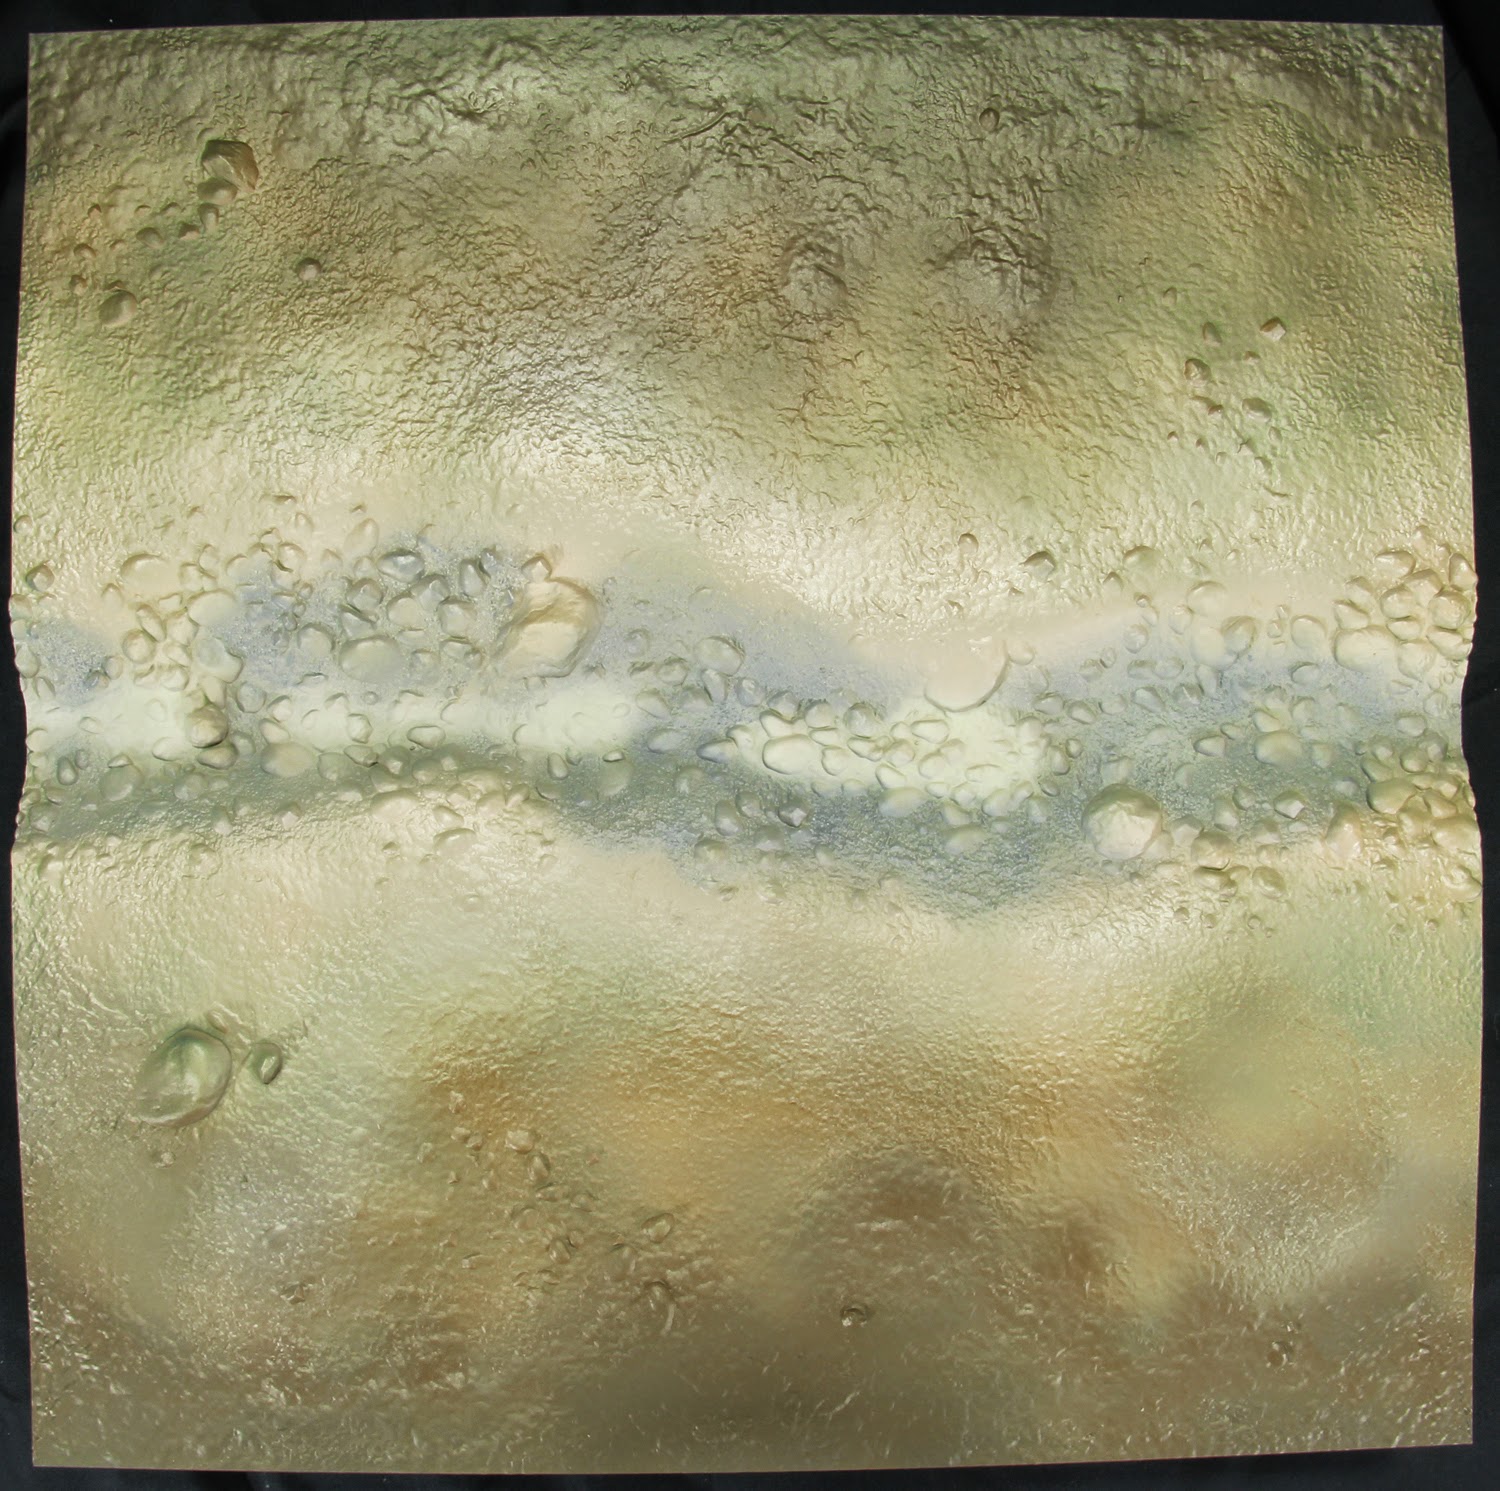
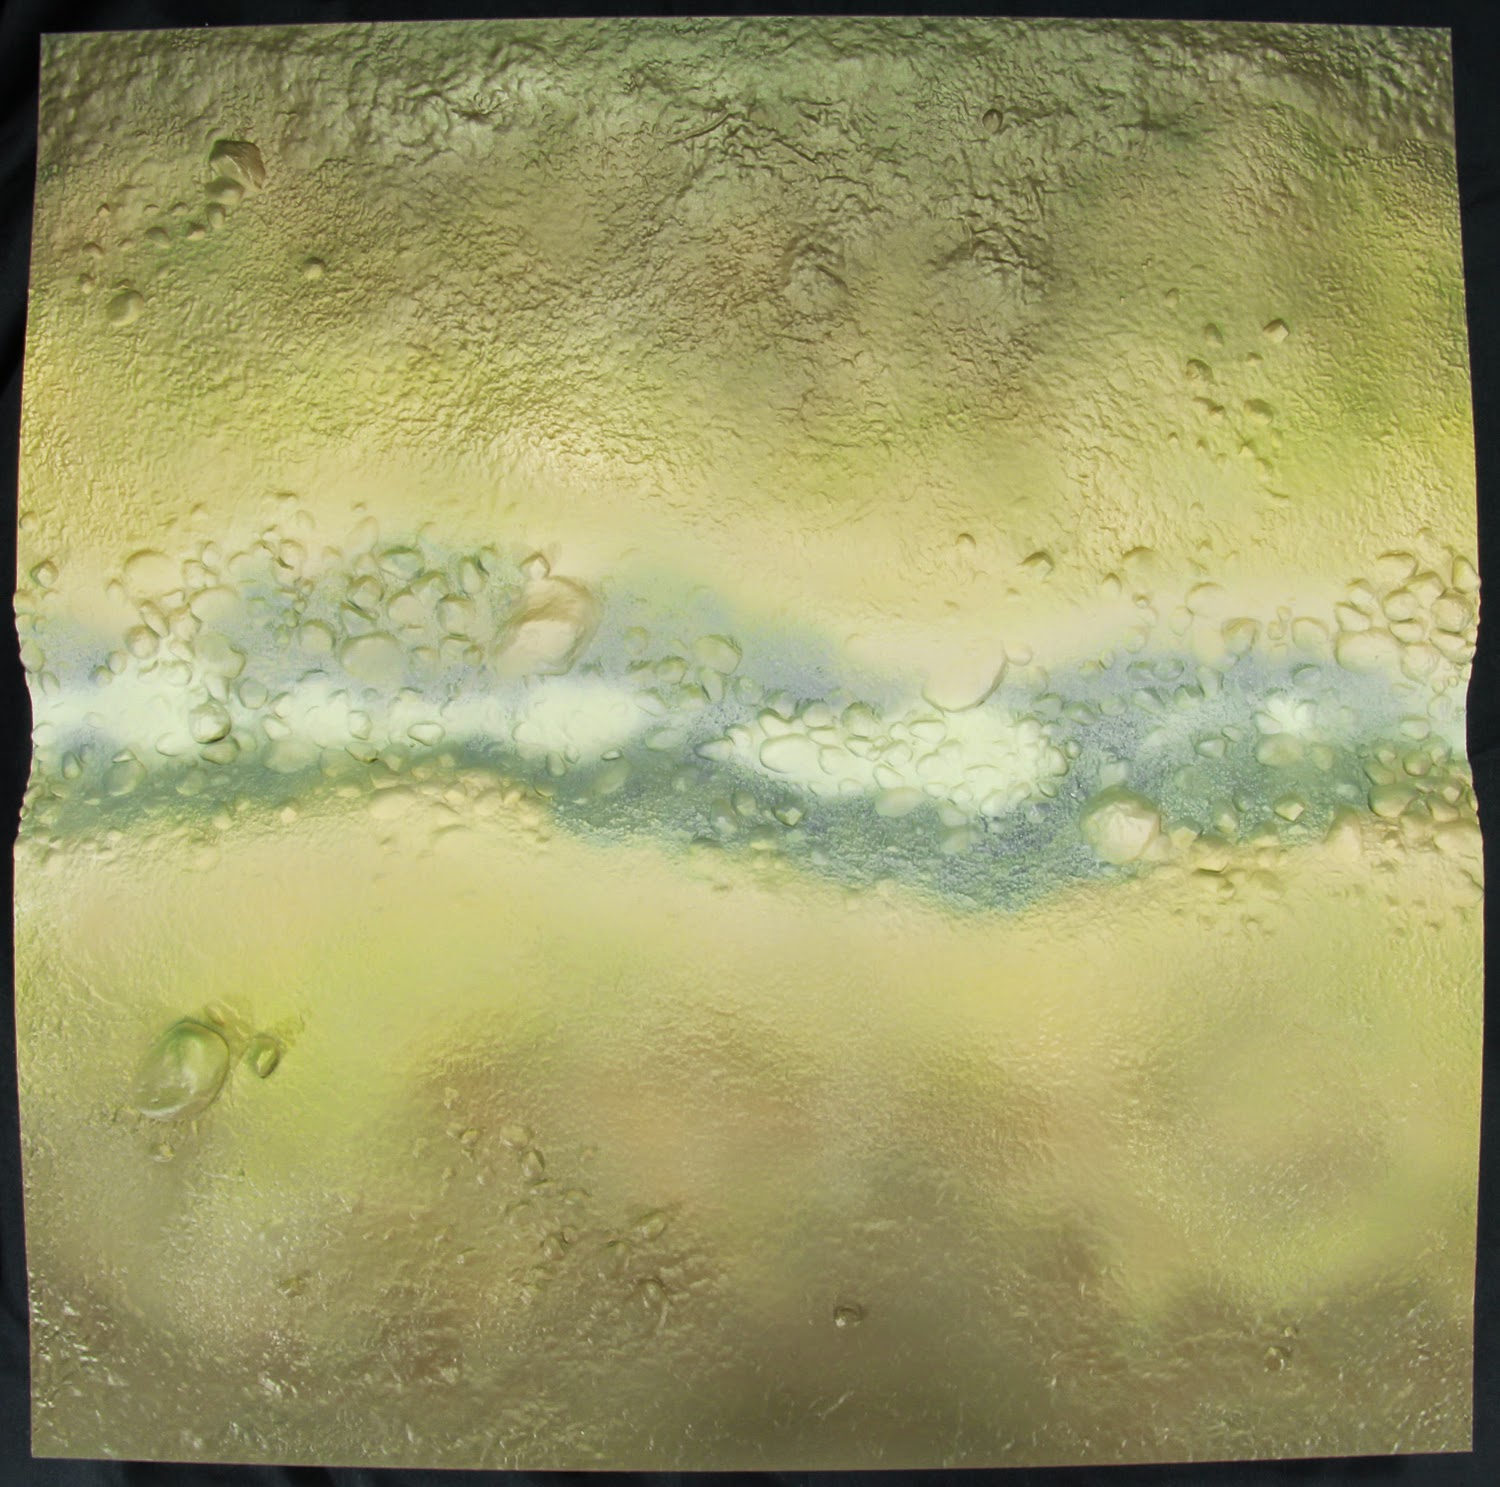
At this point, I find the overall color a bit too flat and toward the beige. I decided to apply a light filter of Minitaire’s Mustard Gas in order to saturate the ground a bit more and bring forth a yellow sand.
Filters are a great way to alter colors. If you find that your paintjob is lacking green, yellow, red or any other color, simply take that missing color, thin it severely and apply uniformly with your airbrush. It is always better to thin your mix to avoid nasty surprises.
It is now time to put the airbrush aside. Each rock was individually painted using Cryx Bane Highlight from P3. I would recommend using 3-4 different colors when doing such. I did not do it in order to save time but if you look closely to the pictures above, you can see the variety of colors of the rocks. It will help in adding a level of realism to your Tablescapes.
A series of oil washes are applied in order to bring out more texture to the grounds. A light mud color is used for the stream and rocks, burnt sienna for the mid section and black for the most outward section.
Oil washes are simple to use and efficient. Simply take the chosen oil color, thin it a lot with your solvent of choice, and spread it in the desired area. If you do not like it, you can simply take your solvent and wipe it off. Make sure to apply a varnish on top of the oil washes once the solvent has evaporated in order to keep working without issues on top of it.
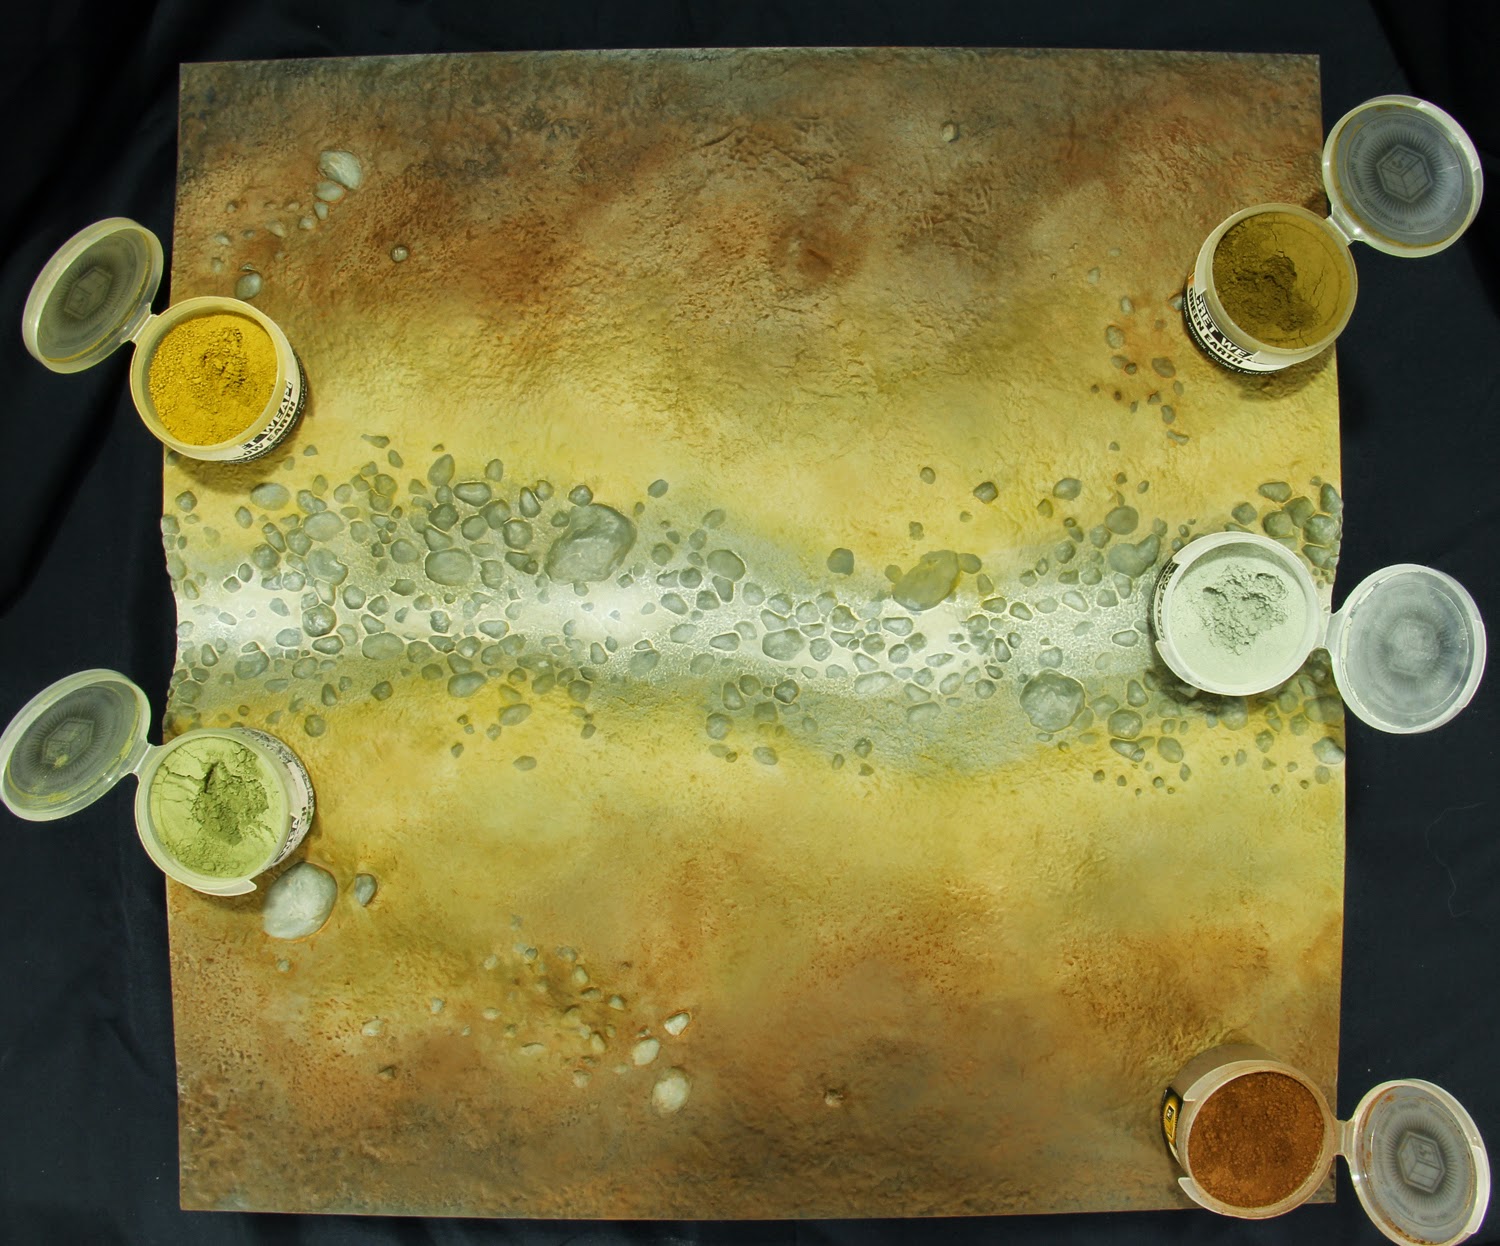
Secret Weapon Weather Pigments are applied to keep building on our texture effect by giving that dusty look. You can see on the picture which color has been used in which area. Slate Grey for the bed of the stream for that clay effect, Ancient Earth on the sides and banks of the stream followed by Yellow Earth to keep the yellow tonality. Finally Green Earth followed by Dark Earth are used to bring more natural earth colors toward the outside. Make sure to fix your pigments before moving forward.
If you are looking for arid grounds, this is where you would stop. No need to go further. You might want to bring the stream bed to a color a bit closer to the yellow ground in order to demonstrate how dry it is. In our case we will go a bit further.
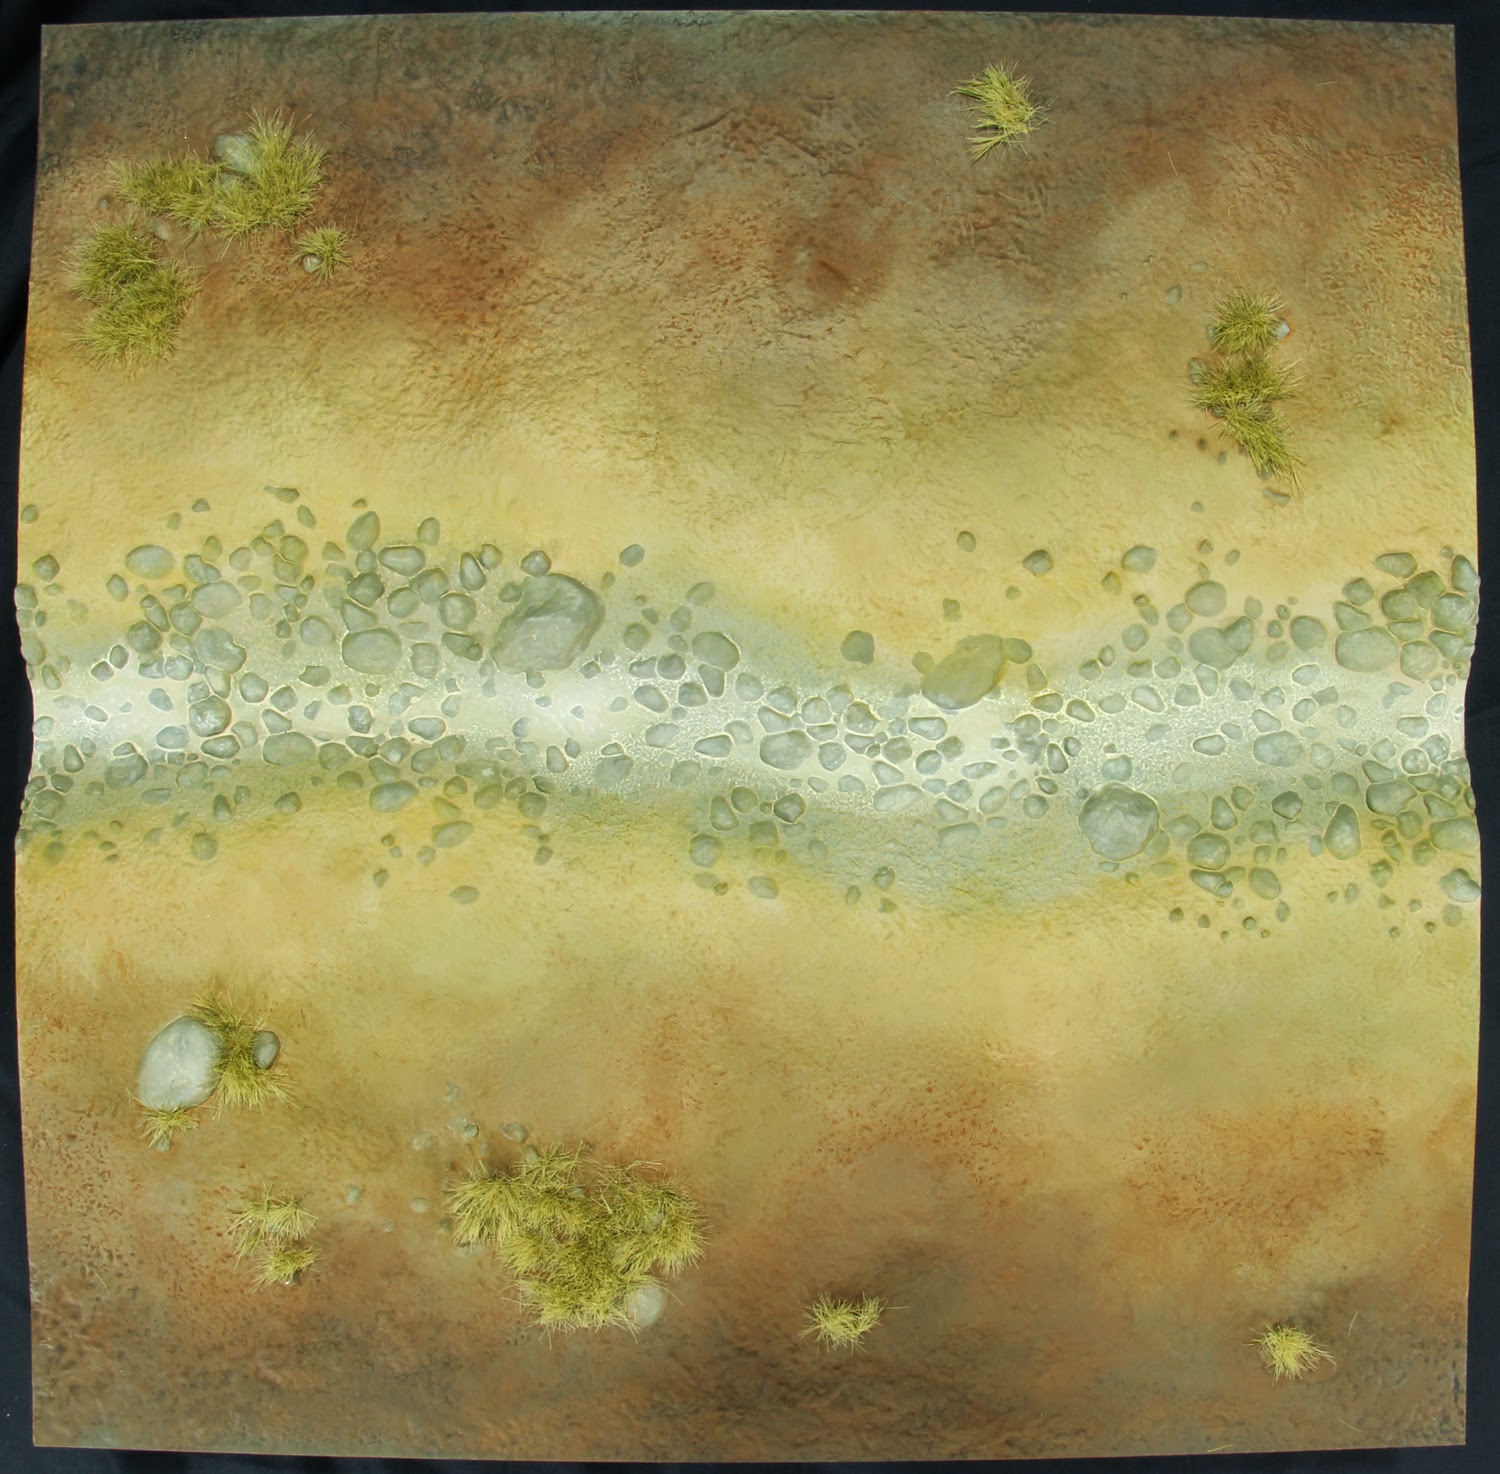
It is time to add a little bit of grass. I first started with tufts. They can be found from most places selling hobby scenic material. They are small packs of static grass on varied size pieces of glue. They allow you to place small patches of grasses here and there. They are available in several colors and heights. Do not be shy to mix it up to bring more realism. In this case, I have place the tufts around the various rocks using a desaturated color reminding us of the rest of the colors. I glue them in place with a small touch of cyanoacrylate. A watered down mix of white glue would do the job but I wanted something quicker and more efficient.
Before going further, I will play with some static grass in order to mix them up and get colors I am looking for. For this, the Masterclass Scenics Grass Collection from Secret Weapon as well as a pack of the lively green static grass from most large companies was used. The key element of a more realistic static grass mix is the various colors composing it.
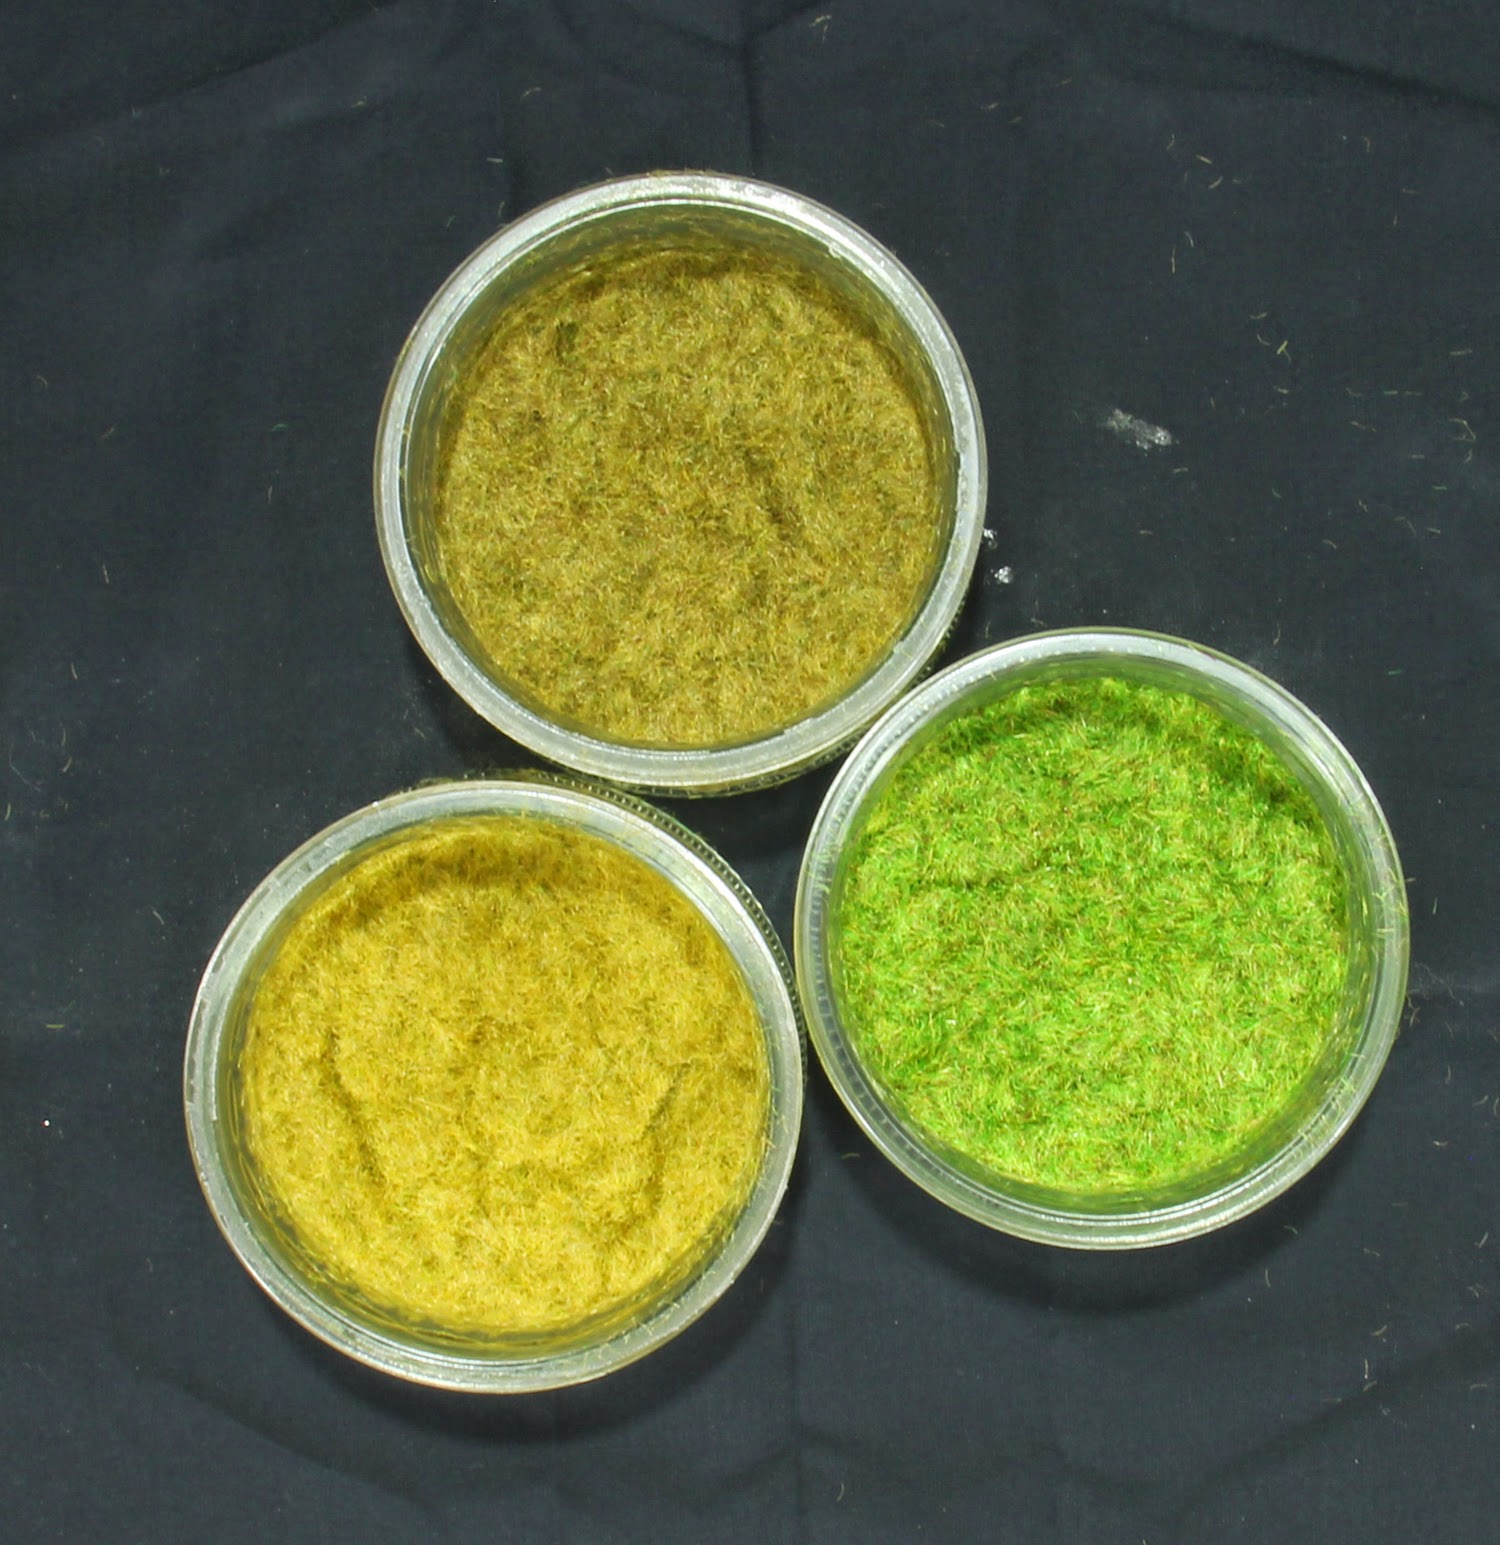
3 mixes were done. One composed of 2/3 of the Burnt static grass from the Secret Weapon pack, with 1/3 mix of the Light Green and Harvest Gold from the Secret Weapon pack as well as the classic green mix from the larger companies. The second mix was 2/3 of Harvest Gold with a 1/3 mix of the others and the last one was 2/3 of the classic green with a 1/3 mix of the others. Which gave us this:
You can see our three mixes. You can see the slight color variation in each of them giving them a bit more realism. These will be applied in patches here and there using watered down white glue. Always make sure to apply it on top of a cardboard. Apply your glue, then sprinkle your static grass on it. Following that, flip your tile upside down and tap on the back of it so all the excess fall on the cardboard. Before changing color, make sure to collect the static grass from your board in order to use the excess again without it mixing with the following color.
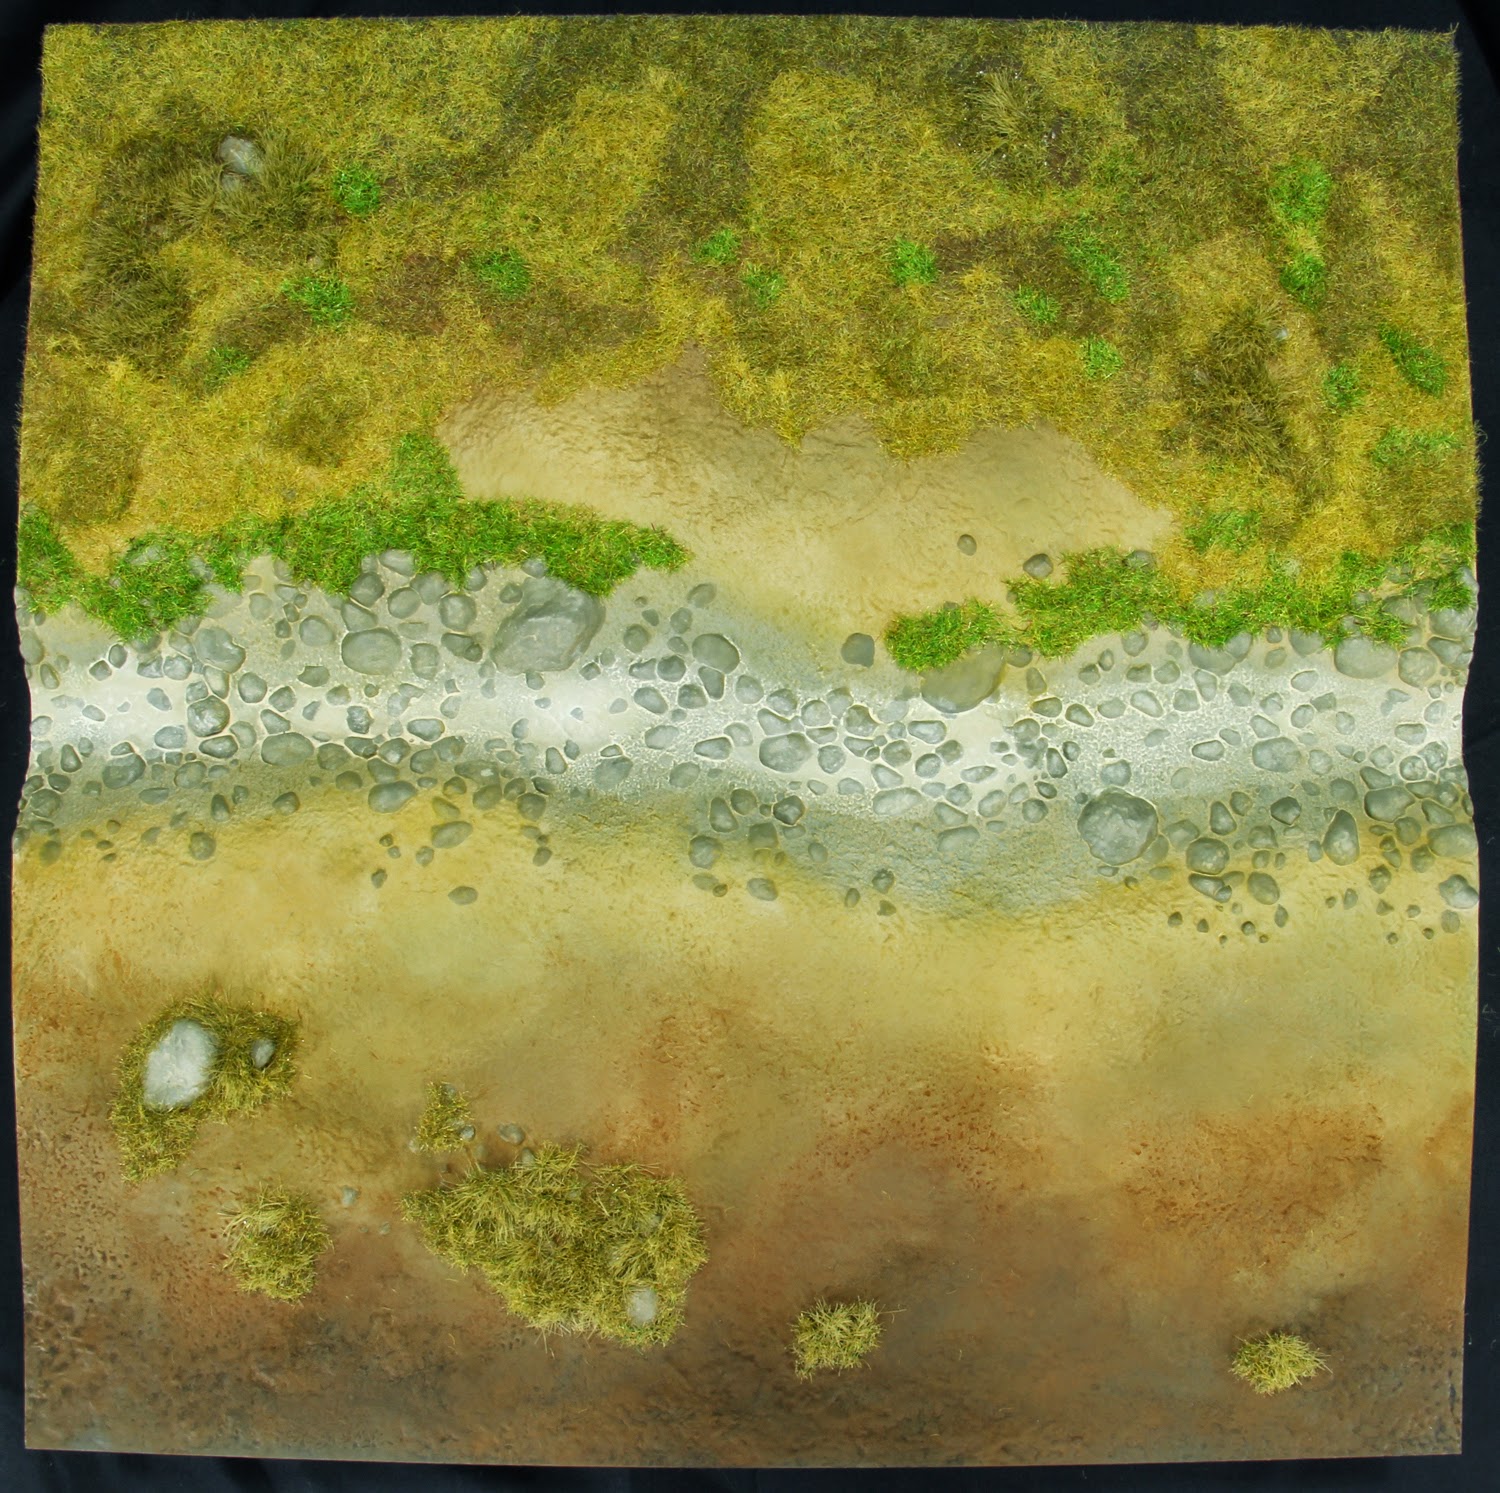
You can see the various colors applied in various patches. Once again feel free to go nuts. I concentrated the vivid green along the river. In retrospect, I would have created 3 mixes of closer colors or created more colors to bring a more natural progression toward that vivid green. I also committed one other critical error: I applied the grass sporadically, carried by the moment, without thinking about being able to connect this tile with others. Fortunately for me, I am not painting the entire set. But if you observe the patches of grass along the edges, you can clearly see how it would be an issue.
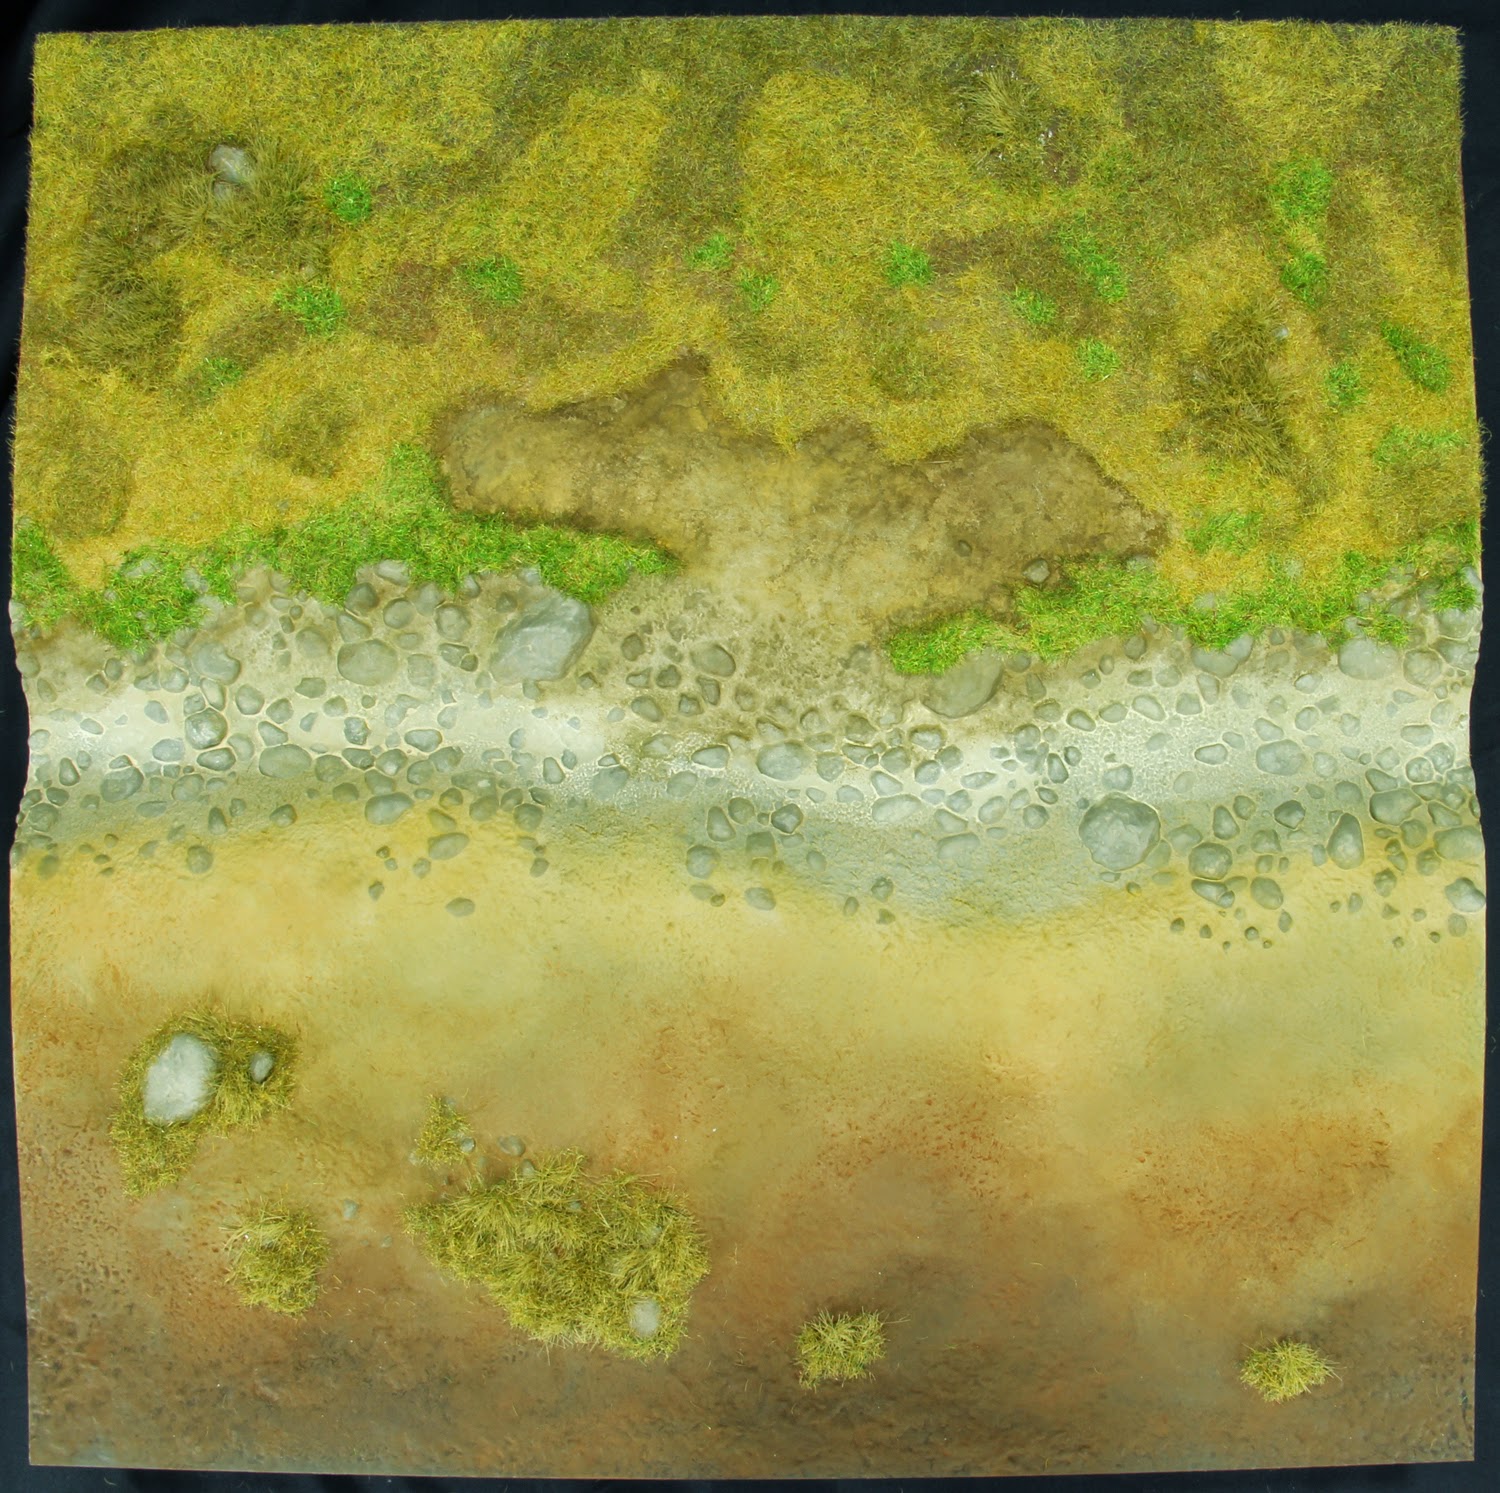
I decided to add more textures to the half of the board with grass. The same pigment colors were used as before. You can clearly see the difference it makes from each side of the river. Simply to show you how a little more work can bring more details.
Resin was used for the river. I personally use the Clear Casting Epoxy Resin product. It is to be noted that the Realistic Water from Secret Weapon is great for small pools of water or thin layers right above the ground. For anything thicker than 1/8″(about 2mm), it isn’t recommended.
Various tutorial can be consulted on how to work with resin as water effect including this one I have written: http://www.akaranseth.com/blog/tutorials/how-to-make-water-effect-using-resin.htm. Make sure to read it properly before using it. Tamiya masking tape was used at each end to stop the resin. Make sure that both tapes are at the exact same level. The tape level should represent where your resin will be topped at. Otherwise the resin will rise up on the tape creating small walls.
I wanted a light greenish tan color for the water so a few drops of Secret Weapon Baby Poop wash was added to the mix to color it. Once you pour your mix, make sure to let it dry for 24 hours in a place protected from dust. Technically every bubble should surface by itself, but if you put grass or branches in the river bed it might need a little help. Simply use a hair dryer to increase the heat of the resin and makes the bubbles rise to the surface. Make sure to blow from a fairly good distance, otherwise you will create waves and make the resin go over your tape.
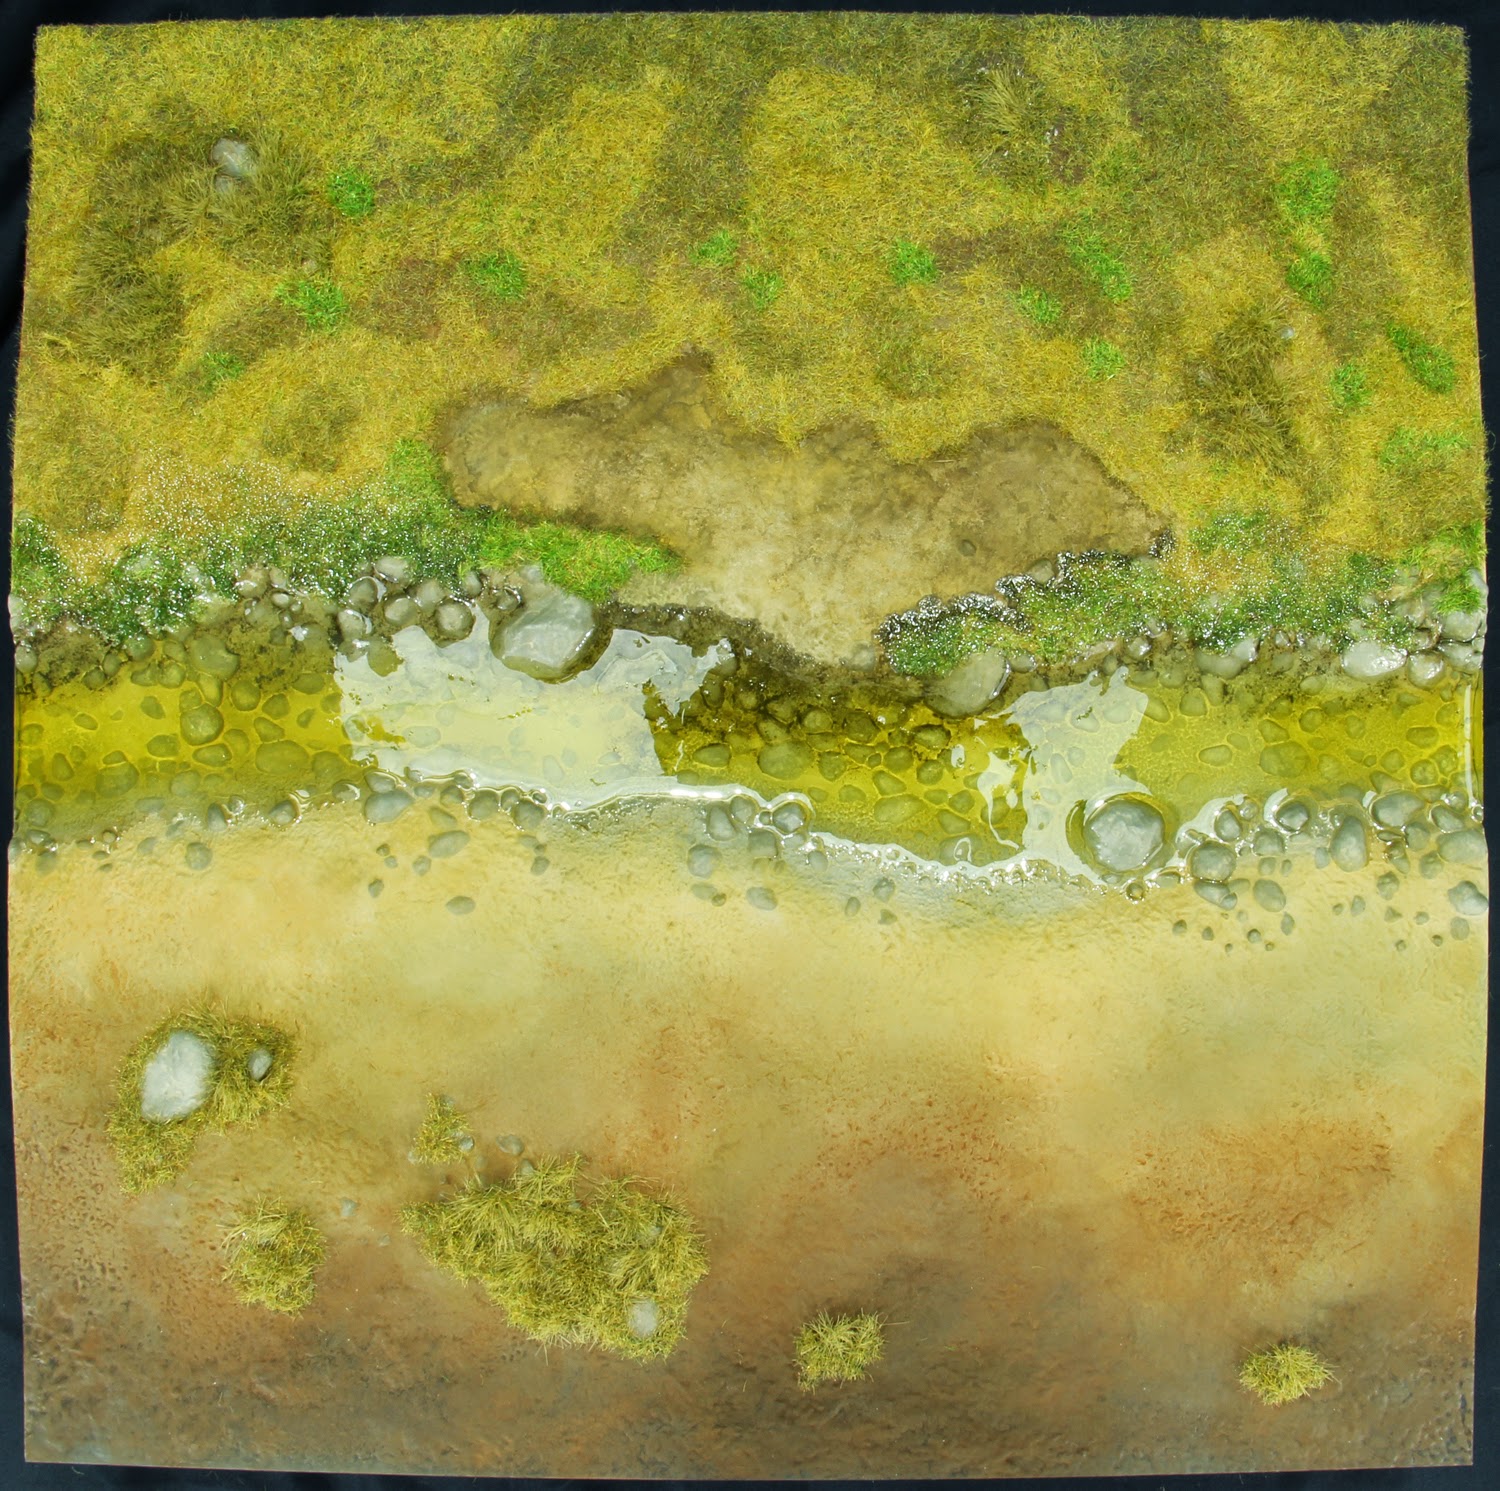
After 24 hours of rest, you should be able to remove the tape and move forward. Looking at this example, you probably spotted an issue: the resin was poured to meet with the grass. I did not think that the static grass would absorb the resin but it did, creating those glossy patches. It could most likely be fixed with matte varnish and such. If I had to redo this, the grass along the river would be applied after the resin to avoid such an issue.
So here you have it, a completed Rolling Field tile ready to join the others and see battle on its ground. Once again, feel free to follow this instruction in the steps you want. You can stop wherever you want. Remember that it is your Tablescapes set. We just want to give you all the tools and information to make it look good.


