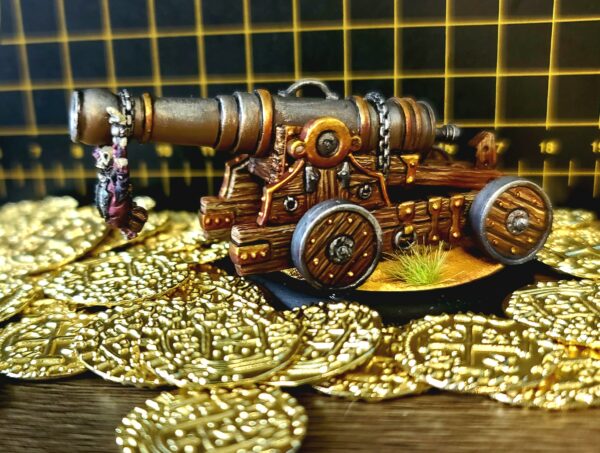
Painting the Commodore Cannon
Welcome back, hobbyists, to another painting Insider! It’s been a while since I was able to get another hobby article up for everyone—a few health obstacles prevented me from getting to my brushes and paint, but it looks like I’ve finally cleared those hurdles, so let’s get back to the action.
With the announcement of the Brineblood Marauders, 2023 has become the Year of the Pirate for me. Yarr! Through the rest of the convention season, I’m going to be dedicating the majority of my personal painting time to making sure all of my pirates are painted and ready for the tabletop. So, while I wait for my Brineblood preview box, I’m going to focus on my Talion Charter pirates for this week. What better way to return than to paint a giant cannon so big it’s been given the rank of Commodore. So, still the guns and stow ’em, signal the men, set the flags, and make good to clear port!
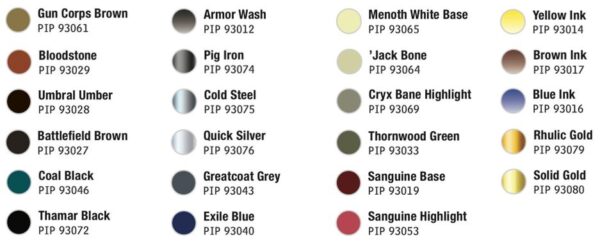
Colors Used:
Woodgrain
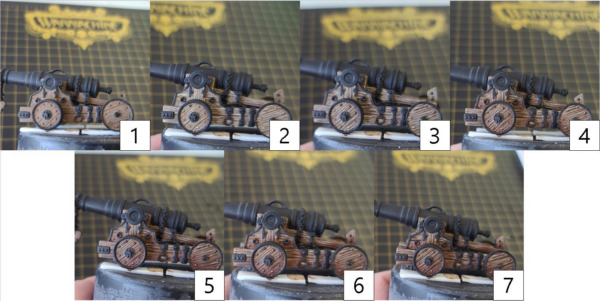
Step 1) I start off by focusing on painting the woodgrain. Basecoat the wood area in Gun Corps Brown. While most of the woodgrain is found on the cannon, don’t overlook that treasure chest hanging from the pile of bones on the end of the cannon.
Step 2) Next, using Menoth White Base, I draw out the grain structures of the wood: small lines with the occasional bump or two to break it up from looking too uniform.
Step 3) To create a little bit of depth to the wood look, I use Umbral Umber to do the same as the step before did, following the lines of the Menoth White Base—essentially, I’m making a woodgrain sandwich: Menoth White on top, a little Gun Corps Brown in the middle, and Umbral Umber on the other side.
Step 4) To bring vibrancy to the wood colors, I mix Bloodstone, a drop of Yellow Ink, and Brown Ink in a 3:1:2 ratio. With this color, I blend a glaze across the woodgrain to make the colors pop. I place the wash in the areas that will be the heaviest seen in shadow and try and blend it to where it will be the lightest.
Step 5) I repeat the previous step once more but only going half the distance of step 4. Ultimately, I’m creating a staining pattern on the wood.
Step 6) To really bring the woodgrain to the level I’m looking for, I’m going to add a single drop—if not just a half-drop—of Blue Ink to the previous color. Too much blue can overpower the color, so use caution when adding in this ink. Using this mix, I blend in one final layer of shade in the darkest areas.
Step 7) To finish off the wood effect, I mix a little bit of Thamar Black into the mix. I apply this color to the darkest areas and the spaces in between any planks to thoroughly define the separation of the boards.
Silvers
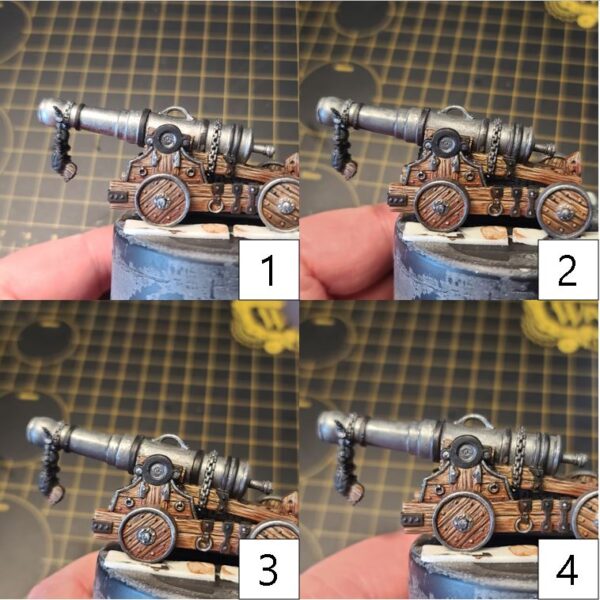
Step 1) Next up, let’s get some silver on that cannon. For the silvers of the miniature, go ahead and basecoat the area in Pig Iron. Take your time and make sure to get a solid coat.
Step 2) Once you have a nice solid basecoat, it’s time to move on to the first shade. Mix Greatcoat Grey and Armor Wash and apply to the shadows of the metal.
Step 3) Time to deepen the color by applying a second shade. Mix Umbral Umber and Exile Blue together and apply to the darkest areas only.
Step 4) With the shading complete, it’s time to add in a highlight of Cold Steel. Focus on the most raised edges to create that definition.
Step 5) Once the model has been sealed with a matte varnish, return to the area and apply a final highlight on the absolute tips of the metal with Quick Silver in order to give it that glinting metal look.
Golds
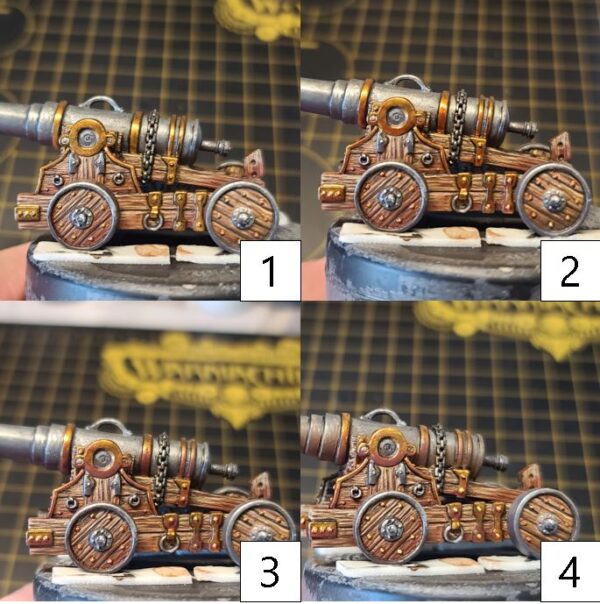
Step 1) Next up: time to tackle the gold. I start my gold off with a nice solid basecoat using multiple thin layers of Rhulic Gold. I take my time, as thick layers don’t typically get the results I’m looking for.
Step 2) To create a nice tone for my golds, I start by glazing the area using a mixture of Brown Ink, Yellow Ink, and Rhulic Gold, applying this as my first layer of shading.
Step 3) To darken the shadows, I mix a small amount of Umbral Umber, Sanguine Base, and Brown Ink together, and I apply this to the areas that will be the darkest of shadows.
Step 4) With my shading complete, I’ll turn my attention to the highlights. I use Solid Gold for my first layer of highlights, being sure to focus on areas where light is reflecting and on the highest raised areas.
Step 5) Finally, after the model is sealed with a matte sealant, I return to the area to apply my final highlight by mixing Solid Gold and Cold Steel together. I use this color to identify the extreme highlights.
Weathering
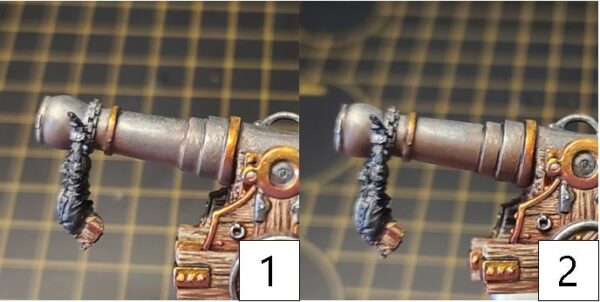
Step 1) This cannon has likely seen its fair share of combat, so it should probably have at least a little bit of wear or dirt on it. Take a small amount of Battlefield Brown and apply this only to the extreme underside of the cannon and work a blend back up. Using straight lines will give the most realistic effect.
Step 2) Darken this weathering location using Bloodstone. Again, focus on the extremes of the shadows and work back up in a line formation to mimic water rolling down the sides of the cannon.
Bone
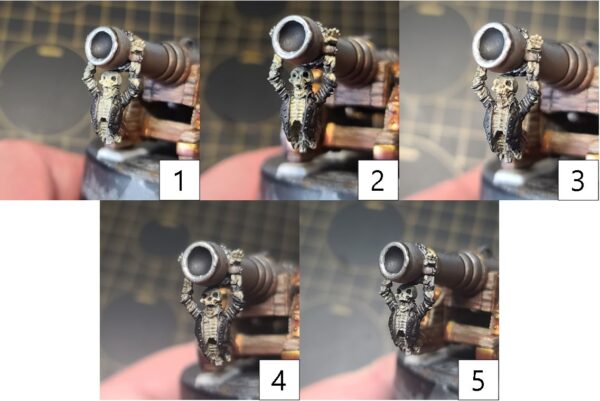
Step 1) With the cannon itself completed, it’s time to tackle the hood ornament chained to the front. To do this, start with a nice basecoat of ’Jack Bone.
Step 2) Next, begin shading the area with a wash of Cryx Bane Highlight thinned out with water. Try not to let it pool too much in any area.
Step 3) For a second layer of shading, use a mixture of Gun Corps Brown and Thornwood Green. Focus on leaving some of the shade showing from the previous steps.
Step 4) Finally, apply a final shade of Battlefield Brown mixed with Greatcoat Grey sparingly to the deepest areas. Be very careful when working it into the recesses of the bone.
Step 5) To highlight the bone, mix Menoth White Highlight and ’Jack Bone together and apply this color to any raised edges or areas you would like to draw attention to.
Jacket
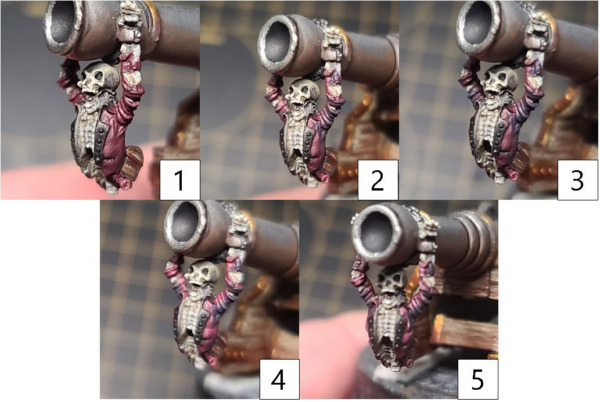
Step 1) Only thing left to paint is the dead dude’s duds. I start by layering on a few thin coats of Sanguine Base.
Step 2) Next, I add a few drops of Exile Blue to Sanguine Base and apply this mixture as my first layer of shading.
Step 3) For the final shade, I add a drop or two of Coal Black to the previous mixture and apply this color into the deepest recesses as the darkest areas of the jacket.
Step 4) With my shading complete, it’s time to start some highlights. I use Sanguine Highlight in thin layers to build up the color slowly. Once I have a nice, smooth transition, it’s time to move on to the next step.
Step 5) Mix Menoth White Base with an even amount of Sanguine Highlight to create a final highlight. Using the two-brush blending technique, I blend out the highlights. While dead men may tell no tales, this skeleton is ready to hit the tabletop—and he’ll tell his tales there.
I’m very excited with how this model turned out. Only 100 models or so left to go? Curse of the Black Primer? Time to set sail, so I’ll see you in the next Insider! Time to chart a course to the Scharde Islands!

The post Painting the Commodore Cannon appeared first on Privateer Press.

