

Madam Moriarty Insider
As the holiday season descends upon me, I start to wrap up all of my active projects and get everything prepped for a great start to the 2024 season. I’m so excited for all of the REDACTED NAMES and REDACTED models coming in just a few months! We have so many cool things coming next year, and I can’t wait to share them with everyone.
Hey, I see you editing back there, Mike…
Fine I won’t spill all of the cool spoilers…at least not yet. It’s the holiday season, though, and the time of giving, right? Sigh, well, since I can’t spoil anything, I guess before the clock runs out on 2023, we should get in at least one more hobby Insider. Today, I’ll be tackling Madam Moriarty for my Brineblood army. So, one more time for the year, grab some brushes and paint and follow along.
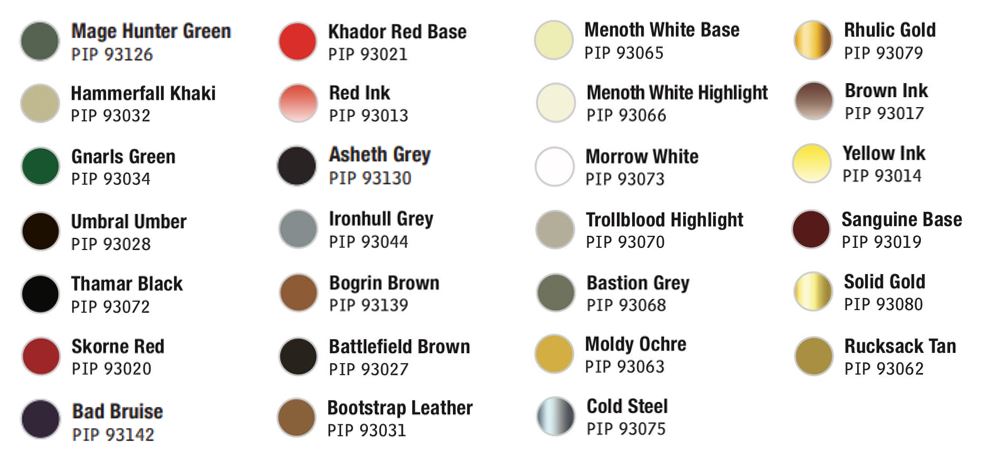
Colors Used
Skins
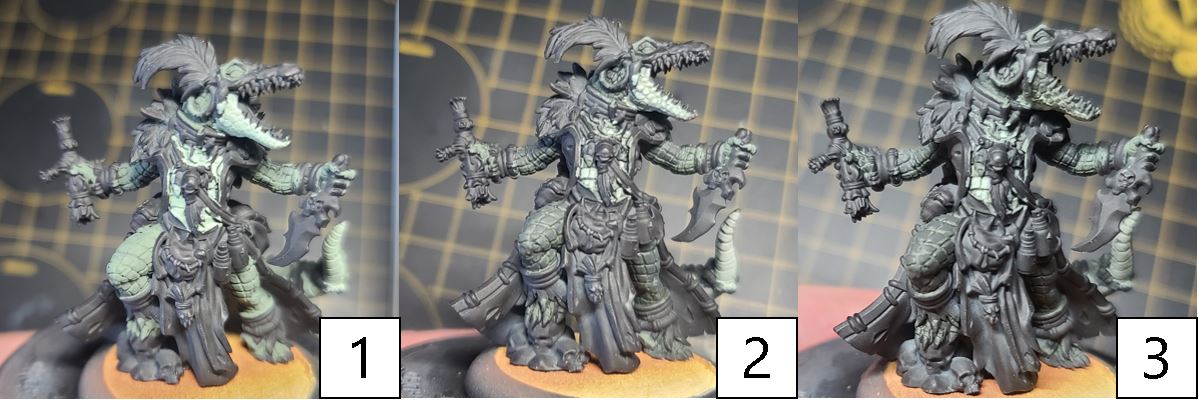
Step 1: I’ll start off with the skin tones of this gator gal. There are two different colors for the skins I’ll be doing at the same time as I go through this area: an upper area and lower area. The upper will be the darker tones, and the lower will be the softer belly scales, which will be somewhat brighter. For the darker areas, I’ll basecoat the model in Mage Hunter Green, and for the lower areas, I’ll mix Mage Hunter Green and Hammerfall Khaki together.
Step 2: To create some shadow and definition, I’ll need to create a glaze for both previous colors. For the darker skin tones, I mix Gnarls Green with Umbral Umber, thin this out heavily with water, and apply an even coat over the darker skin tones. For the lighter areas, I thin out Mage Hunter Green with a heavy volume of water and apply a few thin layers across the lighter areas.
Step 3: For the darker areas, I want to add one more layer by mixing Gnarls Green with an extremely small amount of Thamar Black, and for the lighter colors, I mix Mage Hunter Green with a small amount of Menoth White Highlight. The colors may look a bit odd, but trust the process and head on from here to the red coat.
Red Coat
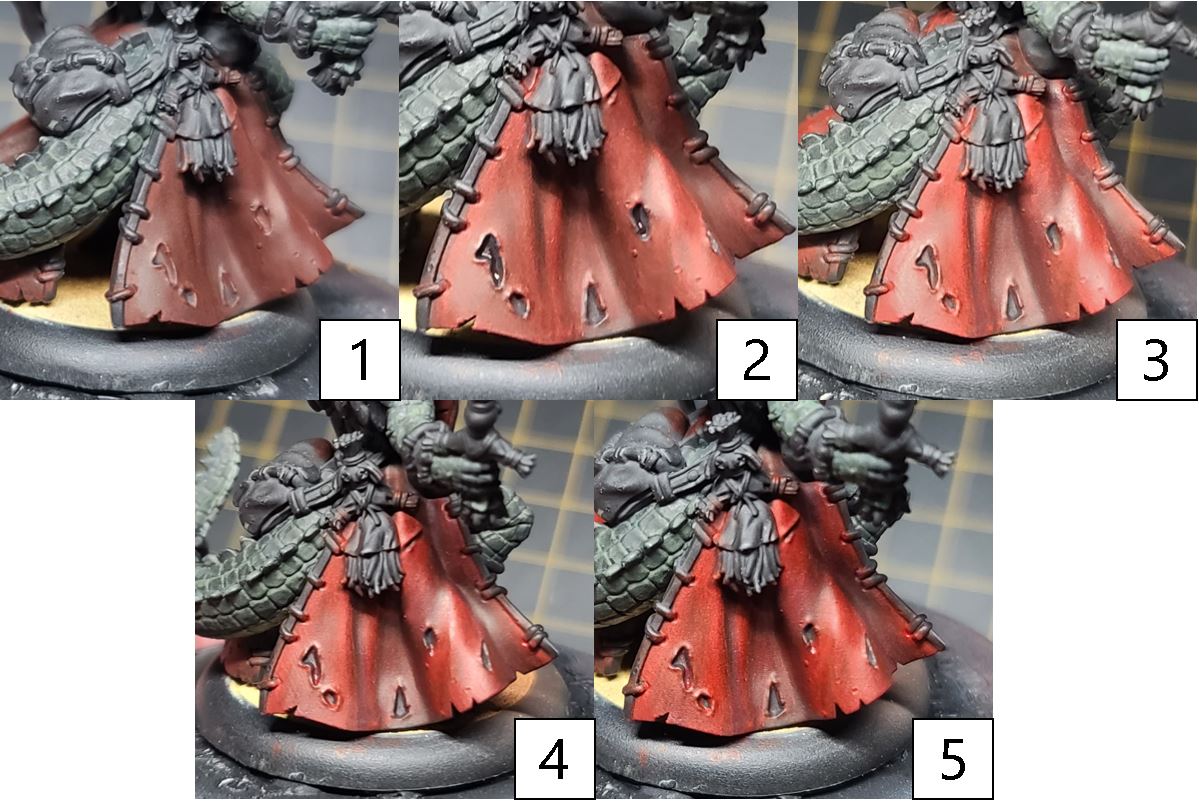
Step 1: For the red coat, it will be easier to build up color with a brown undercoat. Mix a small amount of Umbral Umber with Skorne Red and apply evenly everywhere on the coat.
Step 2: Continue working the highlight up with a layer of Skorne Red, making sure to leave areas of the previous color showing throughout the area.
Step 3: Next, add an additional highlight of Khador Red Base to all of the raised areas and the highest edges.
Step 4: To deepen the shadows and add depth, mix Bad Bruise with Skorne Red and blend this into the deepest recesses.
Step 5: Finally, to bring it all together, thin out some Red Ink with a lot of water and work a few layers of glazing over the entire area. Make sure not to let this color pool up—just even coats across the red coat.
Black Cloth
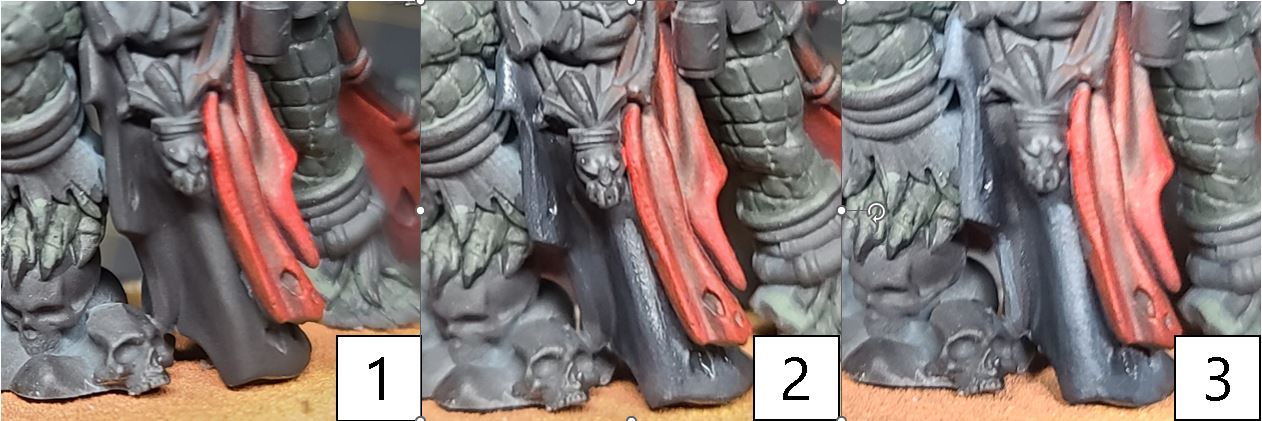
Step 1: Next up, I tackle any black cloth and ropes. I start these areas off with a solid basecoat of Thamar Black.
Step 2: Next, I start working the colors up from black with a highlight of Asheth Grey. Less is more when highlighting black, so I’m careful not to overdo it with this color.
Step 3: Finally, I throw on a bright highlight of Ironhull Grey to complete the look.
Skulls
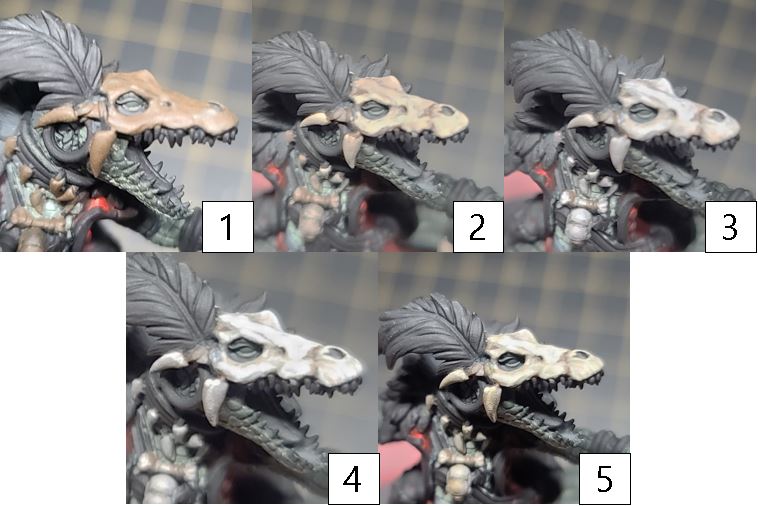
Step 1: Time to paint up some bones! Start by basecoating the area with a mix of Bogrin Brown and Battlefield Brown.
Step 2: Apply a first highlight to the majority of the area with a mixture of Bootstrap Leather and Menoth White Base.
Step 3: Next, add a drop of Menoth White Highlight to the previous mixture and apply another layer of highlights. Be sure to leave areas of the previous steps showing through as you go.
Step 4: For a final layer of highlights, apply Menoth White Highlight to the raised areas and hard edges.
Step 5: Finally, to bring the look all together, mix Bogrin Brown, Battledress Green, and Mixing Medium together and work this mixture into the recesses and stain where dirt and debris would have collected over time.
Black Feather
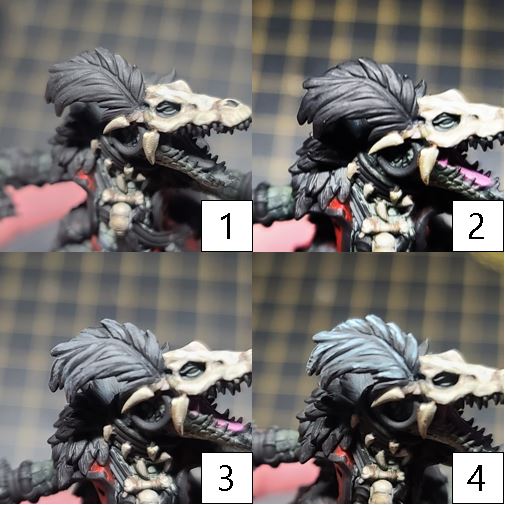
Step 1: With the skulls painted, I move on to the aviary selections of Moriarity. I’ll start with the black feather on top of Moriarity and lay down a basecoat of Thamar Black.
Step 2: Just as with the black cloth, I’ll start working up the highlights using Asheth Grey.
Step 3: I make a second highlight out of Ironhull Grey, making sure to leave areas of the previous steps showing through.
Step 4: Finally, to top off the poultry selection, I use Ironhull Grey and a drop of Morrow White Base to add some final bright highlights to the tips of the feather.
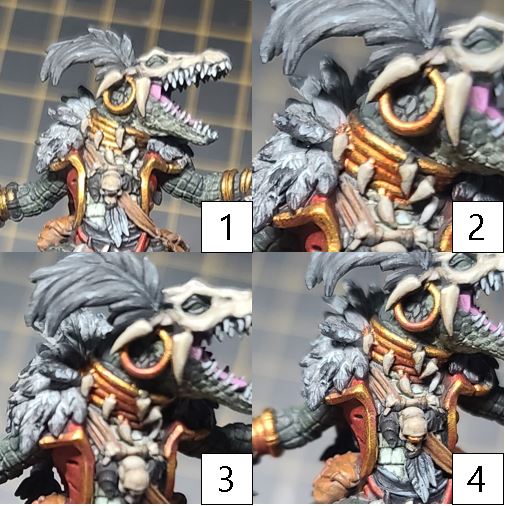
Light Feathers

Step 1: Now we’re on to the bright feathers. Start off with a solid basecoat of Frostbite mixed with Trollblood Highlight.
Step 2: Next, add a highlight of Ironhull Grey apply this to two-thirds of the later portion of the feather.
Step 3: For the very tip of the feather, use a highlight of Asheth Grey.
Step 4: To join all of the areas together, create a blackwash by thinning out Thamar Black with a bunch of water and applying it to the area.
Step 5: Finally, add in some highlights for each of the sections—for the brightest areas, apply Menoth White Highlight, for the midtones apply Ironhull Grey, and for the darkest areas, apply a lined highlight of Bastion Grey.
Leathers
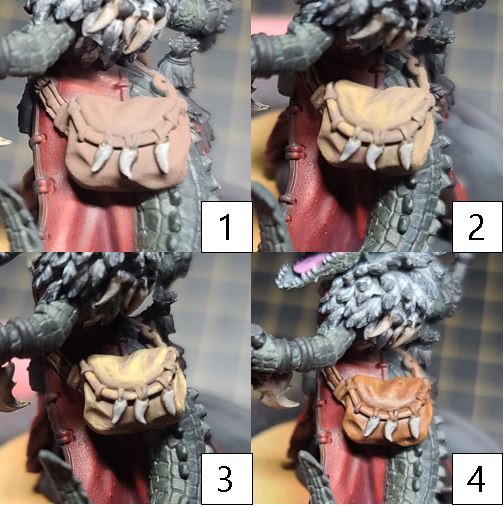
Step 1: Next up, I tackle the leathers. I start off with a solid basecoat of Bootstrap Leather.
Step 2: For my first layer of highlights on the leather, I mix Bootstrap Leather and Moldy Ochre together and apply all over the area. I know it looks way too yellow but fear not: trust the process.
Step 3: Brighten up the highlights even more with a blend of Menoth White Base and Moldy Ochre.
Step 4: To blend it all together and bring it down to a rich leather tone, I thin out Brown Ink with water and apply two or three layers of glaze evenly across the area. I make sure that the glaze doesn’t pool up in the recess, as this is more about shifting the colors rather than adding depth.
Golds
Step 1: Time to work on the gold areas. Start off with a solid basecoat of Rhulic Gold.
Step 2: Apply your first shade to the gold using a mixture of Rhulic Gold, Brown Ink, and Yellow Ink.
Step 3: Continue to deepen the shadows with a second shade consisting of Umbral Umber, Sanguine Base, and Brown Ink.
Step 4: To brighten up the look of this area, apply a highlight of Solid Gold to any raised surface.
Step 5: Finally, after the model is sealed, return to the area and reclaim some of the brightness with a glinting highlight of Solid Gold and Cold Steel mixed together.
Voodoo Dolls
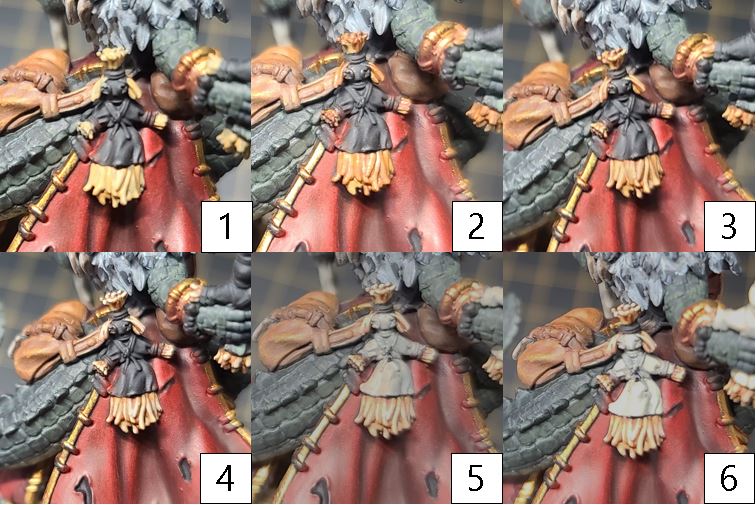
Step 1: Time to get that voodoo that she do. I start off with a basecoat of Rucksack Tan on the straw of the voodoo dolls.
Step 2: I apply a wash of thinned-out Brown Ink with water over the area to create some depth and a natural shade.
Step 3: Next, I reclaim some of the base color by applying a layer of Rucksack Tan. I make sure to leave the base color showing through from the previous steps.
Step 4: Next, I highlight the straw with a final highlight layer of Menoth White Base.
Step 5: For the cloth around the dolls, I use a basecoat of Hammerfall Khaki.
Step 6: Last but not least, I add a final highlight to the cloth using Menoth White Base.
And with that Madam Moriarty is ready to sling some spells and help my warlock dominate the battlefield!
I’ll be working on a few non-painting related projects as the year closes out, so I may not have an opportunity to put the brush to model and share the steps here like I normally do before the start of 2024. So, I want to say Happy Holidays to all of you from me and from everyone here at Privateer Press. We hope everyone has time to enjoy family, friends, and all your hobbies this season!
The post Madam Moriarty Insider appeared first on Privateer Press.