

Insider 8-26-2015
The first miniatures I ever painted were for a board game called HeroQuest (it was all the rage for 12 year olds back in the day). I remember thinking how cool the game was—but that it would be even cooler if the models were painted.
I knew nothing about the need to clean or prime models back then, and I was unaware of the difference between enamel or acrylic paints. But I did know cool, and cool was a painted barbarian. That was my first real introduction to the world of miniature wargaming and board gaming, and my desire to enhance the experience has continued to evolve and be refined as I have grown.
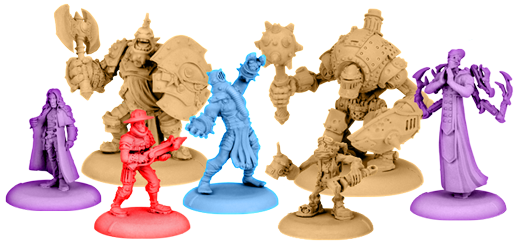
One of the most common questions I was asked while demoing The Undercity at Gen Con this year was whether the miniatures could be painted, and I was happy to share my experiences with painting the various board game miniatures from LEVEL 7 [OMEGA PROTOCOL] and the Unleashed Adventure Kit. Now that I have my copy of The Undercity in hand, I thought I should chronicle my hobbying experience with the game over a series of three Insiders. This first article will be about the process I use to stiffen and clean the board game miniatures in The Undercity. Article two will focus on painting the different villain miniatures while still enabling players to tell who’s blue and who’s red, and the final Insider will showcase hero gender-swap conversions.
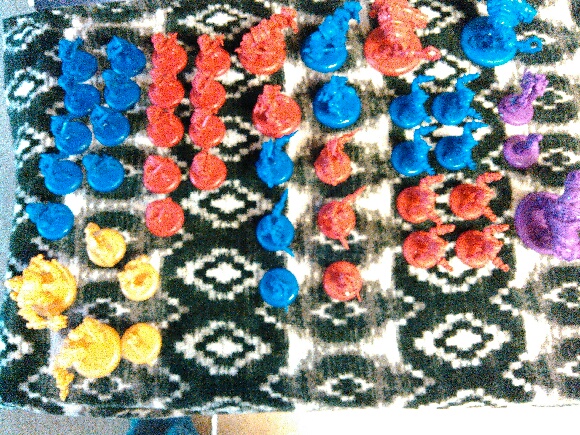
Board games are meant to be self-contained, and once the game is over, everything will typically be tossed back in the box for storage. As such, manufacturers tend to either go with very flat, hard plastic playing pieces (for example, the classic board game Sorry) or for soft plastic such as those used in The Undercity if they want more detailed pieces. It’s important to think about what you want from your product—I wouldn’t paint my board game pieces if I were going to just toss them in the box at the end of the night. I store all of my miniatures in foam cases for protection, which means I can stiffen the board game material without having to worry about the increased brittleness.
The most effective method I have found for stiffening board game plastics is to shock-harden them, and that’s what I am going to focus on in this Insider.
Products needed:
- Cooking pot filled with water
- Tongs
- Bowl of ice water
- Towel
Step 1: Bring the pot of water to a boil.
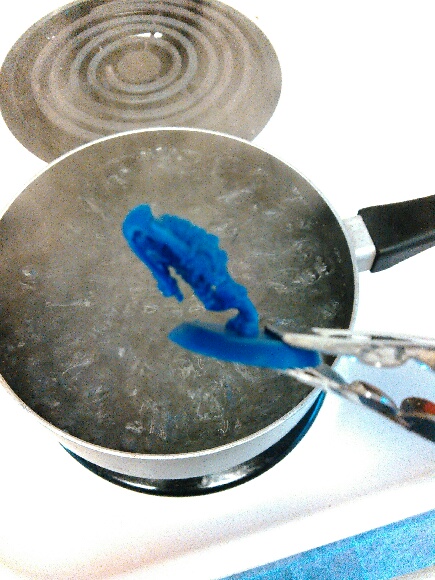
Step 2: Using tongs, place your board game mini in the boiling water. I chose a bent mini to showcase the restorative powers of a good bath. You are going to want to completely submerge the mini for about 30 seconds.
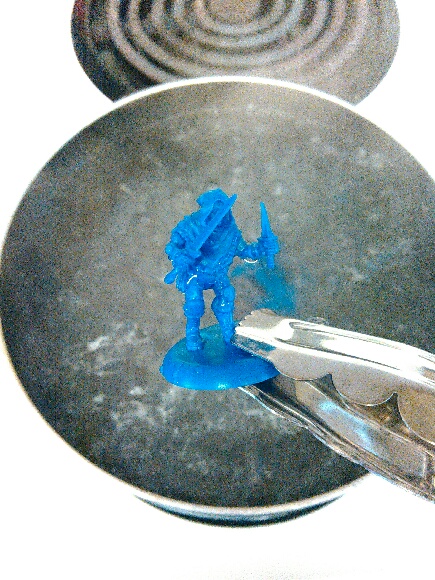
Step 3: After the mini has boiled for a bit, use your tongs to pull it out. At this stage the plastic is very soft, but it will form back to its original shape. Place it in a bowl of ice water.
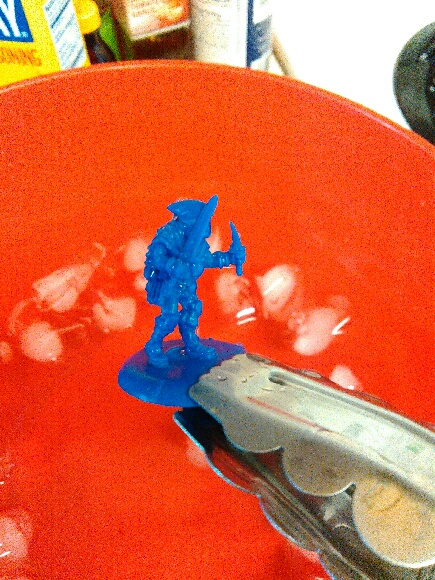
Step 4: Leave the mini in the ice bath for another 30 seconds. Once it’s had a chance to harden, pull it out with your tongs and set it aside to dry. You will want to do this with any of the game’s contents you’re planning to paint. For me, that’s the whole set.
That’s it! The boiling method cleans off any residual release agent the miniatures might have had on them and stiffens the plastic so you can get good adhesion with your primer. But we’ll address that in the next Insider…