
Insider 5-2-2014

Creating pins was no easy task. Since each pin is only a few inches in diameter, my objective was to capture the essence of each character, warbeast, or warjack in a simplified format that still conveys the original design aesthetics. In a few cases, this wasn’t as much of a concern—some characters, like Pistol Wraith Caine, were created especially for the pin program.
For this Insider, I’ll go over the design process for one of my favorite pins, the Feral Warpwolf!
First, I review the existing concept art, illustrations, and the actual model, taking note of important design elements and of the general character of the warpwolf. Circle Orboros armor is notoriously complex and intricate, so I had to figure out a way to carry through that classic Circle aesthetic without making my line art too busy.
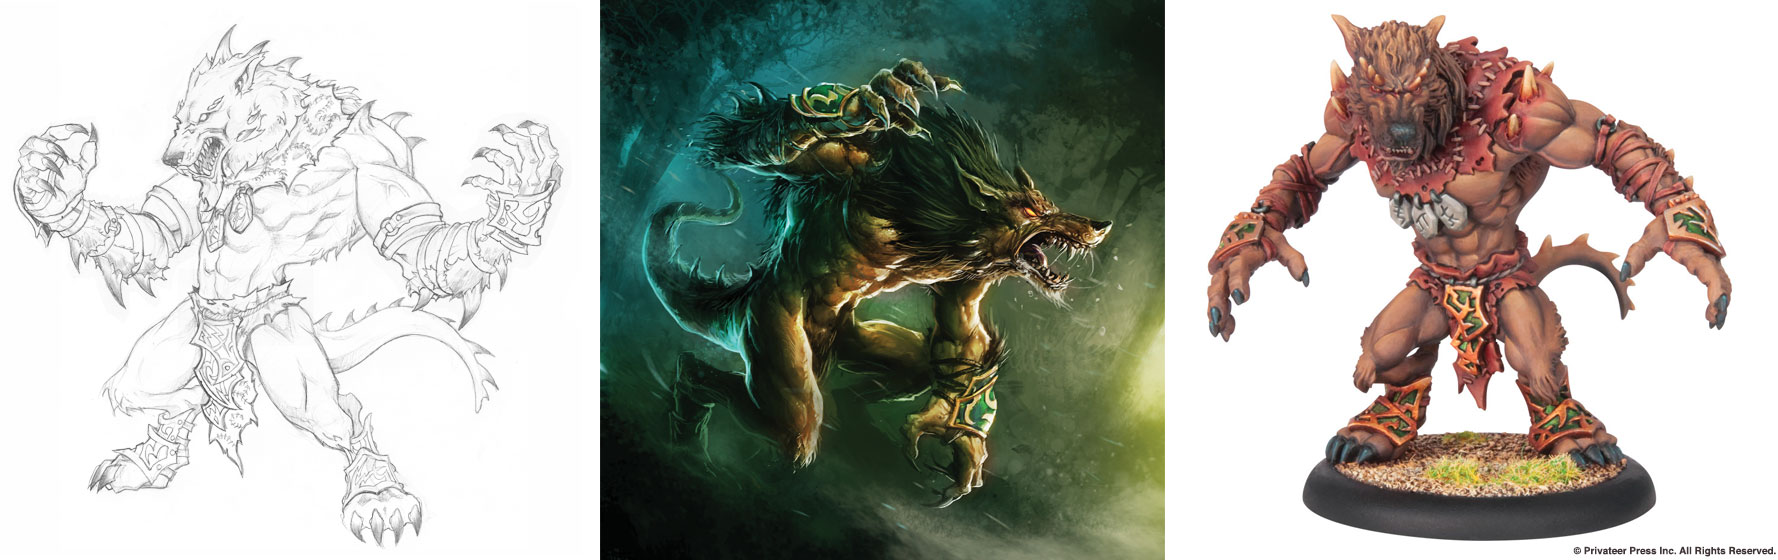
Next, I create a rough sketch of how I envisioned the pin would appear. You’ll notice the important details of the Feral Warpwolf, such as his overall shape, pose, proportions, outfit, and anatomy have been translated into a simpler, yet immediately recognizable, format. Extraneous details, like individual stitches, hair follicles, and wrinkles have been eschewed in favor of these core elements.
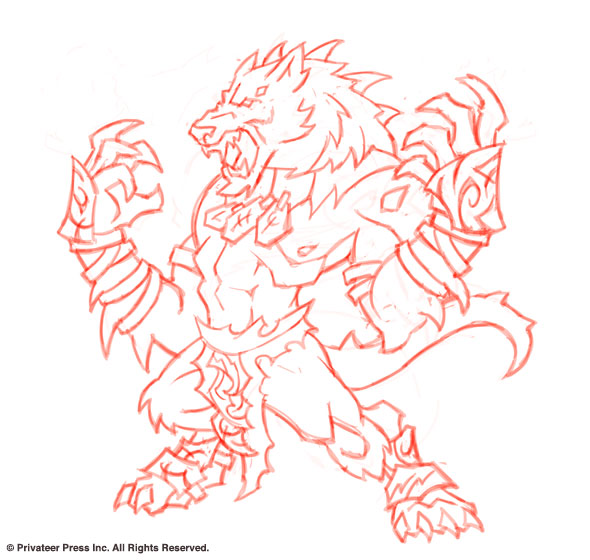
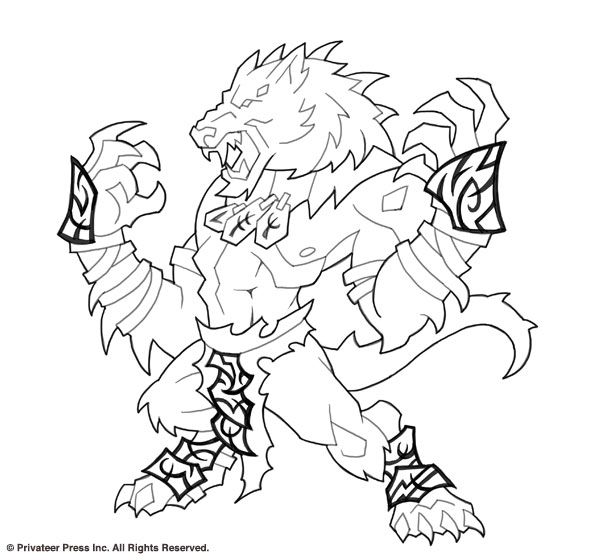
Once my peers on the creative team review the sketch, I clean it up with hard lines. This process is very similar to the way comic book art is created by pencilers and inkers. These hard lines then provide a guideline for Laine, one of our graphic designers, to work from.
I’m going to tag in Laine here to talk about choosing colors and about her work on the pins.
Once Nick is done with the sketch and hard lines, it’s my job to come in and turn the illustration into a pin.
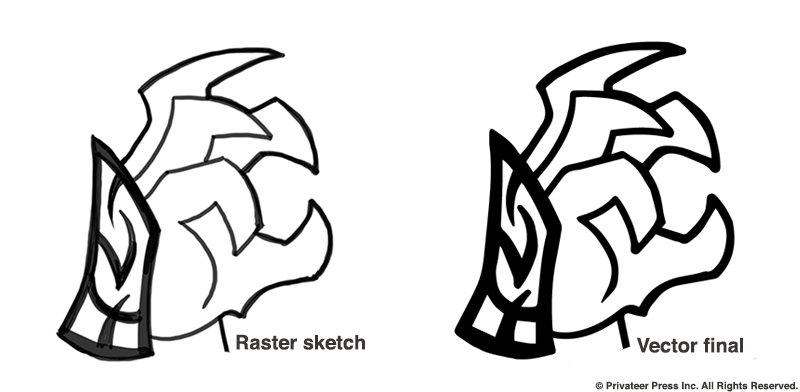
The first step is to turn the raster image Nick made into a vector image. Raster images are made from pixels: individual square dots of color that combine to form an image. Most computer-generated images are created this way, but for our pins we need something more precise. Vector images are made of mathematical expressions like curves, points, and lines. This may sound confusing, but thankfully we have computer programs to handle the mathematical side so I can just focus on making everything look good.
Now that the image has been vectorized, I can move on to color. Those black outlines will be made of raised metal while the white spaces in between will be recessed and filled with enamel colors. These color pools cannot mix or we’ll have a muddied mess on our hands, so the outlines must serve as barriers between the colors.
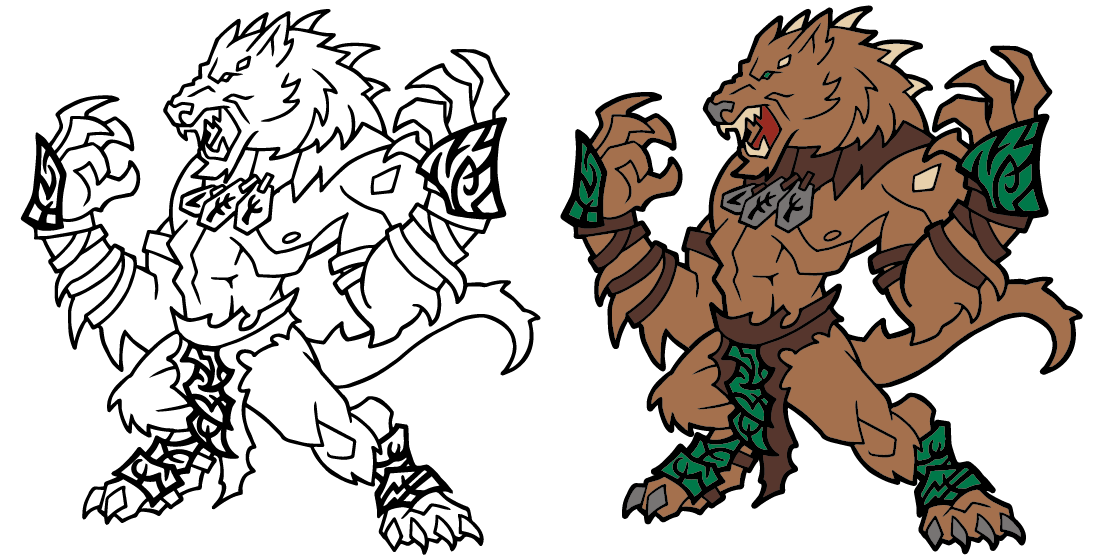
Picking the colors can be tricky. You can’t do gradients of colors with enamels like you can with an illustration or miniature. This warpwolf as a miniature would have an array of browns in its fur coat, but for the pin we have to choose just one shade that best encompasses them all. That brown also has to match the rest of Circle so they will look cohesive as a faction.
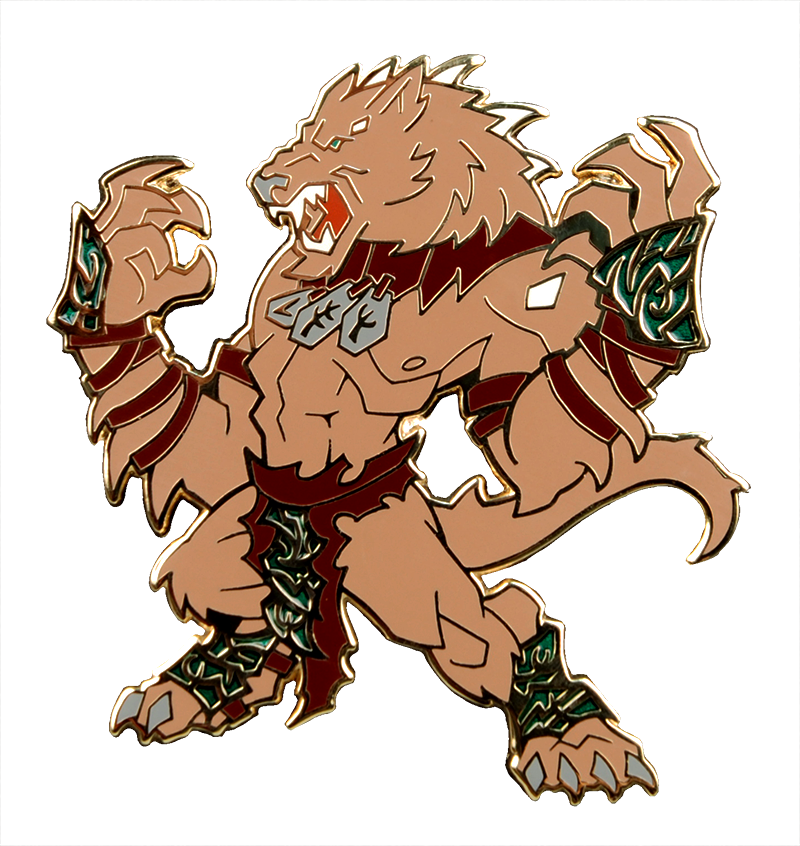
Once the design is approved, it’s sent off to be made into one sweet-looking Feral Warpwolf pin!
I hope you’ve enjoyed this peek into the pin-creation process and that you’re just as excited as we are to see Privateer Pins available at Lock & Load GameFest 2014! Get ready for tons of new pin designs to be revealed in the near future—there are some big surprises just around the corner.
![]()