
Insider 10-27-2014

Well, it‘s about time!
Time for part two of my Cephalyx army “Insider Blog: Conversions.” If you missed the introductory article and army photos, you can take a look at them here.
Converting an army is a lengthy but rewarding process. In all honesty, every army I’ve ever collected has been converted to some extent. When collecting Cephalyx, a sub-faction known for their nasty experiments, explorative surgeries, and augmentation, it was really a guarantee that a large quantity of conversion work was going to happen.
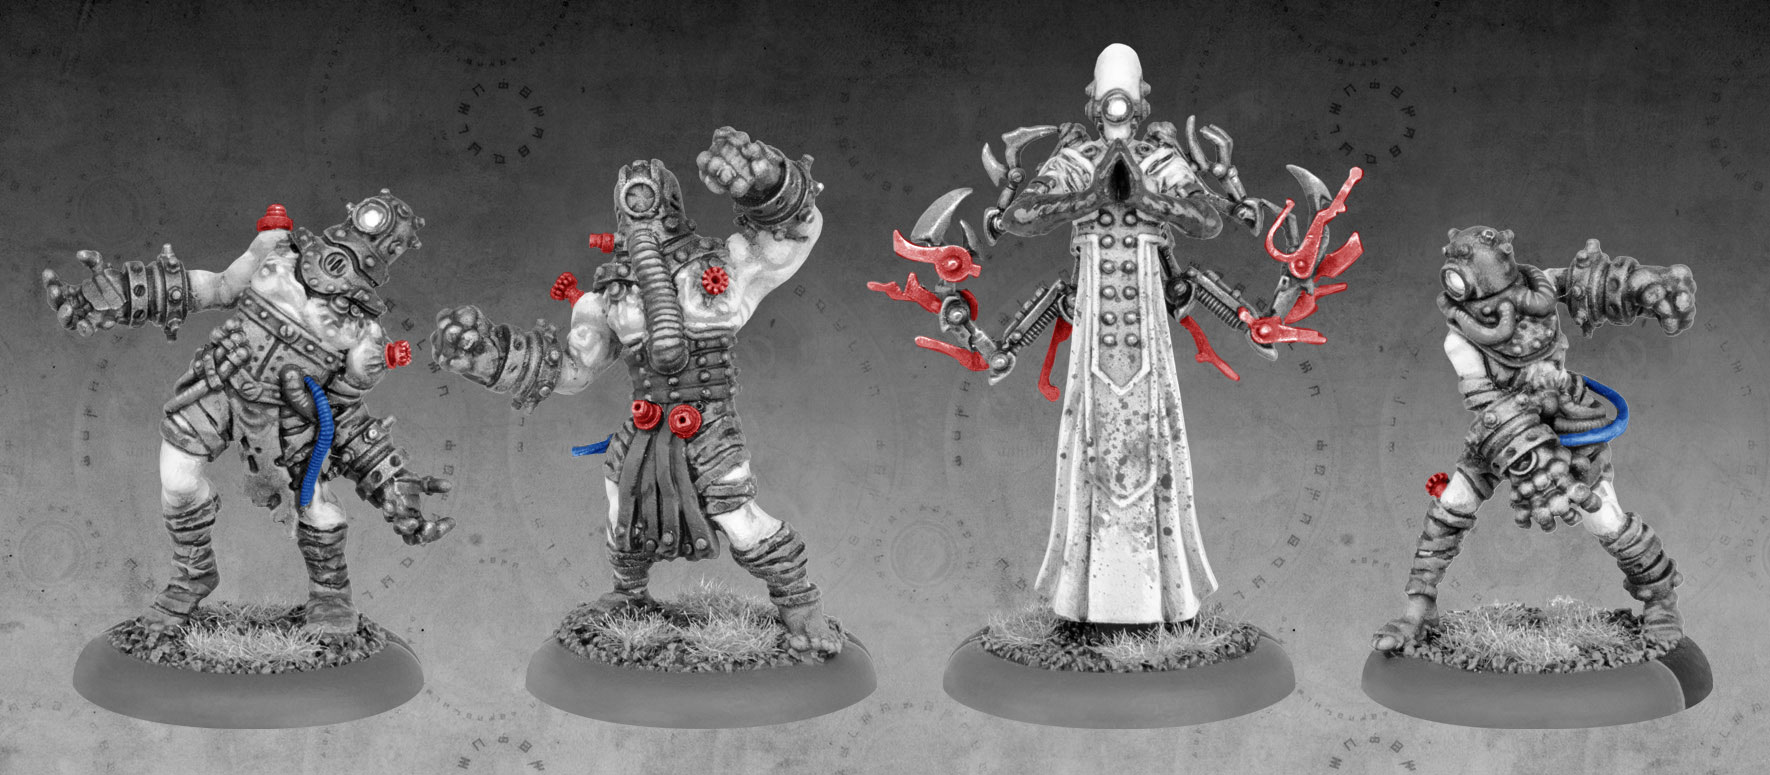
For my miniatures, I used primarily four different conversion media: wristwatch parts, model train nuts and bolts, Privateer Press modeling putty, guitar wire (also known as guitar string), and electrical wire from various places. I’ve color-coded my conversions to help identify what was modified and how it was done.
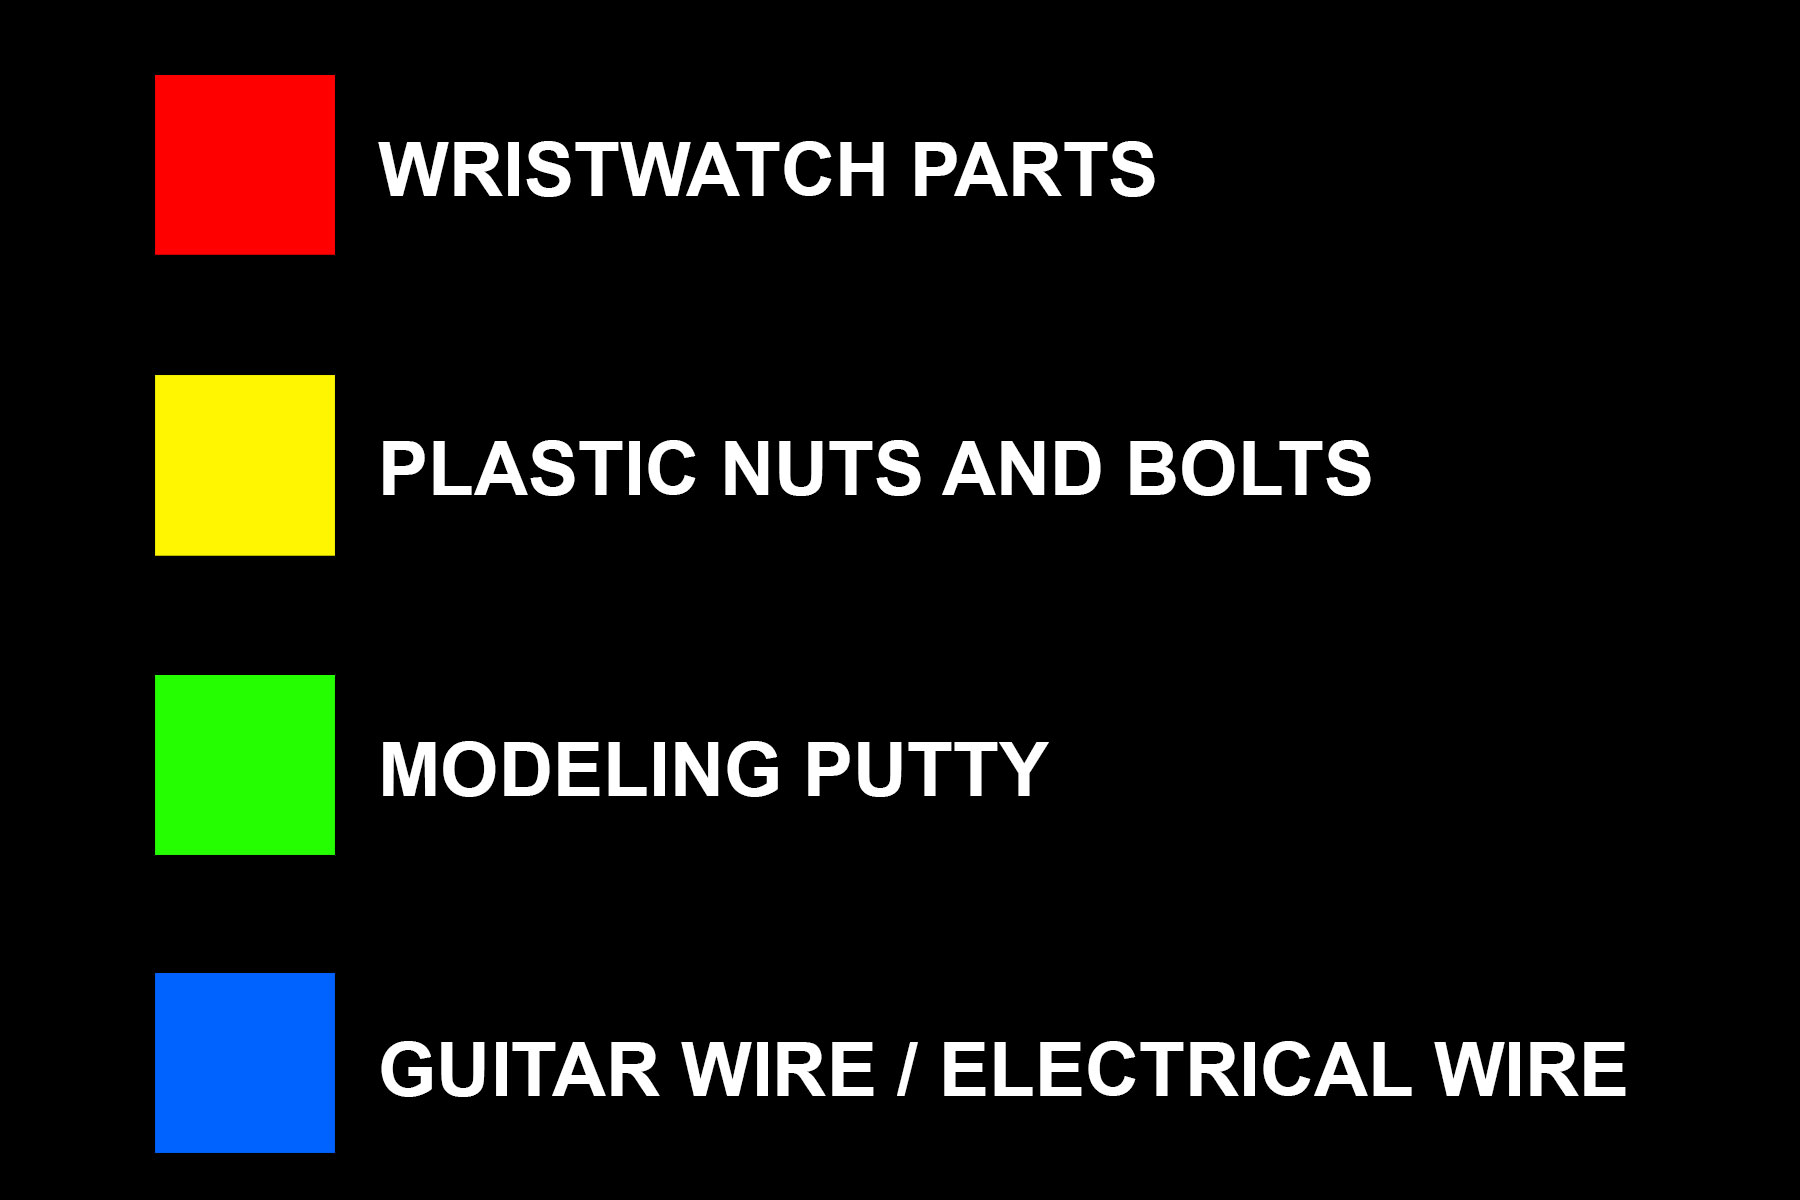
So, what exactly are wristwatch parts? Wristwatch parts are any of the various gears, levers, wheels, screws, or pinions found inside of a good, ol’-fashioned wristwatch. They are generally available online from jewelry and hobby retailers, though they can be found other places as well.
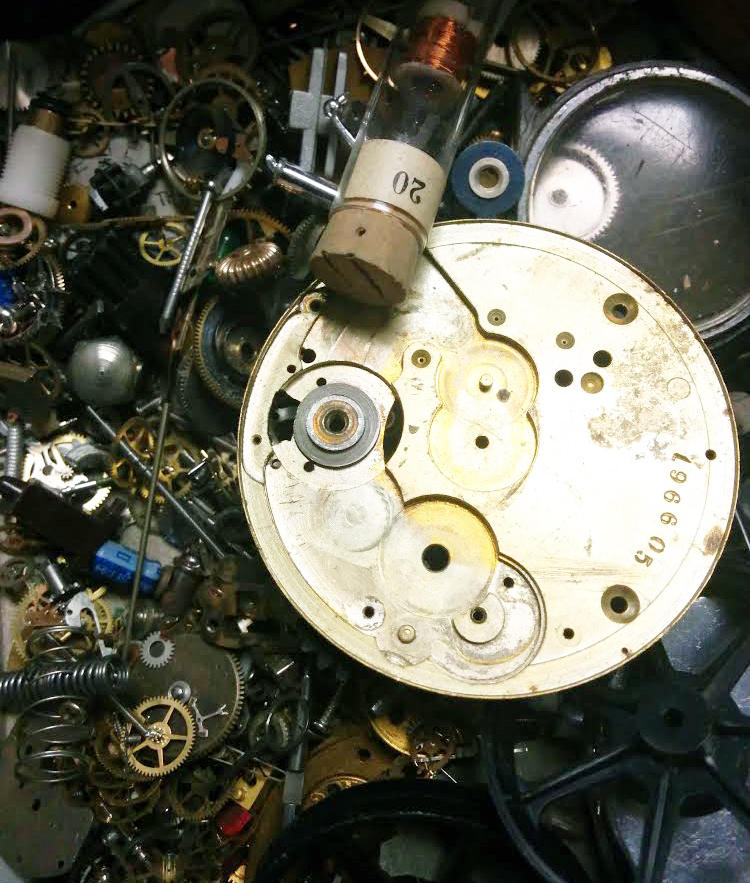
In addition to the wristwatch parts, my greebles bucket also contains various computer parts, old model kits, and weird things I find on the side of the road. This collection is literally one of my favorite resources when converting miniatures: these various bits of junk get my creative juices flowing and inspire intricate detail work that is normally impossible on mass-produced miniatures.
Here’s a breakdown of what was changed per unit:
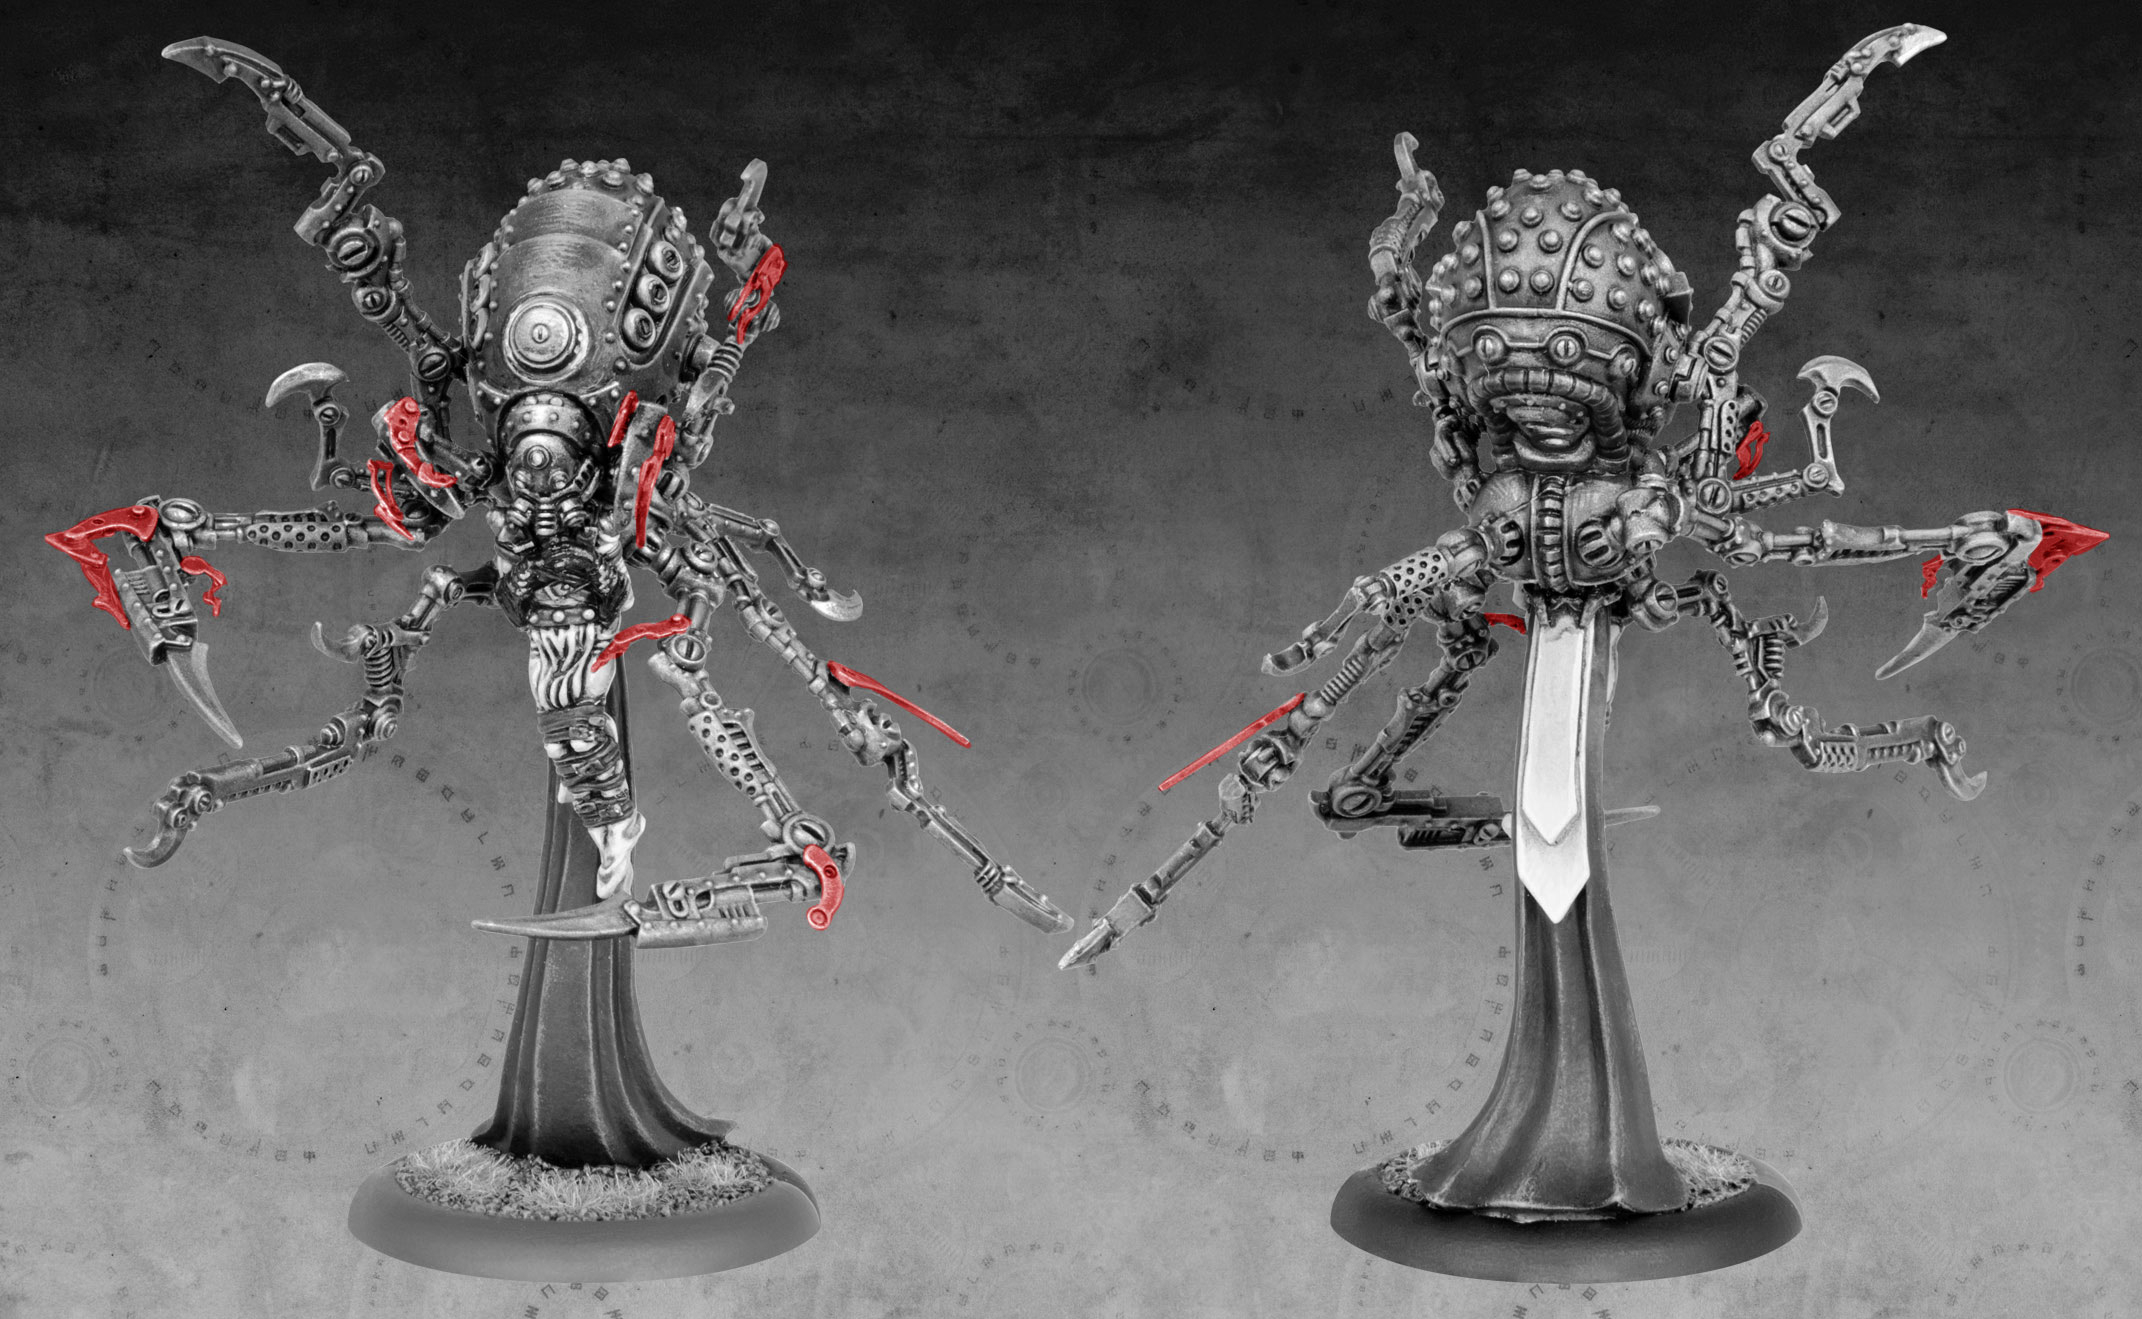
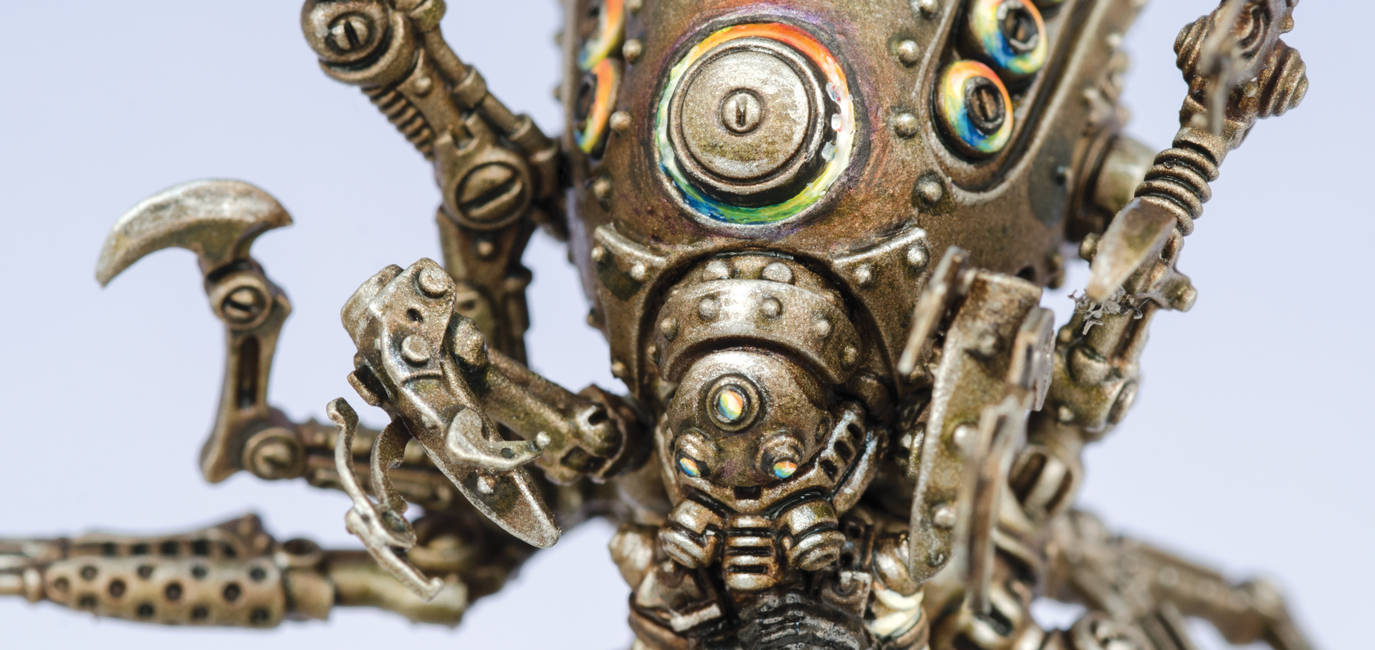
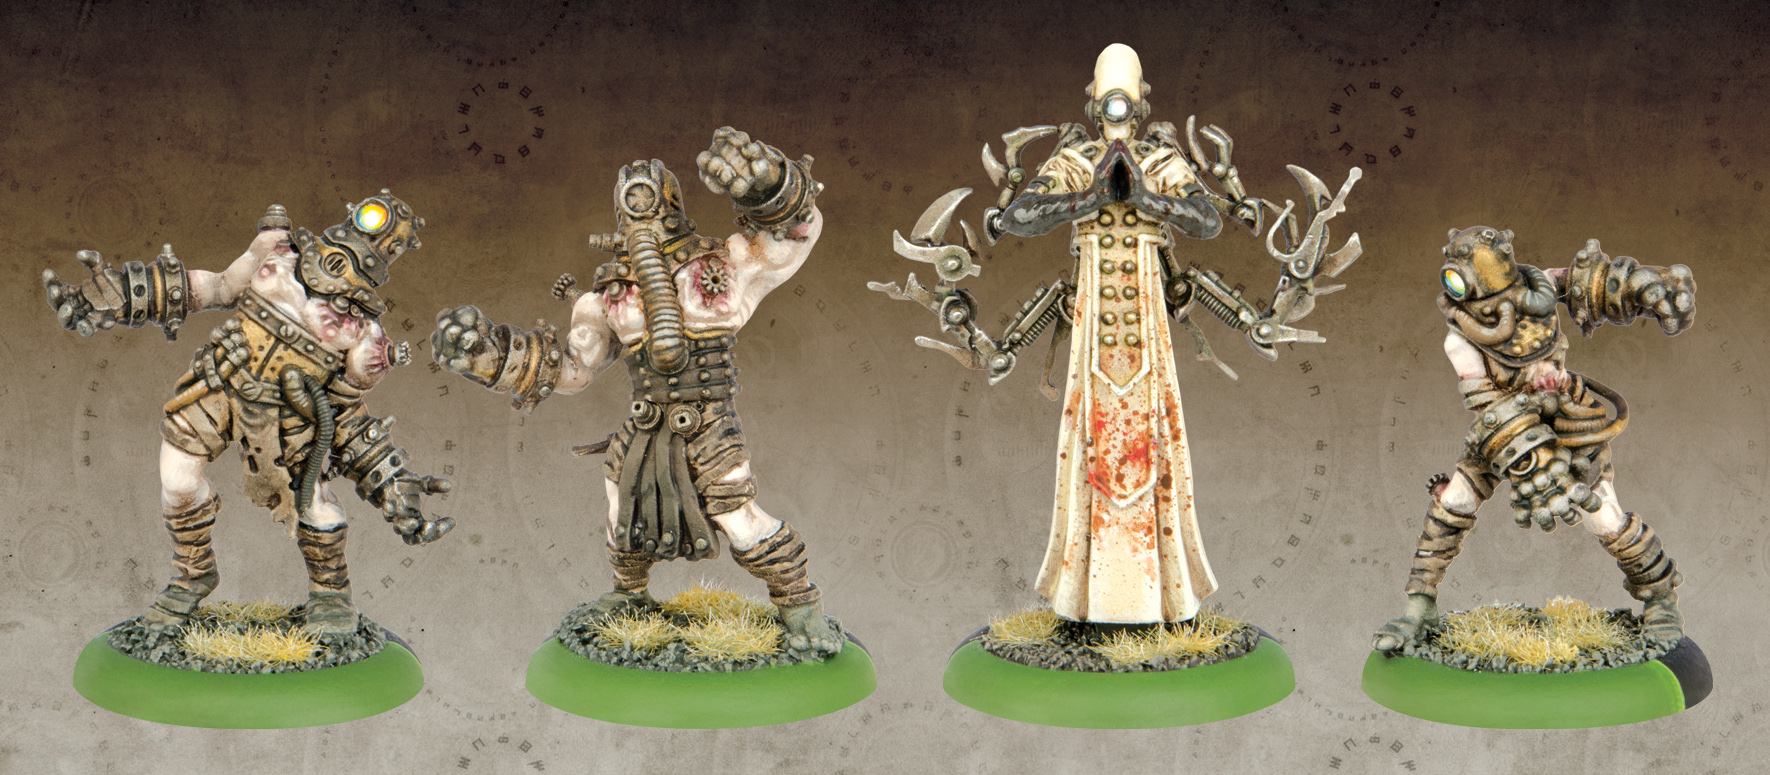
EXULON THEXUS
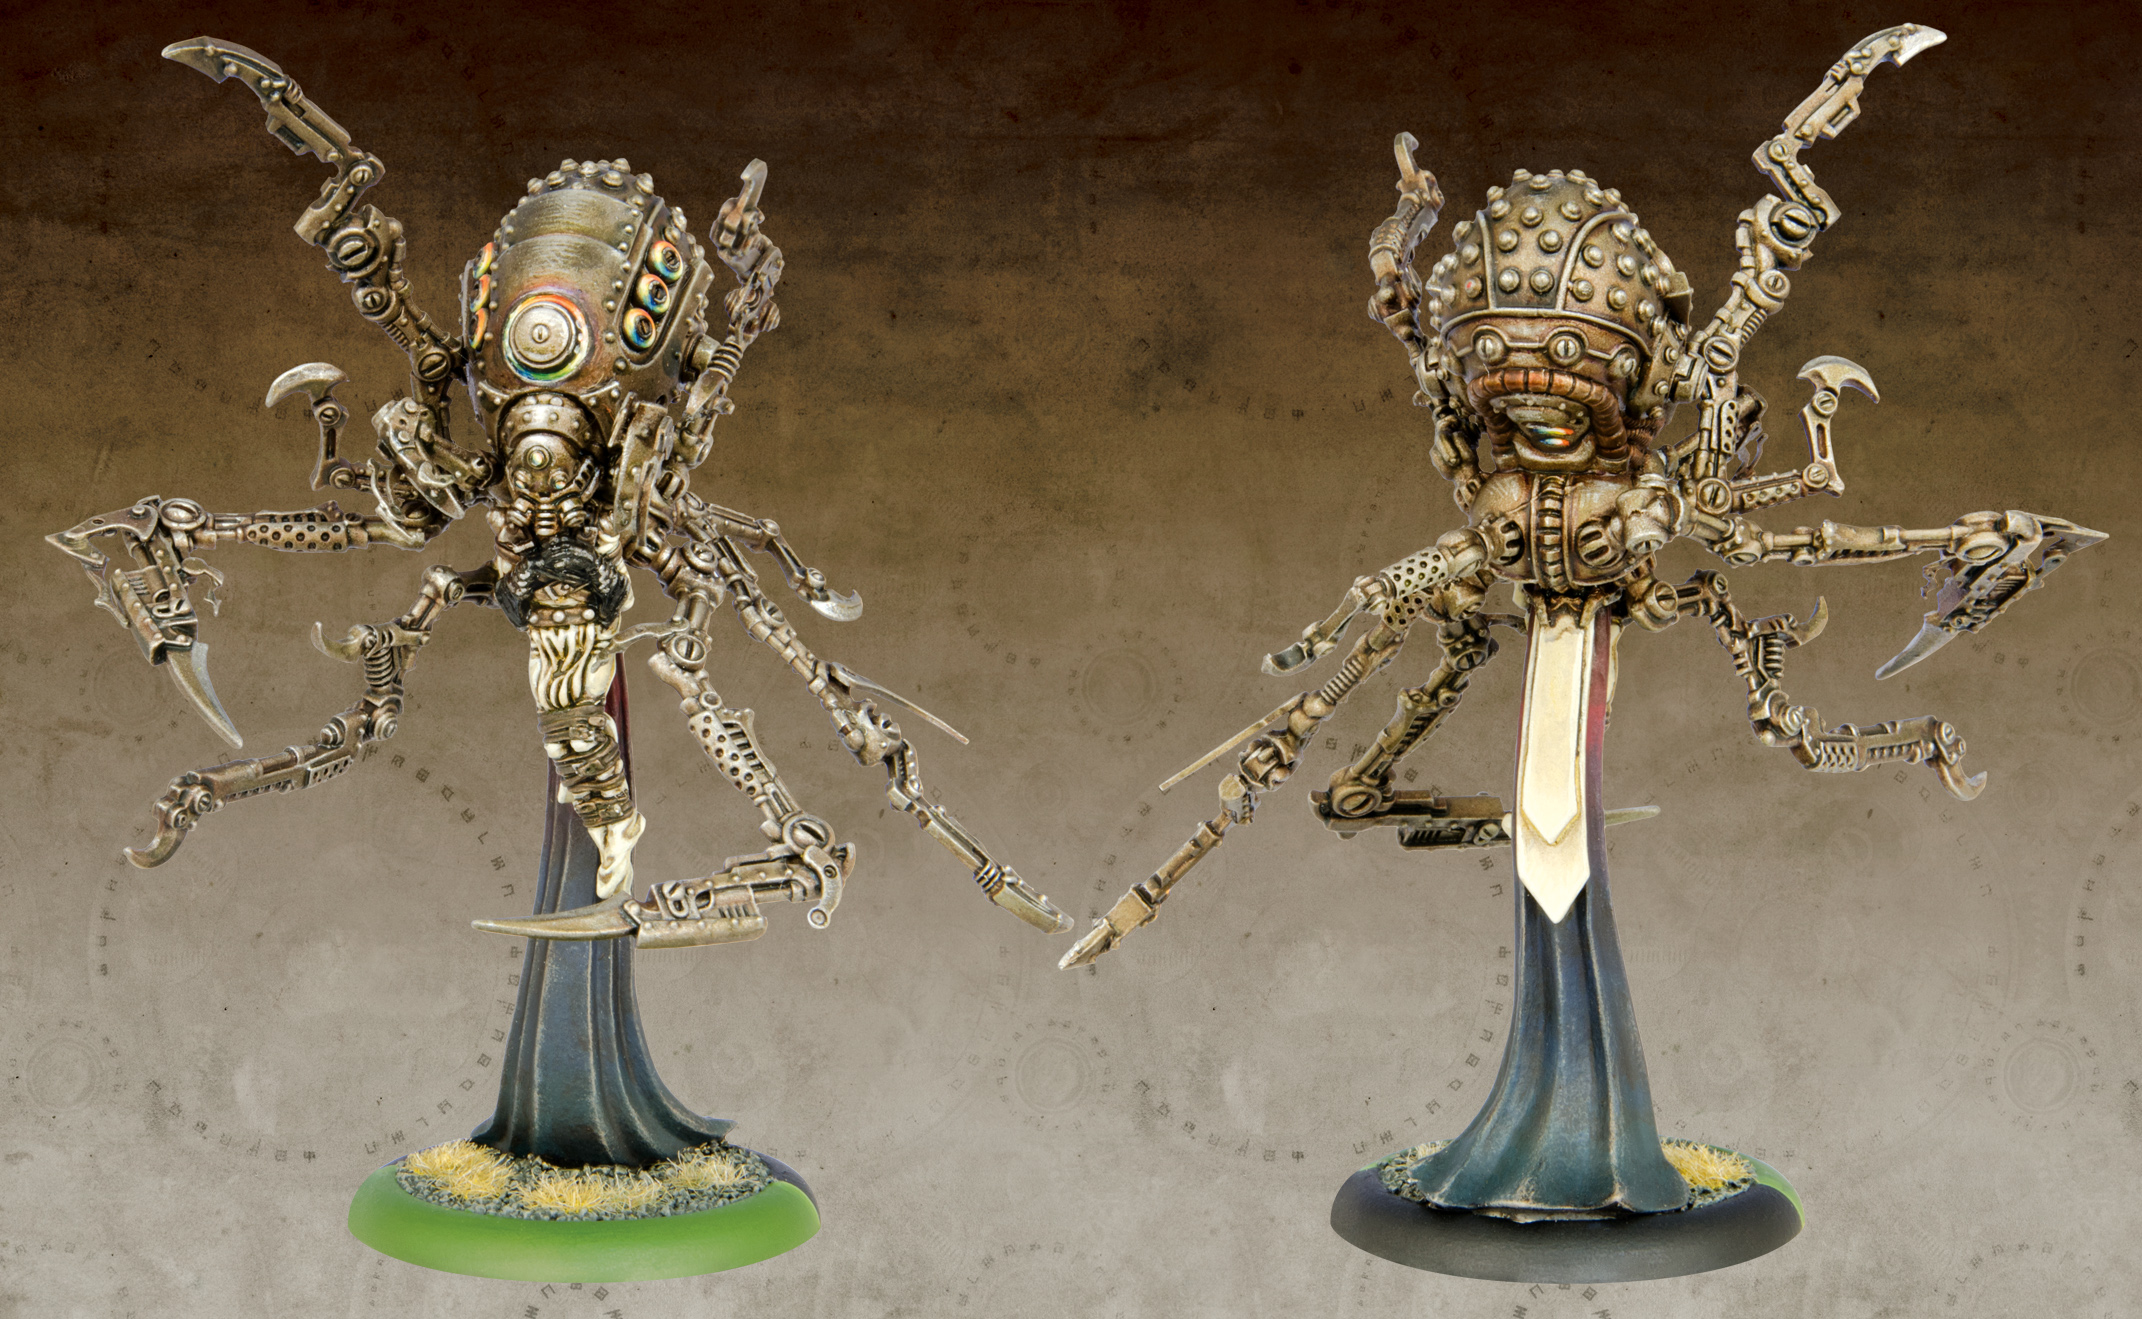
Aside from swapping the positions of the arms from the studio version and some creative posing, most of the work on Exulon was done with the subtle addition of wristwatch parts. I particularly wanted more detail added to the spider-like grabbers around his head…talk about creepy.
SUBDUER
To help add extra dynamism and movement to the Subduer, I thought it might be neat to throw some extra pipes onto his head arrangement, sort of like mechanical dreadlocks. Because guitar cord and electrical wire have metal cores, they were ideal materials for posing the dreadlocks as if in full motion.
The extra gears and plugs were created using wristwatch parts, per usual.
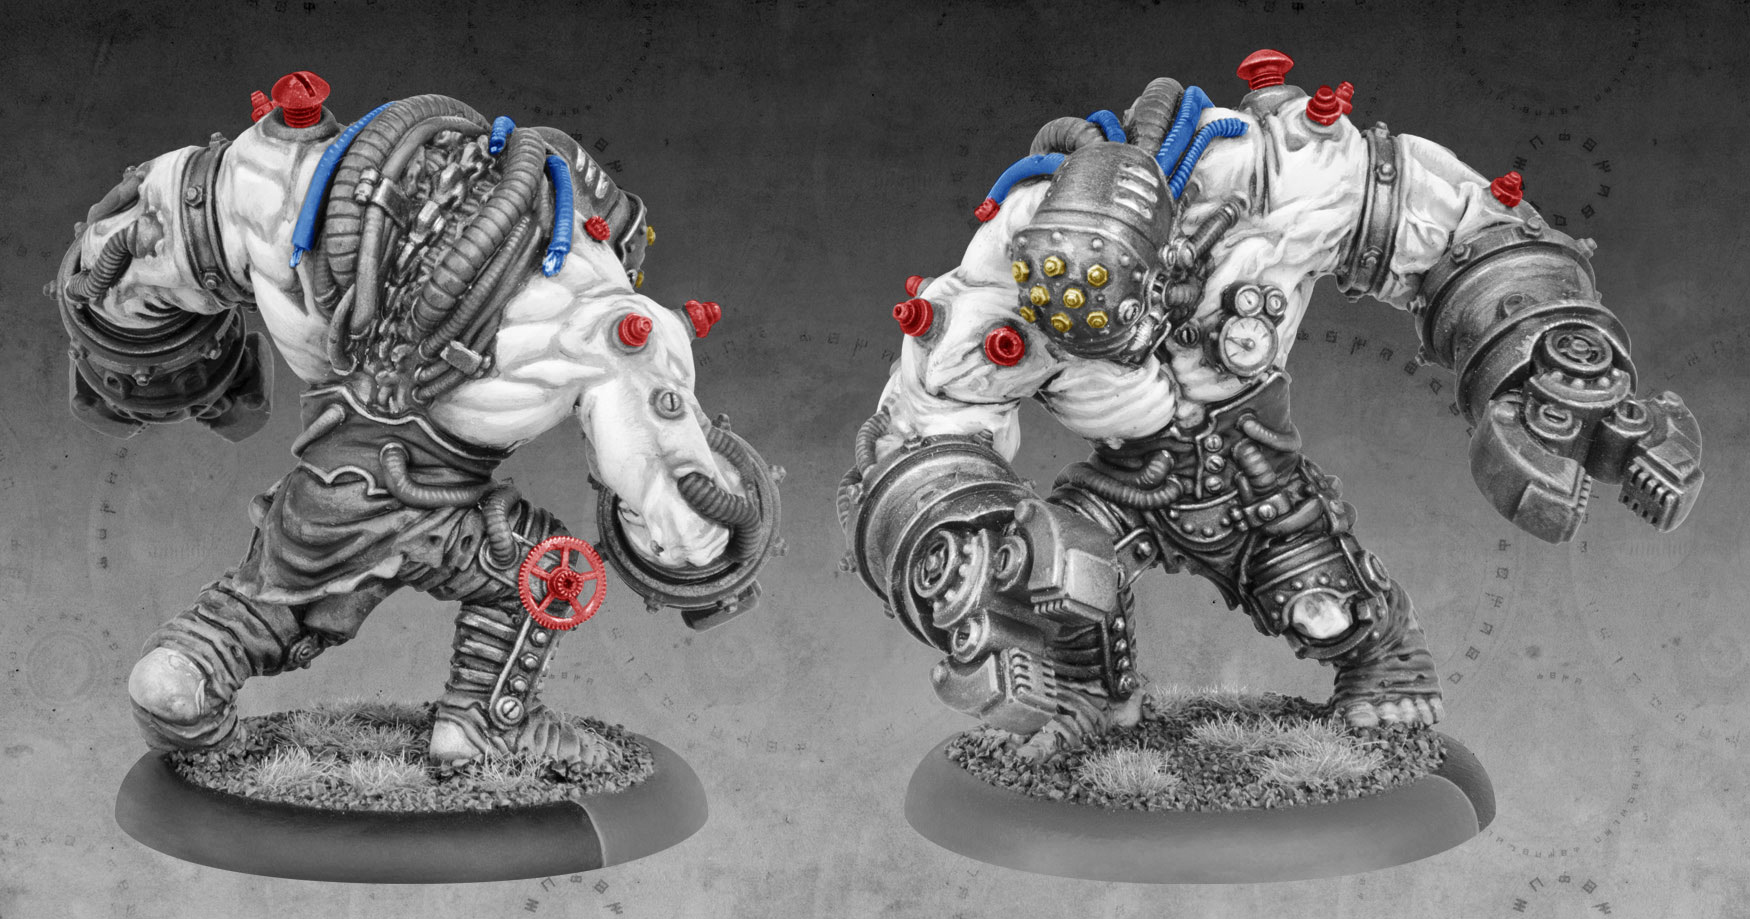
WARDEN
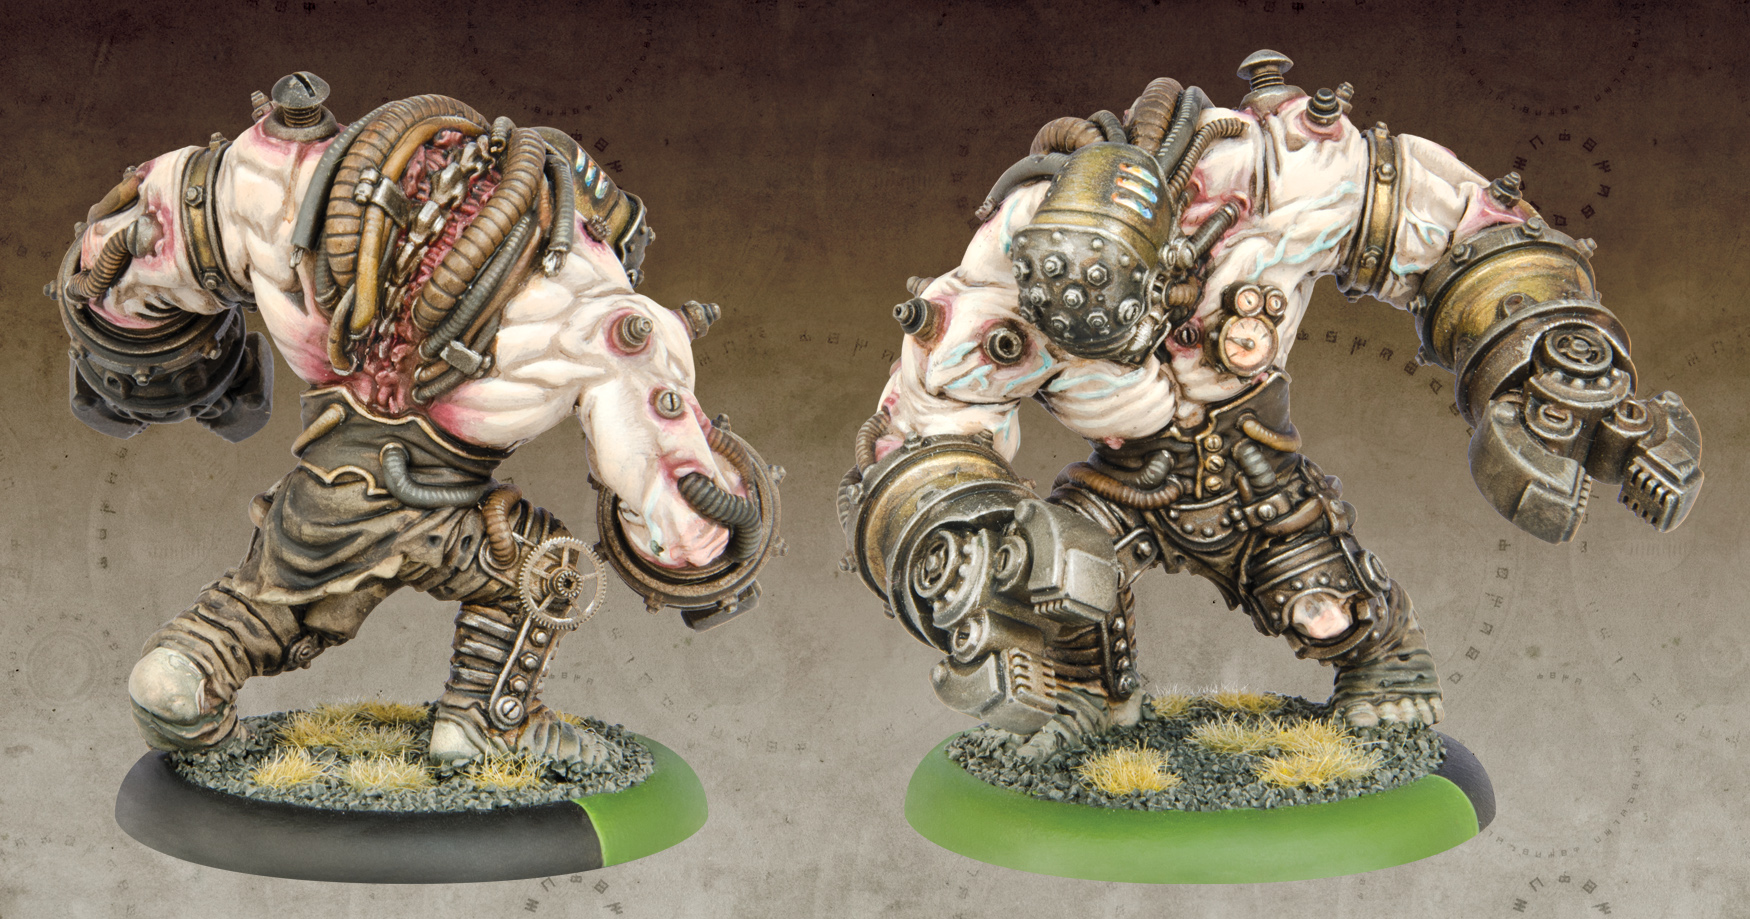
When I look at a miniature and read the story behind it, I can’t help but create a little movie in my head. In the case of the Warden, I imagine the monstrosity grabbing an enemy with his massive mitts and then viciously head-butting them into a messy pulp.
To further this horrific scenario, I decided to add a little “texture” to his head plate, using multiple model-train rivets.
Of course, I couldn’t help but add a few extra wristwatch parts and wires to add some flair.
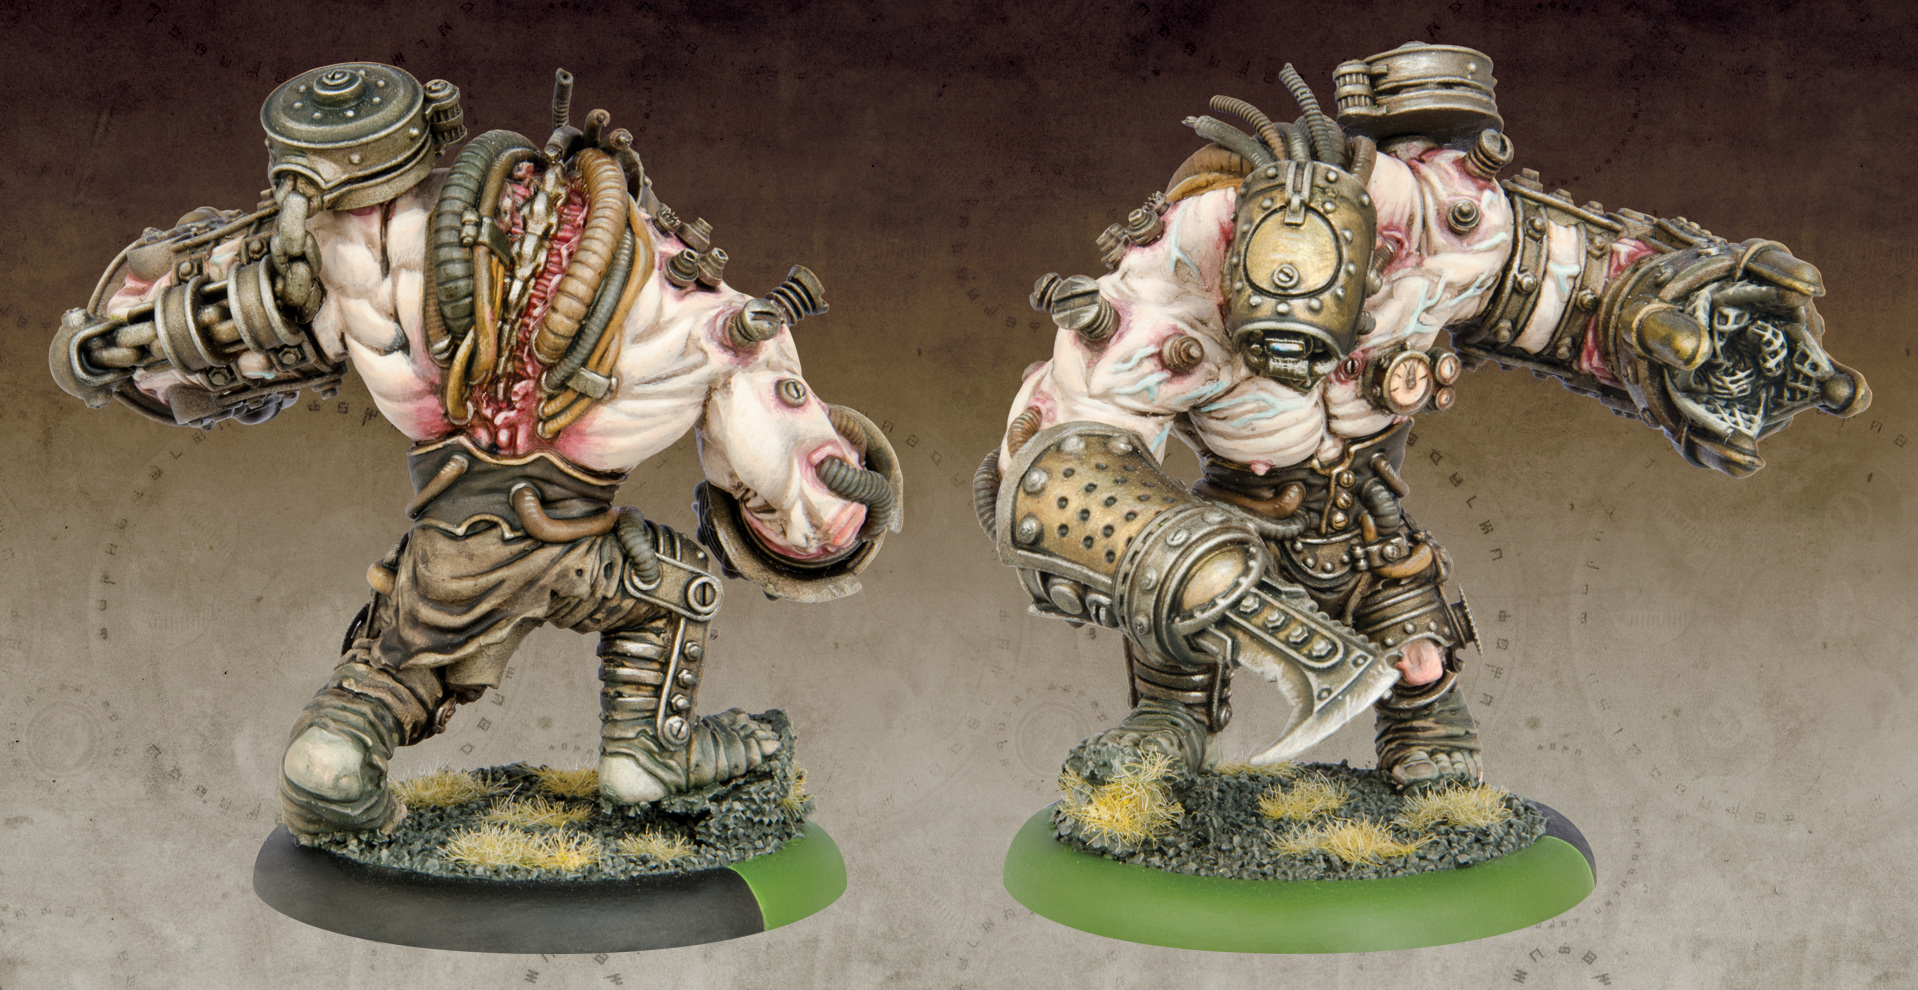
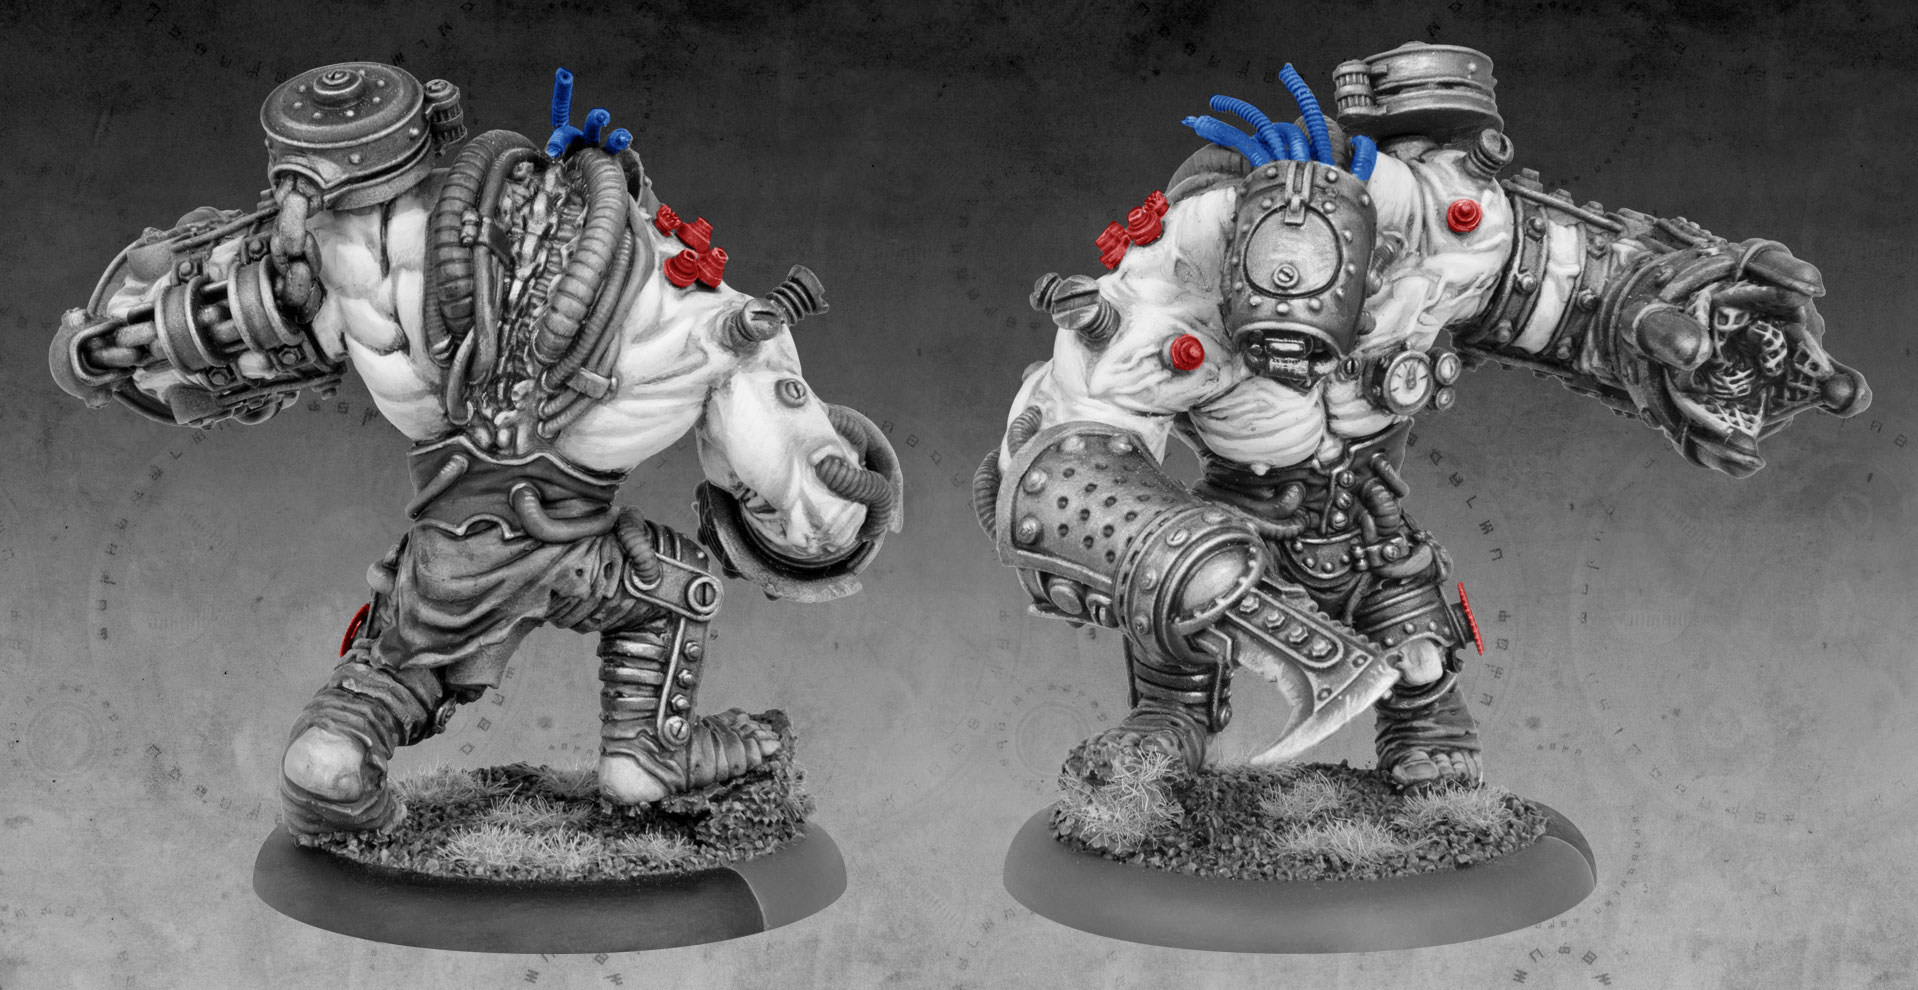
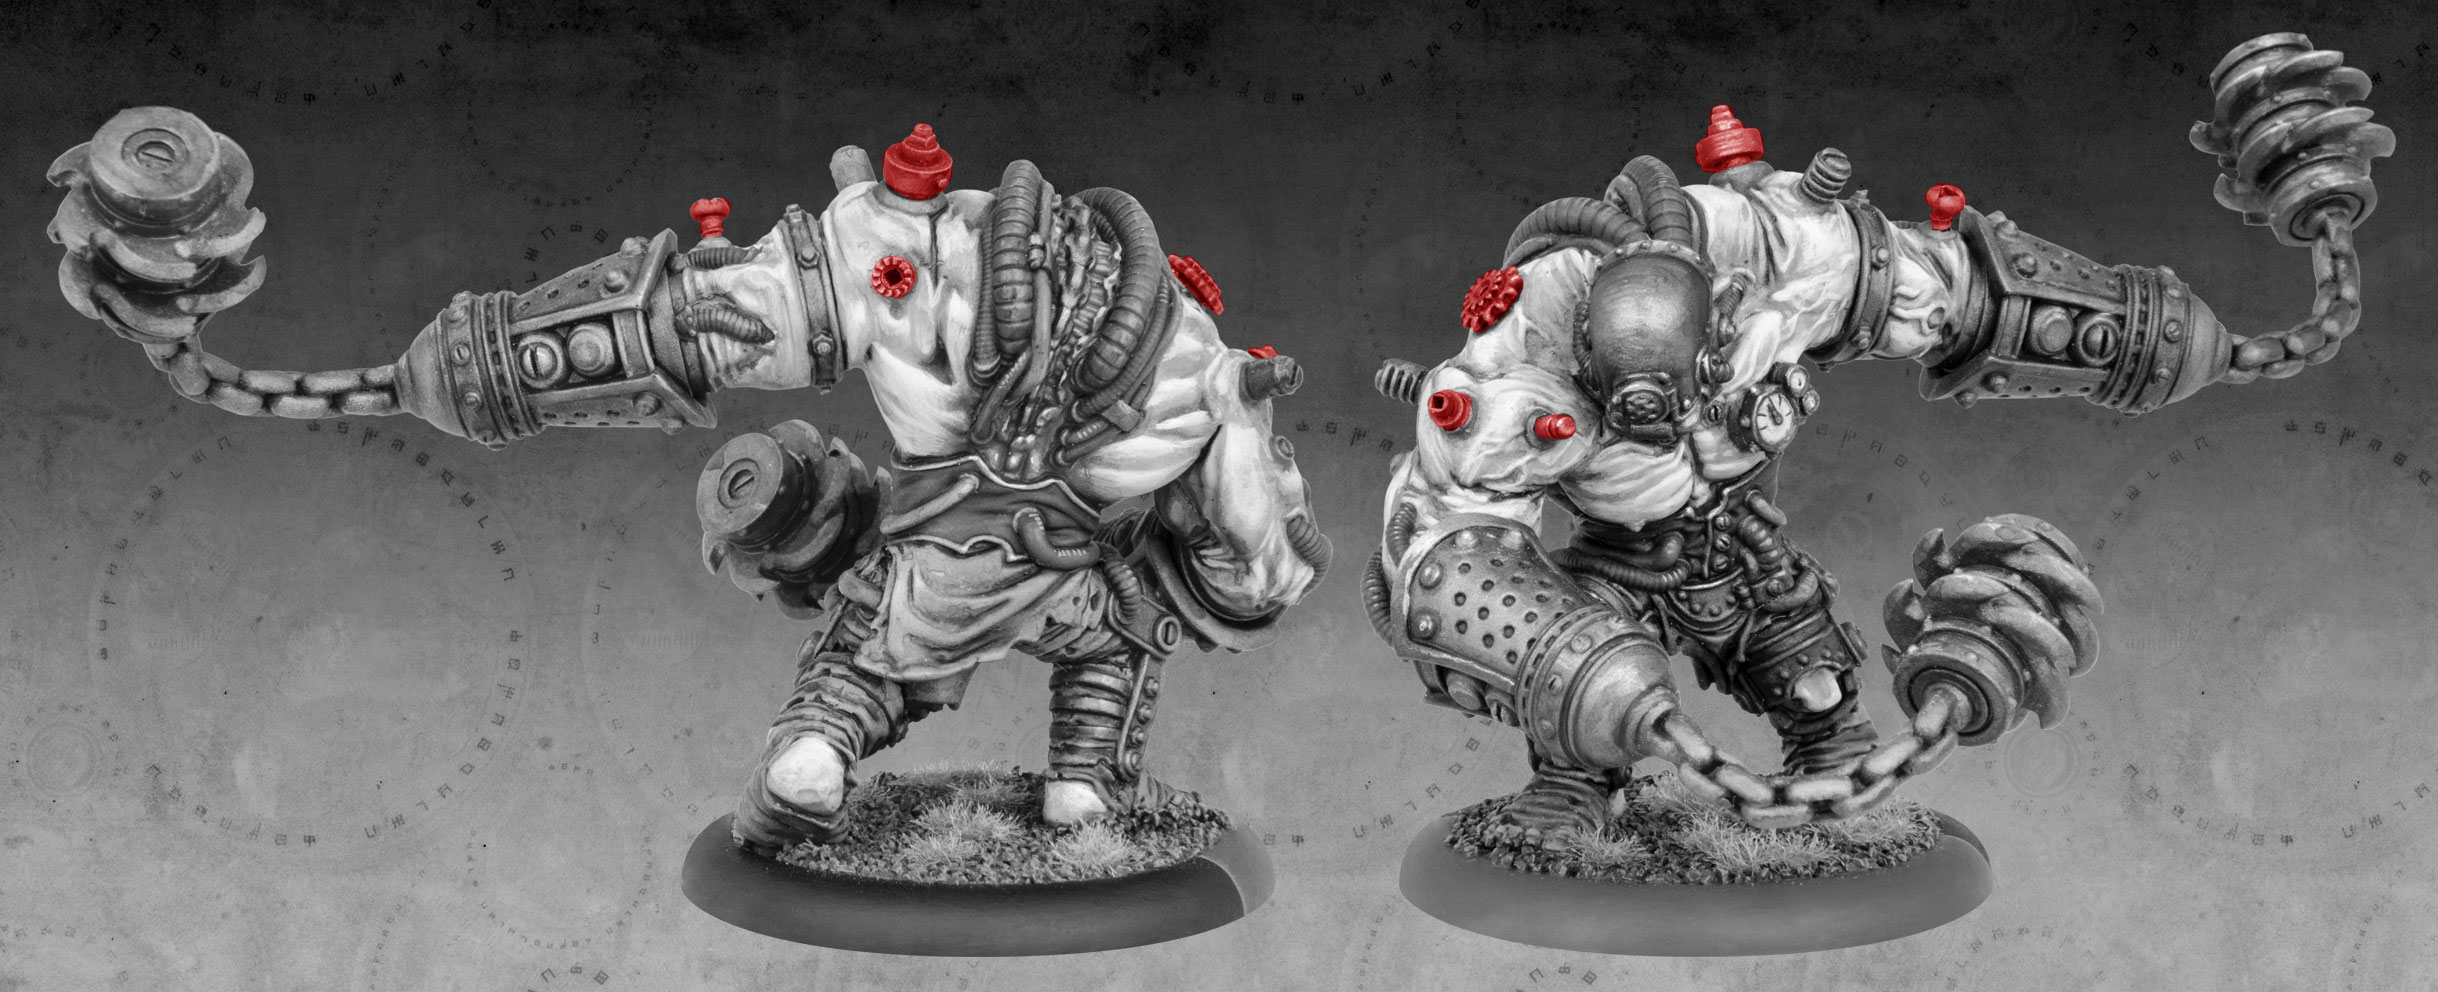
WRECKERS
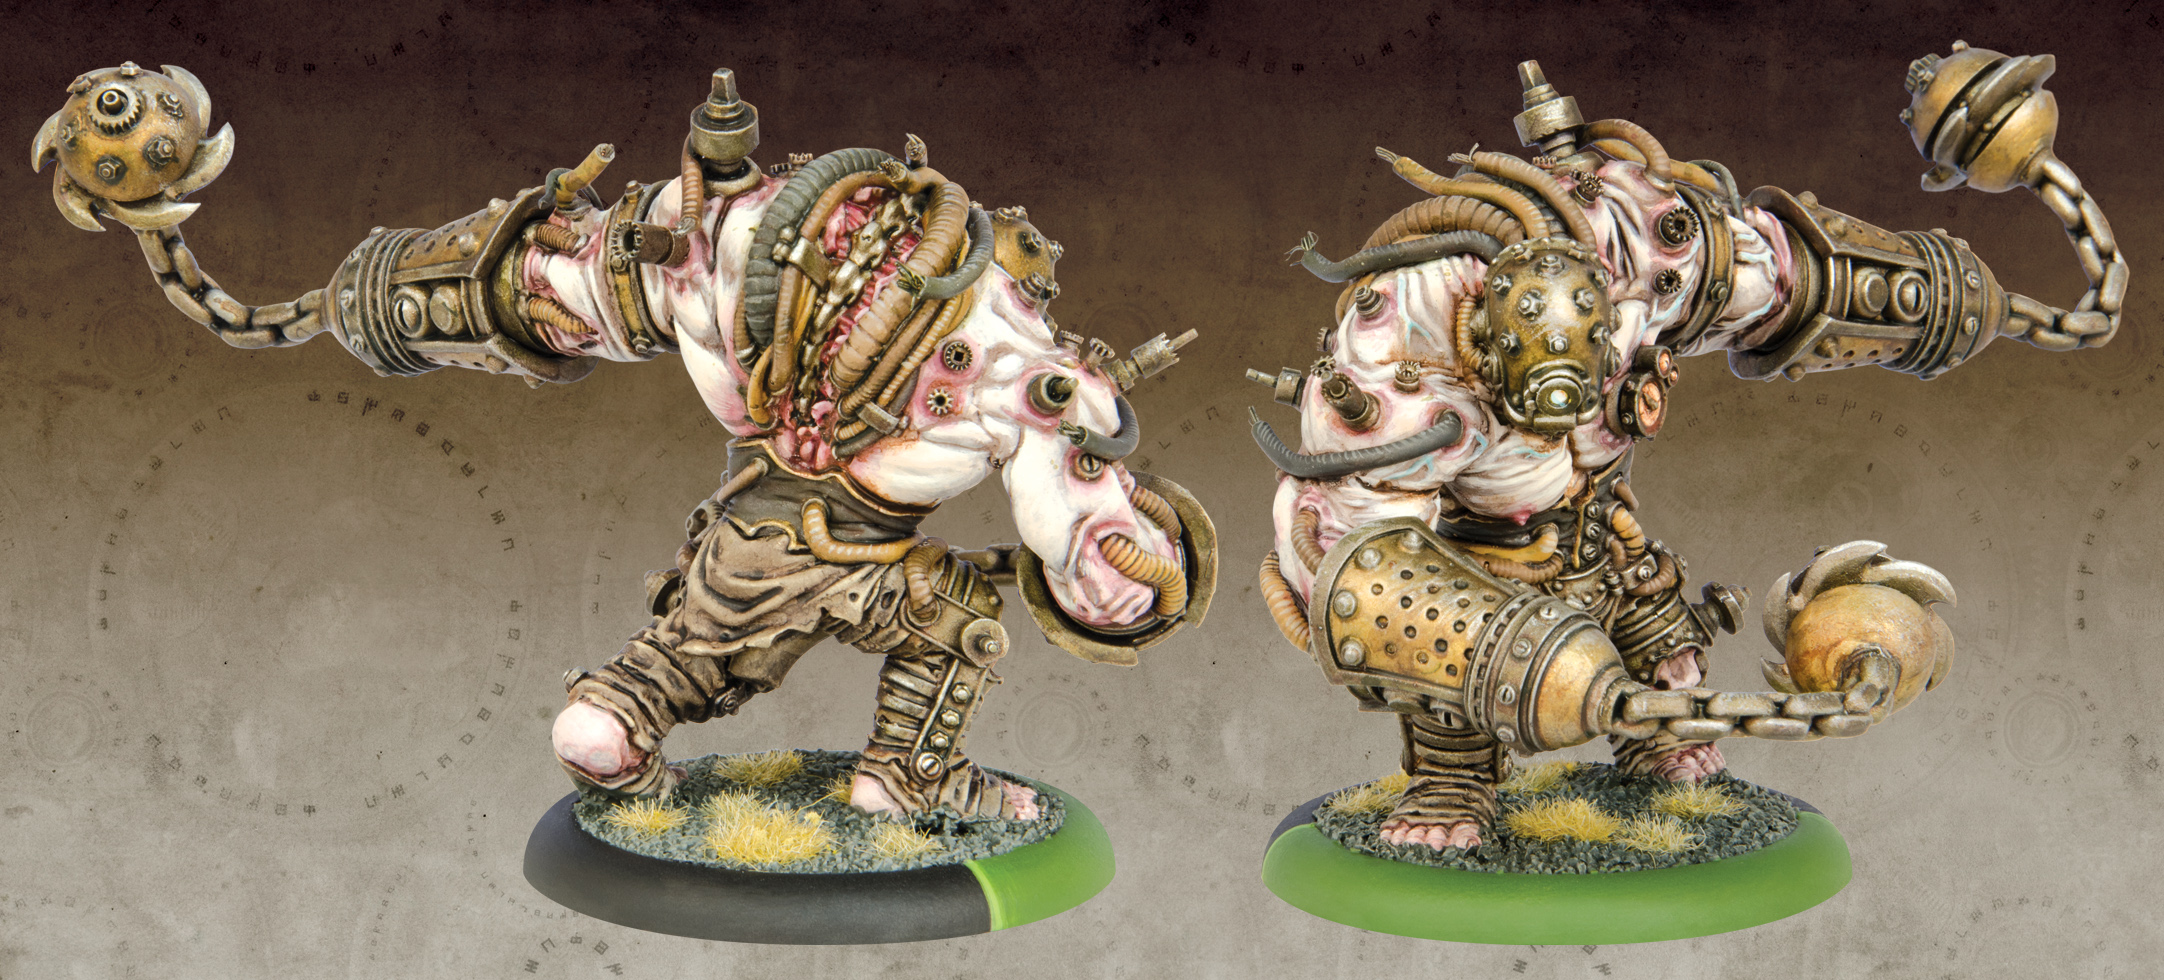
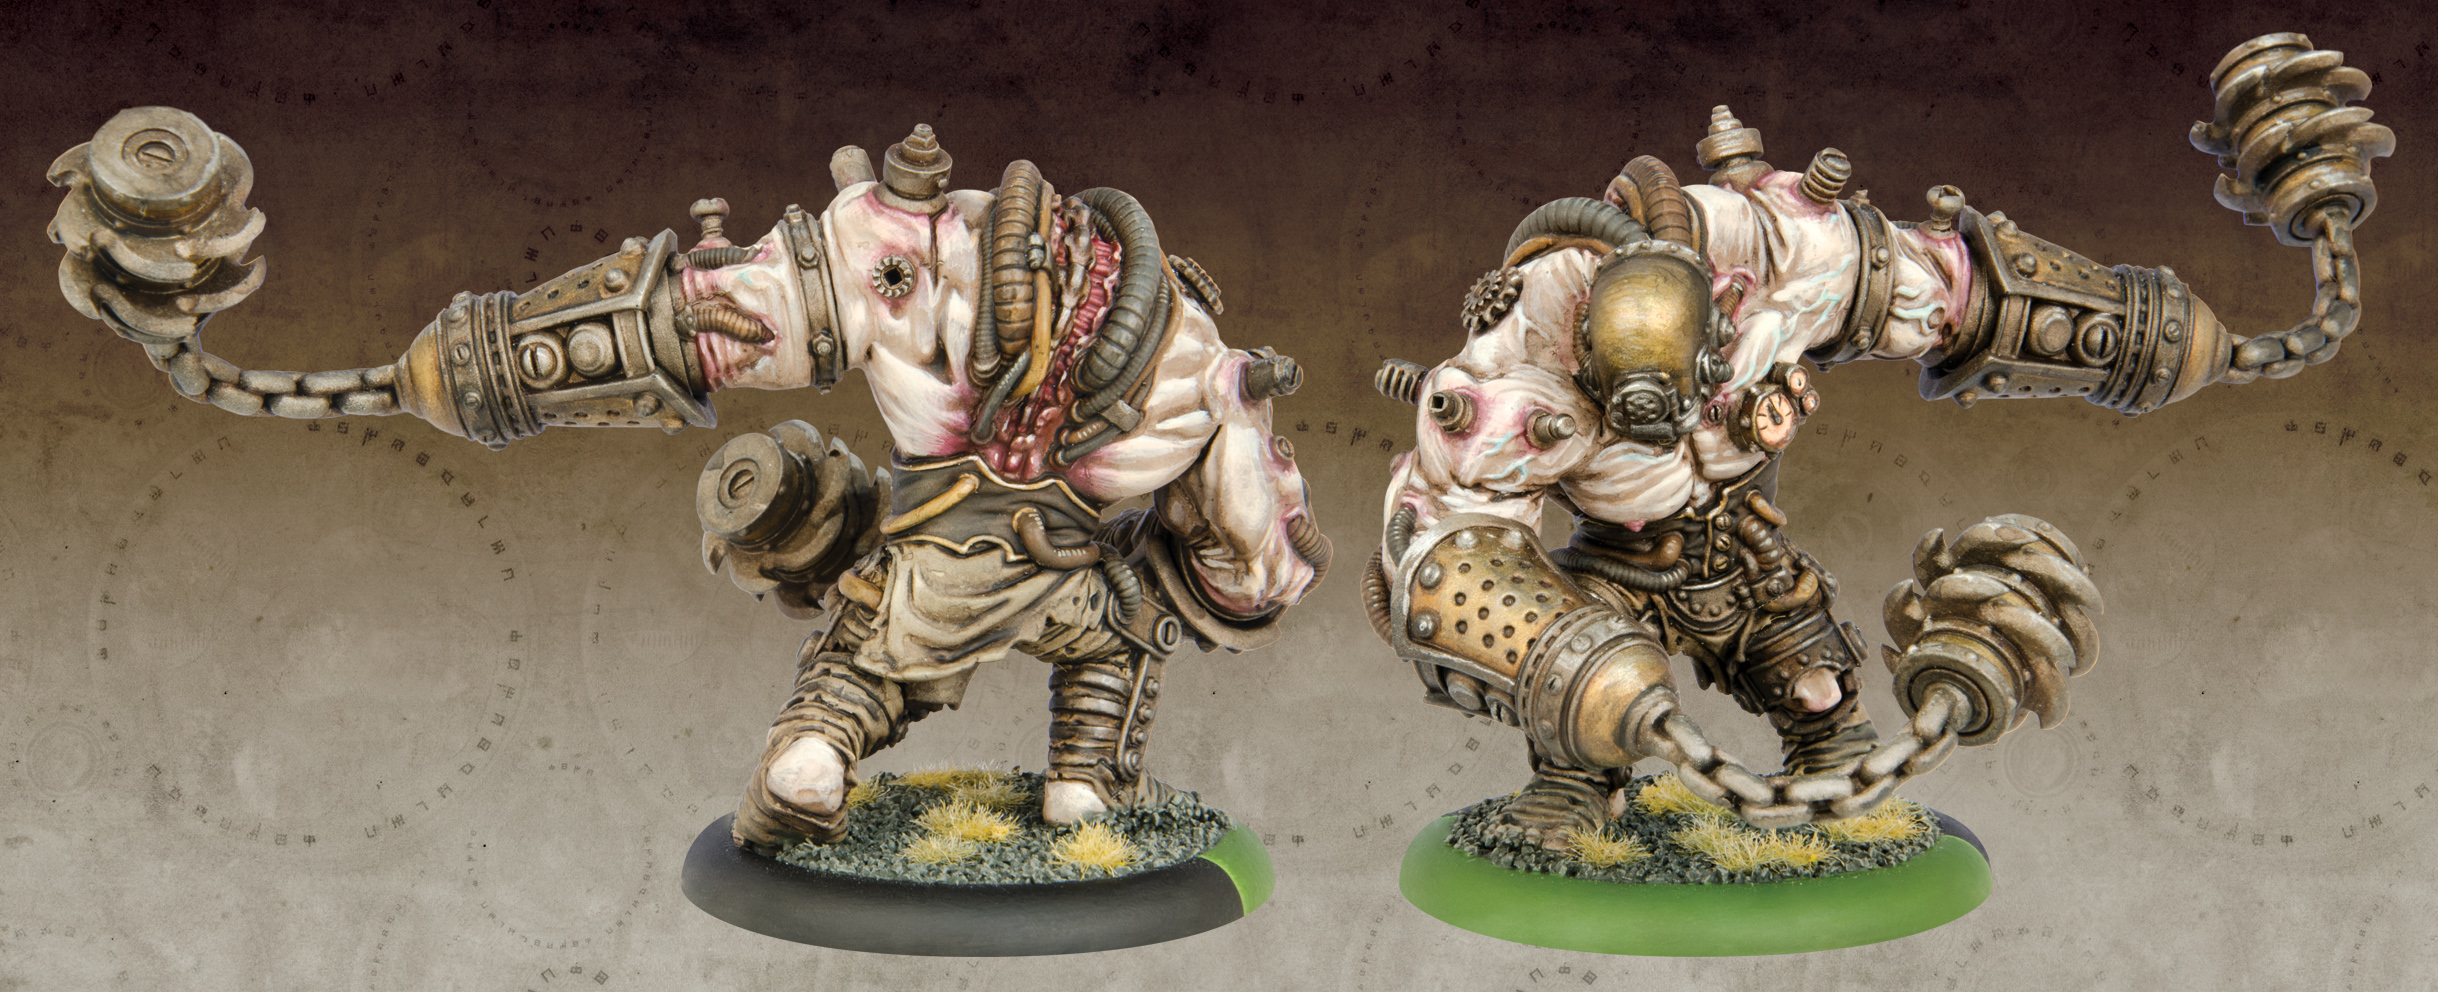
While my second Wrecker got off easy, my first spent a bit more time under the scalpel.
Let’s start with the quick stuff first. I wanted to visually separate my two Wreckers, as they generally work in tandem on the battlefield. I loved the idea that my first Wrecker had torn free from its surgical apparatuses, intravenous tubing and wires flailing everywhere as it runs rampant among its enemies. To create that effect, I used a copious amount of guitar string and electrical wire posed dynamically. To further separate the two, I also added tons of wristwatch parts (representing implants, surgical plugs, venous ports, etc.) and more model train rivets to his head plate. Likewise, the simple addition of a small metal disc to his ocular port dramatically changed the first Wrecker’s visage.
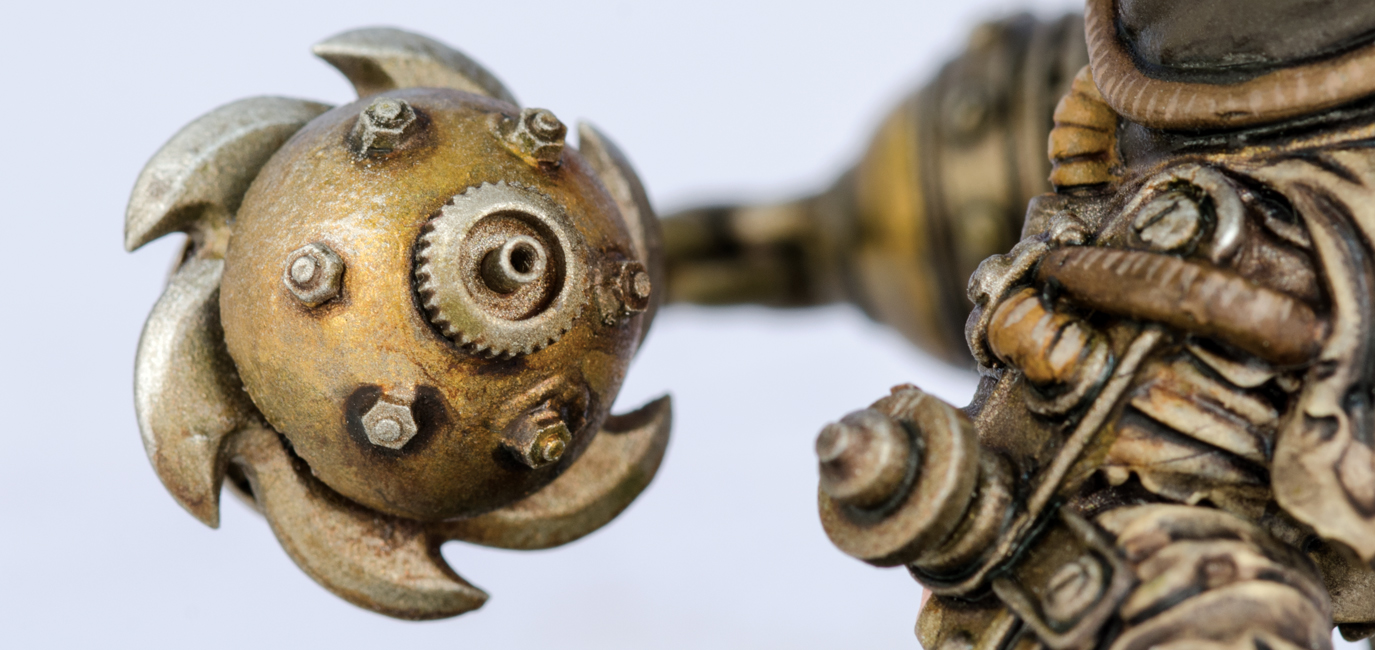
Of course, the largest disparity between the two is the modified wrecking balls. These were created using excised disc blades from the standard plastic kit, bifurcated balls of modeling putty, model-train rivets, and various wristwatch parts.


SLAVER AND DRUDGES
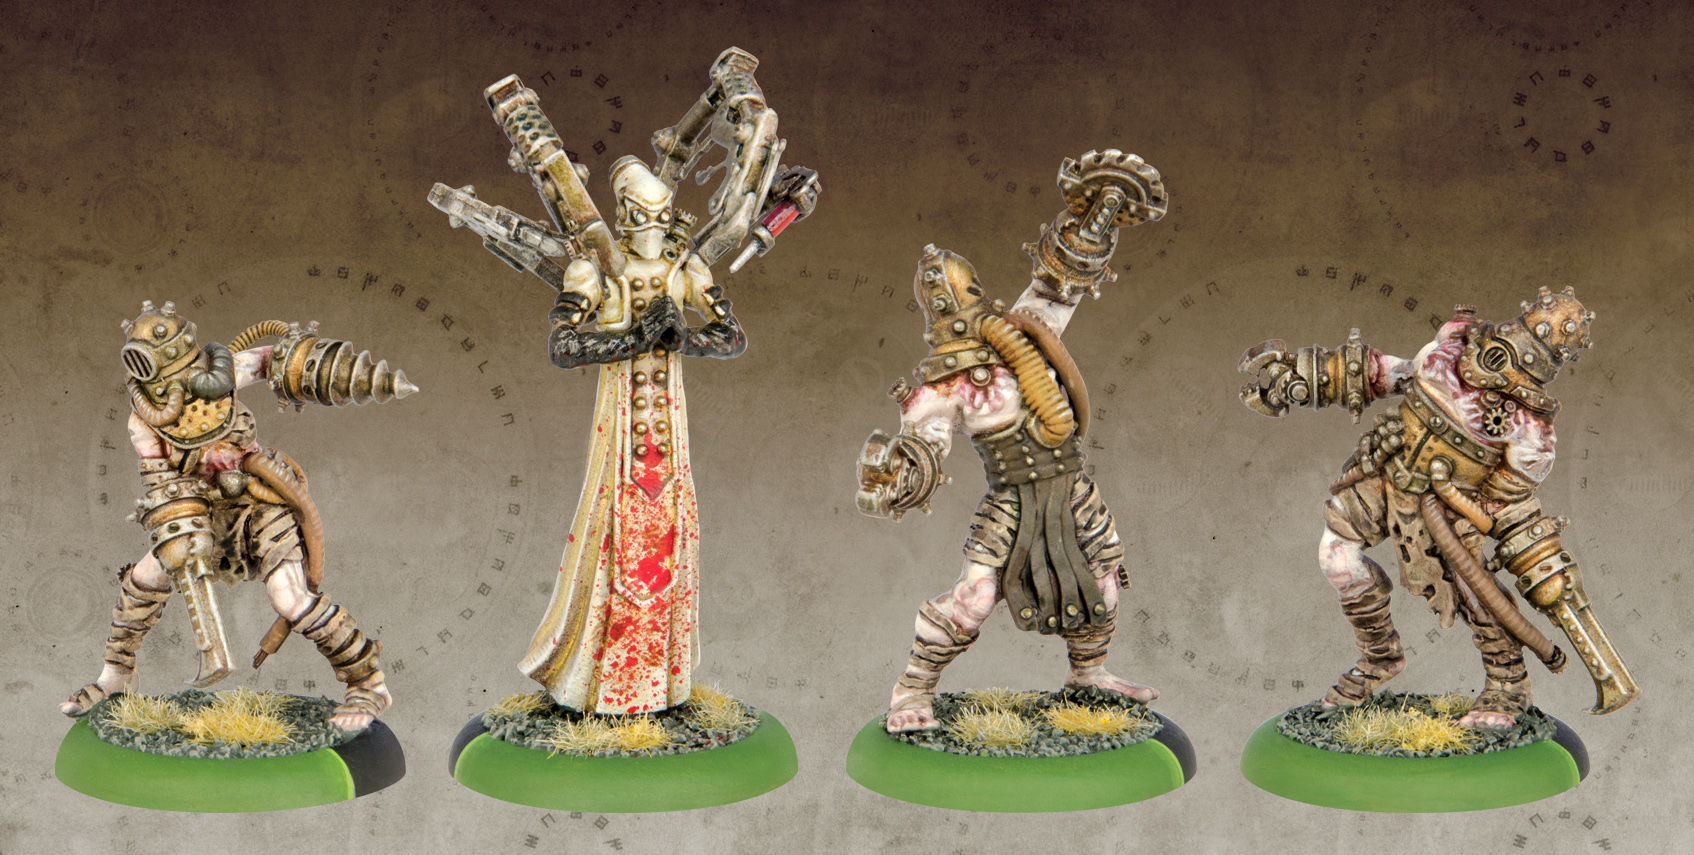
To ramp up the detail level of my Slaver, I added additional levers to the surgical implements on his backpack array. These included a plunger for the syringe, grasper for the scalpel, and spray guard for the circular saw.
On the Drudges, I primarily added additional plugs, ports, and grafts using more wristwatch parts. I also added various wires and guitar cord to their bodies. This not only helped visual variety in the unit, but it also added dynamism and narrative.
On the Drudges, all conversion parts were added by drilling small holes into the actual miniature, providing a secure socket for the augmentations.
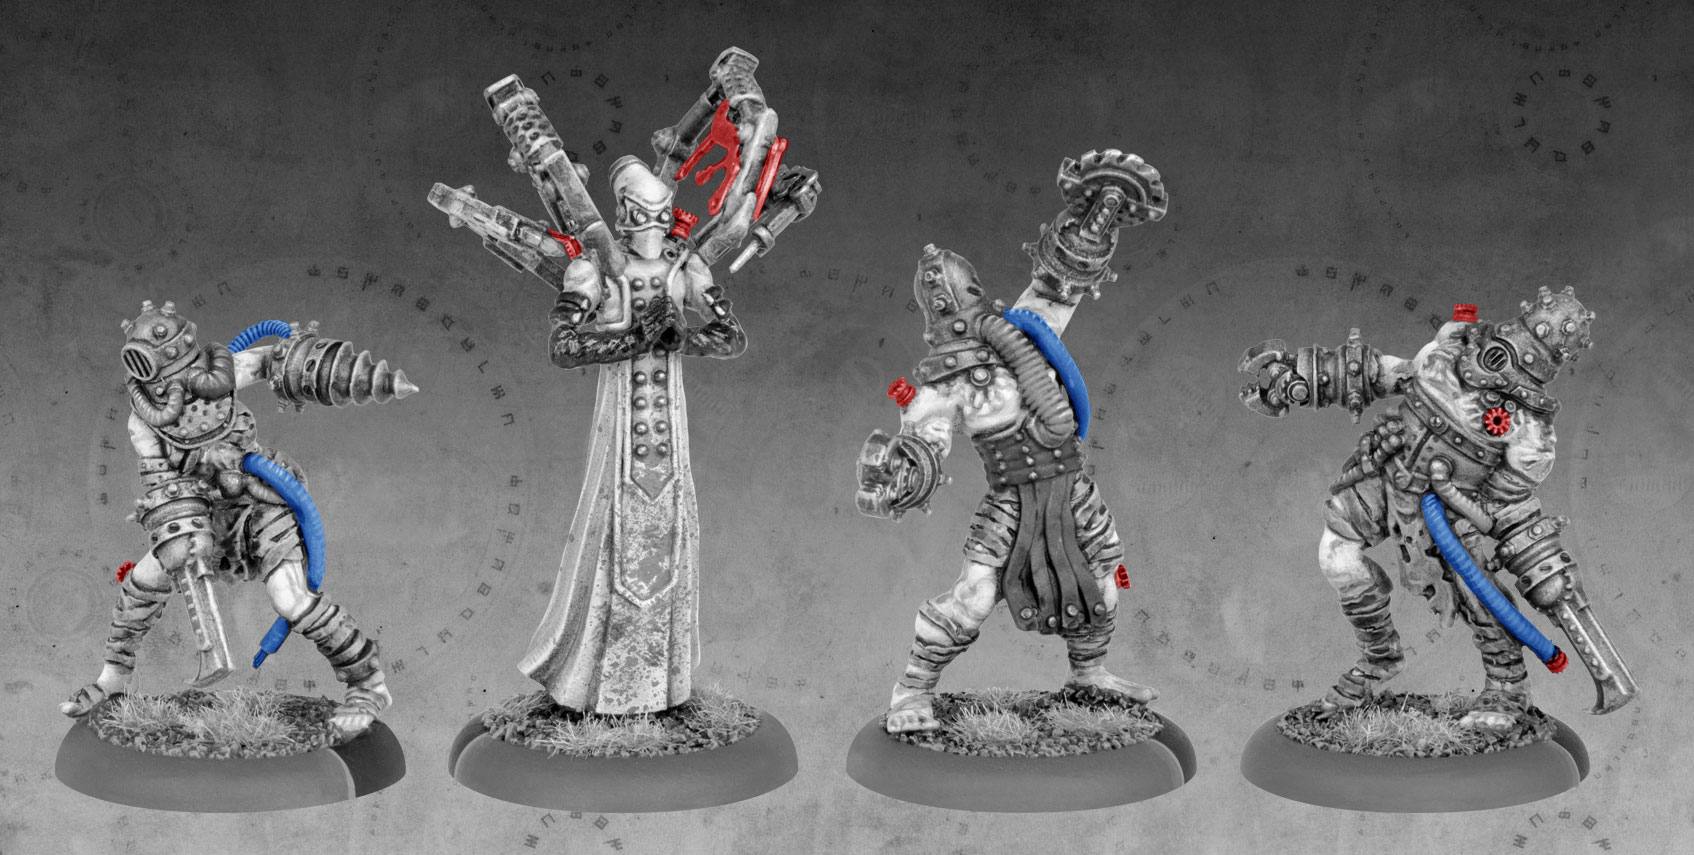
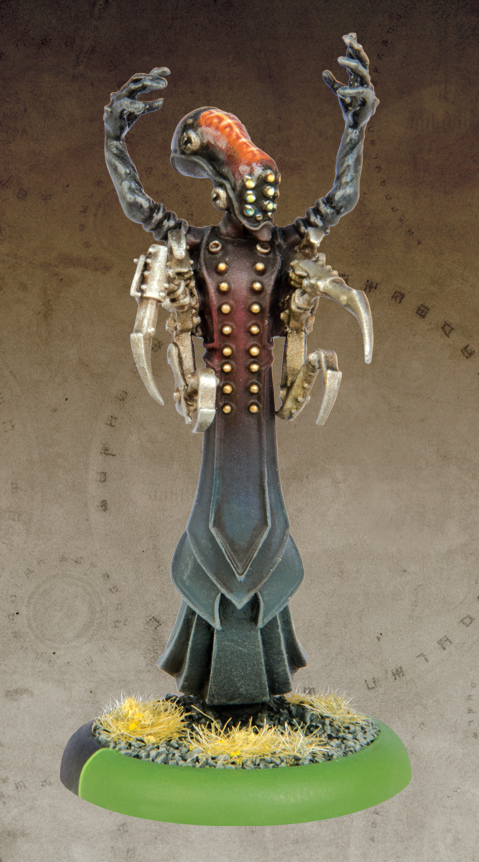
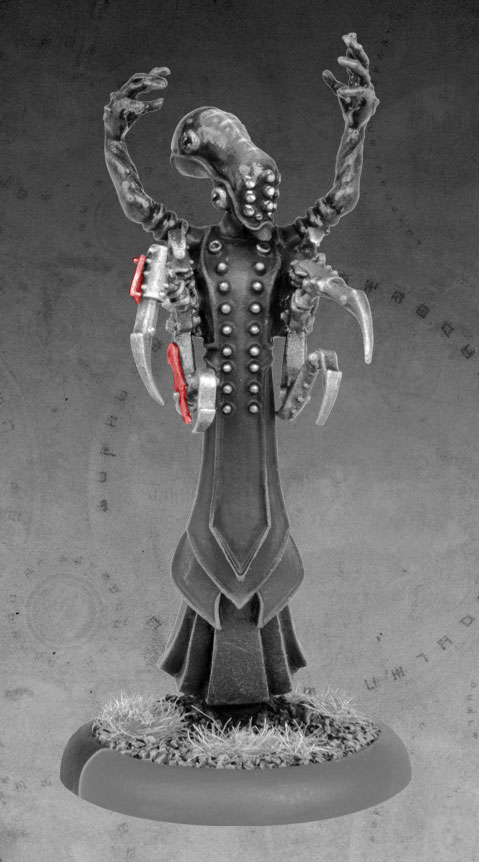
MINDBENDER AND DRUDGES
On the Mindbender, I really wanted his backpack array to fan out menacingly behind him, as if each arm branched into smaller, nastier blades.
The Drudges were converted in the same manner as the Slaver’s Drudges.
AGITATOR
Aside from some small additional wristwatch parts to his surgical blades, I primarily converted the Agitators by re-posing. This entailed bending individual fingers, wrists, and elbows with padded needle-nose pliers, a very time-consuming and delicate process. I also made sure to carefully bend the main body, slightly altering the Agitator’s posture. Lastly, the head and neck were re-posed by removing a portion of the connecting point with a metal file.
DOMINATOR AND BOOMHOWLER
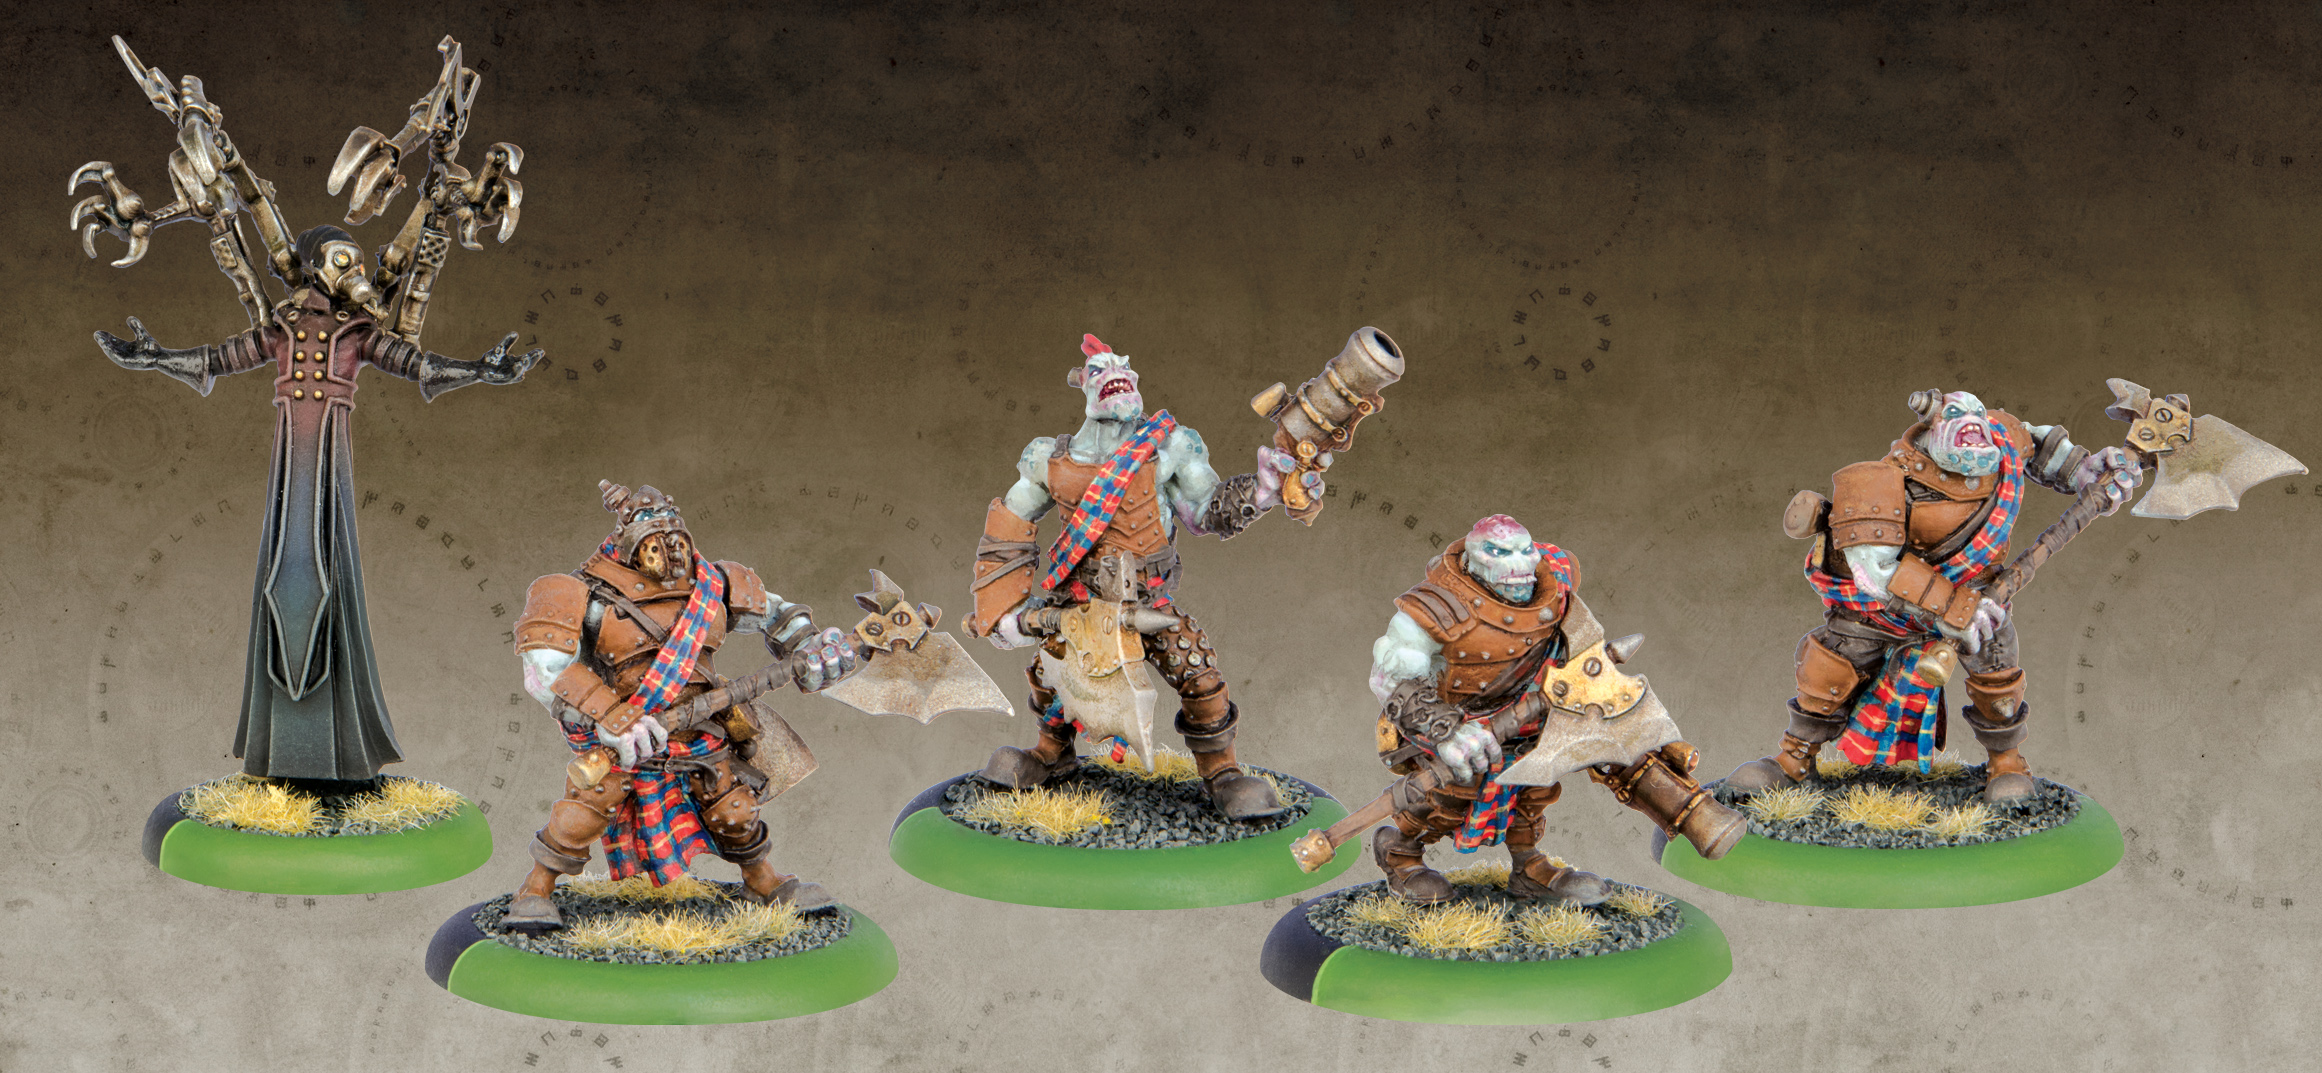
From the start of this project, I knew I wanted to convert a unit of Greygore Boomhowler and Co. to match my Cephalyx army. In my mind’s eye, I pictured surgical augmentations and visible brain control devices protruding from each trollkin’s hulking body, forcing them forward in a comatose stupor.
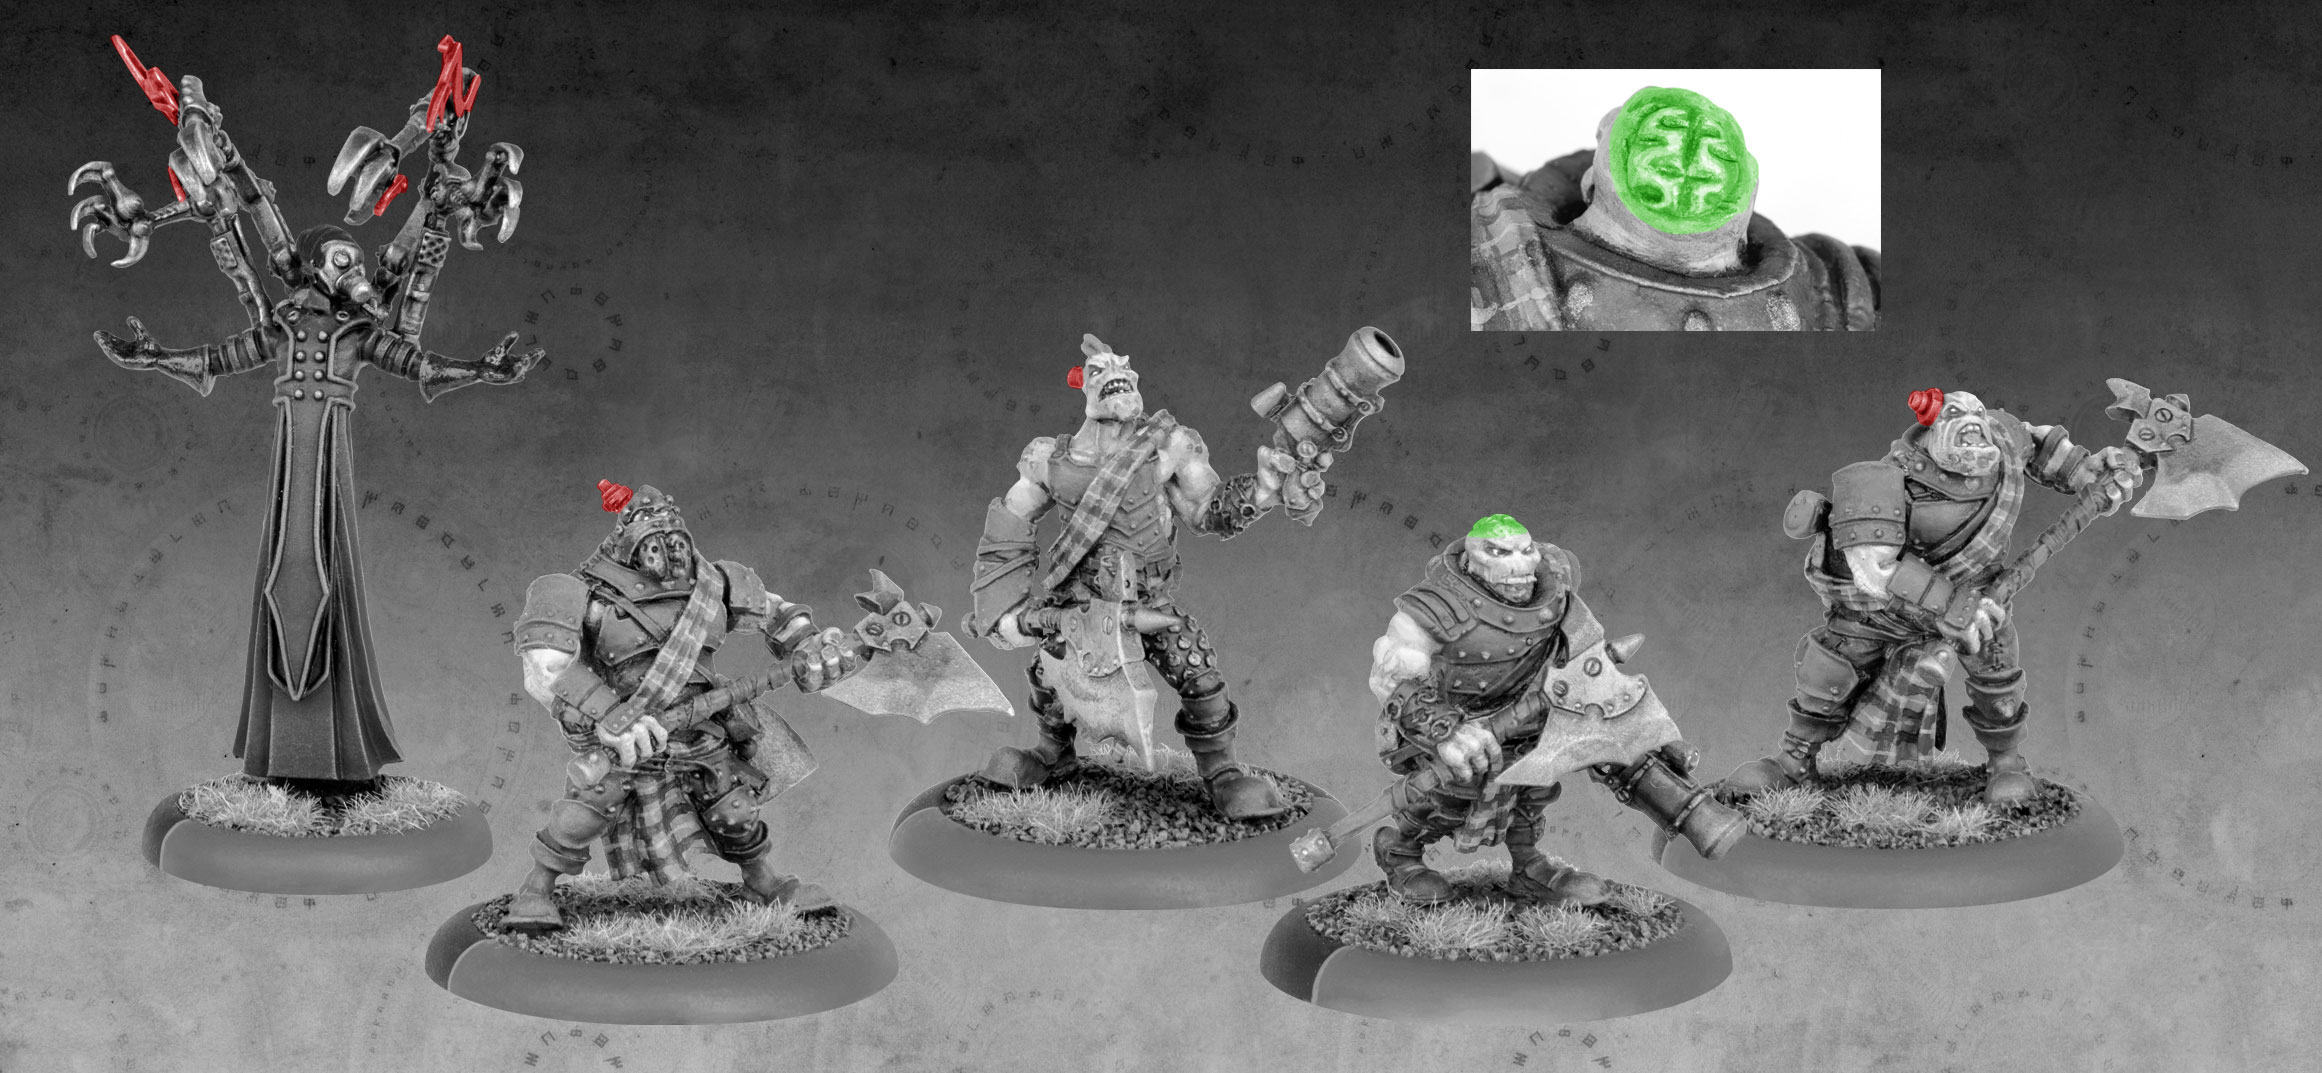
For the actual implants, I drilled holes into the head of each trollkin and then glued a tiny gear into the hole. On one extra-special member of the unit, I filed off the top of his head and sculpted an exposed brain.
It should also be noted that I performed multiple head swaps using Kriel Warrior parts to add some diversity within the unit.
On the Dominator, I simply added a few wristwatch parts to his puppeteer claws and re-posed his head. The angle of his gaze was designed to connote a masterful calm rather than the aggressive stare-down of the generic pose.

That’s all for now on my conversions. Thanks for reading! Stay tuned for my next Insider on how I painted my Cephalyx and how you can achieve a similar effect.
Nick
![]()