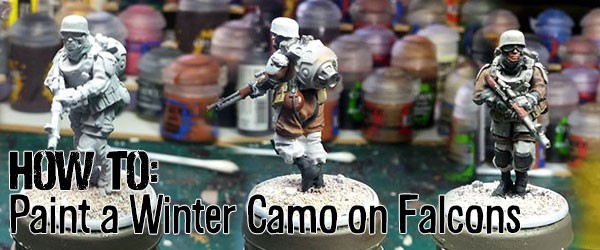
How to: Paint the Fallschirmjager Falcons
Have your Fallschirmjager Falcons get prepared for a winter operation by learning how to paint them in a winter camo!
Preparation
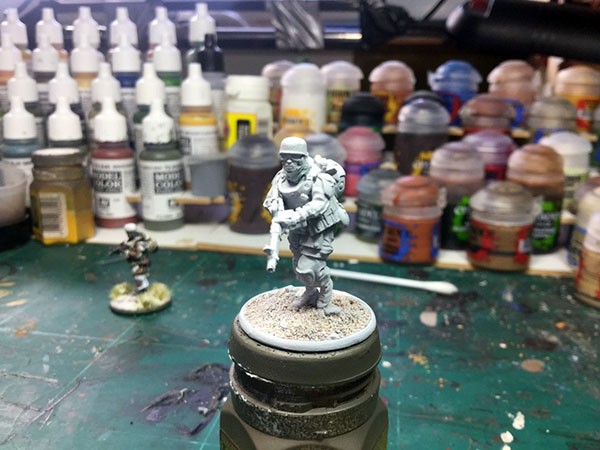 “Sculpt” a tube scarf to emphasise the winter feeling. Base with modelling sand and undercoat with a white primer.
Phase One
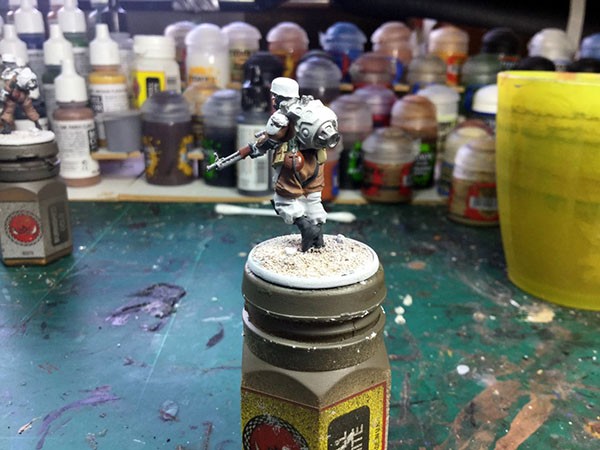 Block in all the basic colours, leave the armour and trousers white.
Base colours are:
- Army Painters “Tanned Flesh” for the skin
- Vallejo “Black Grey” for belts, straps and the boots
- Games Workshop: “Mechanicum Standard Grey” for the scarf and gloves
- Army Painter “Gun Metal” for clasps, the gun and assorted detail of the armour
- Vallejo “German Camo Beige” for the belt pouches
- Vallejo ”Mahogany Brown” for the stock of the gun
- Vallejo “Flat brown” for the water bottle
- Vallejo “German Camo Dark Green” for the water cup
- Vallejo “German Camo Pale Brown” for the camo smock
Phase Two
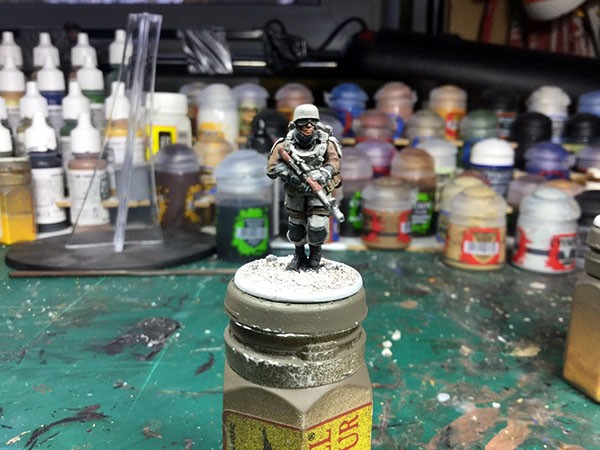
Black-wash the whole model with “Nuln Oil“ from Games Workshop. Try to avoid any puddles, especially on the armour.
Phase Three
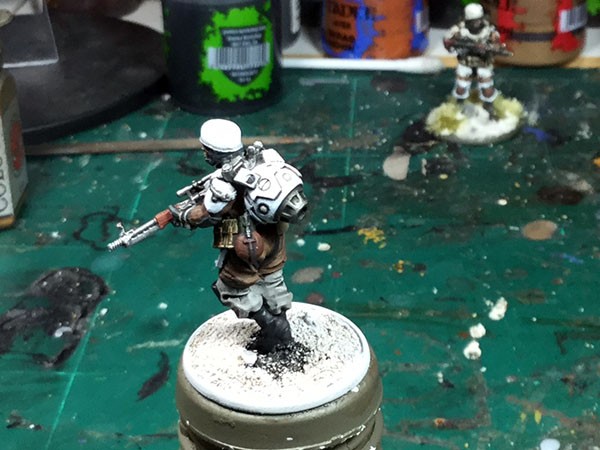
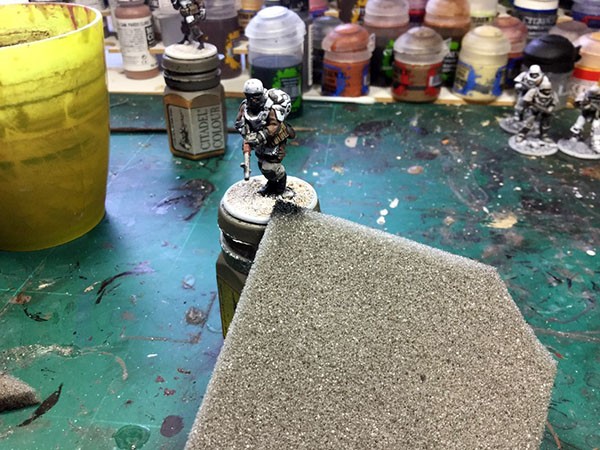
Repaint all the armour, the anti-grav module and helmet with pure white (Vallejo “white”). It’s best to apply several thin coats of white building up to a pure white around the edges. By doing so the darker base colour will still be visible where some shading may be needed. Note that the trousers are not repainted white at this stage.
Now it´s time for some weathering to make the armour look well used. For that purpose, a piece of packing- foam is ideal. Dip the corner of the foam into Vallejo “Black Grey” and then onto some piece of cloth to remove some of the paint. Then carefully go over the armour, helmet and anti-grav module and lightly tap the corners and edges with the foam. This will create a nice and random chipping effect.
Don´t worry if some of the “Black-Grey” ends on other parts than the armour, these will be repainted in later stages.
To finish the armour, apply a very thin coat of GW Seraphin Sepia diluted with water.
Phase Four
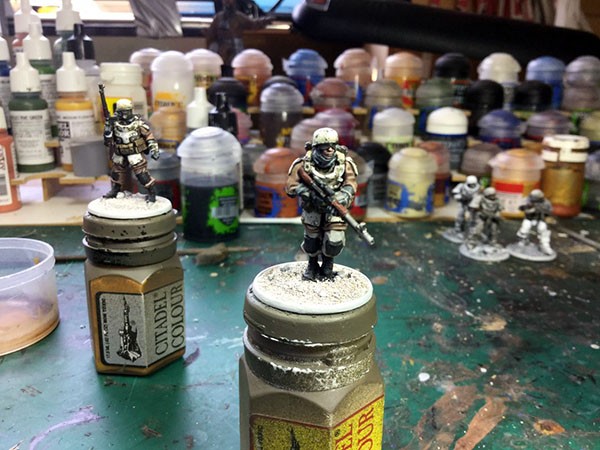
Repaint the face, camo-smock, ammo-pouches, water bottle, gunstock, scarf and gloves with their original base colour leaving only the recesses in the darker colour. Add highlights on the raised parts of each item by mixing some Vallejo “Ivory” to your respective base colours.
Phase Five
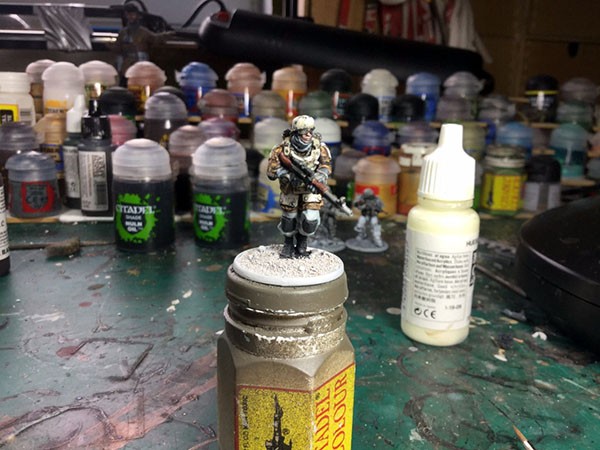
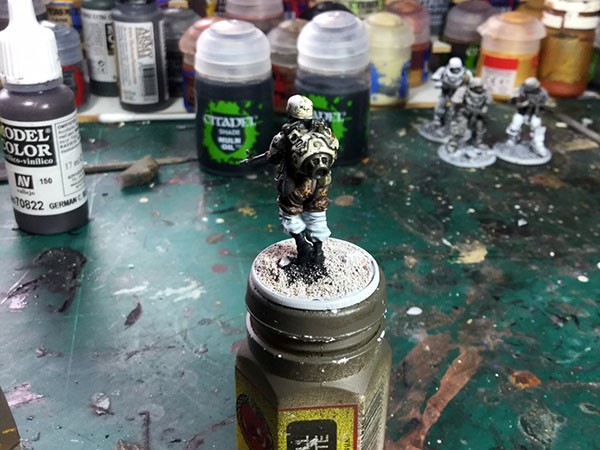
For the oak-leaved camo first apply some dark brown blotches over the base colour, then add some mid brown blotches next to and partly overlapping the dark ones. Finally carefully paint the orange dots over the whole area. Looking at some pictures of an actual camo smock helps to get the “feeling” right when in doubt where to place these dots.
Repaint the trouser with Celesta Grey from Games Workshop and then add two thin layers of pure white onto the raised parts.
Paint the infrared goggles with red and add an orange highlight to the upper parts of the lens.
Phase Six
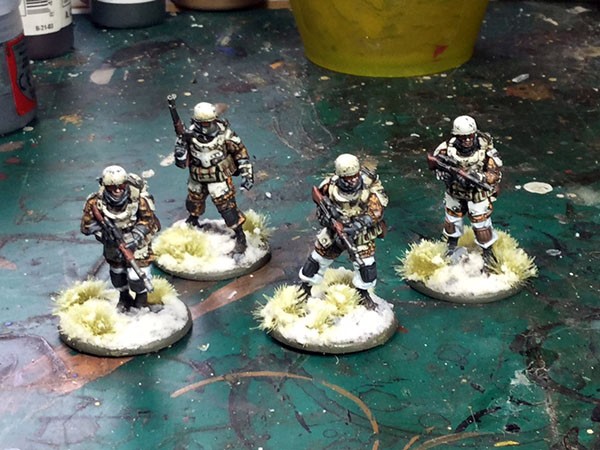
Paint the base with Vallejo “Burnt Umbra”. Then add some Vallejo “Ivory” to the “Burnt Umbra and give the base a quick dry brushing. Glue some grass tuft onto the base and cover everything with some snow effect (Games Workshop Valhalla Blizzard in this case). Once this is dry repaint the edge of the base with Vallejo “German Field Grey”.
Do you have an article within you? Are you itching to show your collection to the world of Bolt Action? Then drop us a line with a couple of pictures to [email protected] or share with all over at the Warlord Forum
Don’t let Germany fall!
You might also like…
 Step by Step: Painting the Caunter scheme
 Step by Step: Australian Commandos Review & Painting Guide
 Hobby: Konflict 47 Grenadier conversions
 How to: Paint a Jackal Walker
 Hobby: Painting late war German Camouflage without an airbrush
 Step by Step: Painting the Maus!
 Conversion Workshop: The Type 4 Ho-To
 Painting Guide: Long Range Desert Group

