History: The Battle of Waterloo – part 1
The Field
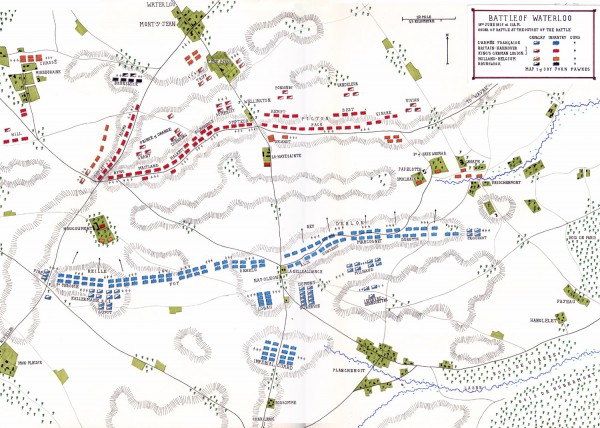
The battlefield of Waterloo was small by the standards of the day, being three miles long and a mile deep. Wellington had occupied an excellent position, the main feature being the ridge of Mont St. Jean that ran from east to west. The ridge’s front was fairly steep, but could be traversed by both infantry and cavalry. Along the crest of the ridge ran the road to Wavre, which was in effect a deep sunken lane. The ridge at its centre was bisected by the main Charleroi to Brussels road. The ridge stretched from Papelotte, La Haye, Frishermont and Smohain, a scattering of farms and hamlets at the eastern end, through to the well-built chateau of Hougoumont at the western end on the forward slope of the ridge. In the centre of the position was the farmhouse of La Haye Sainte, again on the forward slope of the ridge and on the right hand side of the Brussels road. Hougoumont and Papelotte were key defensive features as they secured the left and right flank respectively of Wellington’s army. La Haye Sainte was also a critical position as it commanded the road to Brussels.
The Allied deployment
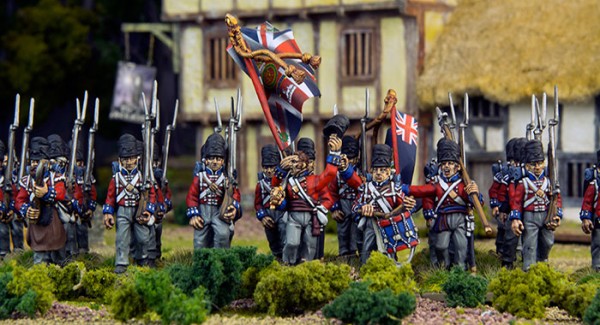
Wellington recognised the importance of these features and garrisoned them with some of his finest soldiers. La Haye Sainte was protected by 400 light infantry of the King’s German Legion. These were supported by crack marksmen of the 95th Rifles stationed on the opposite side of the road to the farmhouse, in an old sand quarry. Hougoumont was a major concern to the Duke and it was here that he placed his finest warriors, men of the light companies of the 1st, 3rd and Coldstream Guards, supported by Hanoverian and Nassau light infantry. The remaining majority of his Guards Division was then stationed to the rear of the chateau.
As the battlefield was not a long one, Wellington deployed the other 68,000 men of his army in depth, especially on his right and centre. His left was thinner as he expected this area to be supported by his Prussian allies.
Where the Brussels road crossed it, the ridge was not steep at all, and so Wellington assigned his best divisional commanders with some of his steadiest infantry to the area. Sir Charles Alten, with twelve battalions of infantry, including four battle-hardened King’s German Legion units, took the right of the road, whilst on the left was Sir Thomas Picton with eight battalions of Peninsula veterans. Sir Henry Clinton’s 2nd Anglo-Hanoverian Division was in reserve behind the right centre, whilst Lambert’s Brigade from the incomplete 6th Anglo-Hanoverian Division was in reserve. These three veteran Peninsula battalions would be in close support of the Duke’s centre. The remaining untried Dutch, Belgian and Hanoverian formations were bolstered with veteran British and King’s German Legion infantry, cleverly interspersed to fill any gaps that might appear in the line. The cavalry were mainly stationed in reserve near the grouped reserves of the Duke’s infantry, whilst British light cavalry protected the extreme right of the line. The Duke, as usual, ordered his formations to position themselves on the reverse slope of the ridge; this denied the French the knowledge of where the main strength of the Allied army lay.
The French Deployment
Napoleon, only being able to see skirmish formations and artillery, deployed his army of just over 77,000 men symmetrically on the slopes of another ridge to the south of the enemy and the French formed around the Brussels road. On the right, D’Erlon’s I Corps was supported by Milhaud’s Cuirassiers and the light cavalry of the Guard. On the left, Reille’s II Corps was backed up by the heavy cavalry of the Guard and Kellerman’s Corps. Near the inn of La Belle Alliance, were stationed the reserves of the French Army: 13,000 infantrymen of the Imperial Guard, Lobau’s VI Corps and two light cavalry divisions under Barons Subervie and Domon. It has to be said that the French were very slow to get into any semblance of battle order.
The Battle Plans
Wellington’s plan was threefold. Firstly, he would hold his ground to deny Brussels to the French. Then he would nail himself to his chosen ridge and await Prussian support; and when they arrived he would go over to the attack and defeat the French army.
Napoleon’s plan was simply to destroy Wellington’s army. To complete his plan he ordered a frontal assault against the Allied centre, the assault being delivered by D’Erlon after the enemy was softened up by an artillery bombardment. On hearing the plan the Emperor’s generals were shocked; those that had fought in Spain understood that such a plan could spell disaster. Honore Reille, always the professional, gave his worried opinion. As a result of this exchange, Napoleon ordered a diversionary attack on Hougoumont to entice Wellington into committing his reserves early in the battle, so they could not be used to stop D’Erlon’s later sledgehammer assault.
You might also like…
 History: Major-General Sir Thomas Picton (1758 – 1815)
 History: Napoleonic Wars Army Structure
 History: Jean Andoche Junot, 1st Duc d’Abrantes (1771 – 1813)
 History: Field Marshal Prince Gebhard von Blücher (1742-1819)
 History: Sir Arthur Wellesley, Duke of Wellington (1769- 1852)
 History: Major-General Robert Craufurd (1764 – 1812)
 New: Albion Triumphant Volume 2 – The Hundred Days campaign
 Pre-Order: Napoleonic British special offers

