

Controlling the Game – Part II
Zach Bunn on Regaining Control in STAR WARS (TM): The Card Game

“Control, control, you must learn control.”
–Yoda, Star Wars: Return of the Jedi
Light side and dark side clash in a struggle that shakes the galaxy in Star Wars™: The Card Game. To claim victory, you must build your forces, strategically plan your attacks, and overthrow your opponent’s plans. Controlling your opponent’s options and controlling the flow of the game is crucial to achieving your final victory.
In Zach Bunn’s last guest article, he established some principles for gaining control in Star Wars: The Card Game. Today, he continues to expand upon those ideas and provides an example of a game where he lost control and exploring how he could reclaim it.

Zach Bunn on Regaining Control
In my last article, I laid the foundation for a definition of control in Star Wars: The Card Game, and I even claimed it was the most important concept in the game! I want to continue the discussion of board control, but this time I want to show a very real and practical example of board control at work.
Below is an image of the board state during a game I played as the light side against Matt Wehner in the finals of the 2014 Star Wars: The Card Game Regional Championships in Independence, Missouri. As you can see in the image below, Matt has board control in spades.

It’s the first game in the match. Some important things to note:
 The dark side has destroyed one objective, the light side has destroyed none.
- The Death Star dial is at five.
- The Balance of the Force is currently with the light side.
- The dark side has the following objectives in play: Counsel of the Sith (Core Set, 27) with four damage, Fall of the Jedi (Core Set, 99) with one damage, and Imperial Command (Core Set, 73) with no damage.
- The dark side has four resources open, one of which is on Counsel of the Sith
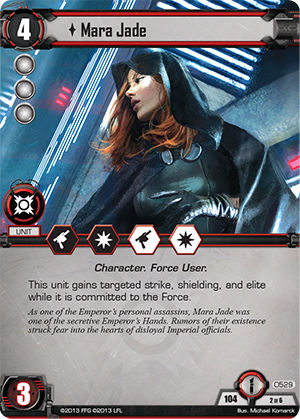
- The dark side has the following units in play: Darth Vader (Core Set, 35) committed to the Force and focused, a focused Mara Jade (Lure of the Dark Side, 529) with Mara Jade’s Lightsaber (Lure of the Dark Side, 531) attached, and a ready Imperial Shadow Guard (Lure of the Dark Side, 530).
- The light side has the following objectives: Questionable Contacts (Core Set, 69), Wookiee Life Debt (Edge of Darkness, 318), and Along the Gamor Run (Knowledge and Defense, 552).
- The light side player has five open resources with the following cards in hand: Chewbacca (Edge of Darkness, 319), Millennium Falcon (Edge of Darkness, 332), Saboteur (Edge of Darkness, 329), Hired Hands (Knowledge and Defense, 554), Wookiee Warrior (Edge of Darkness, 320), and Twist of Fate (Edge of Darkness, 157).
- It’s the light side player’s turn, in the deployment phase.

In this scenario, what do you do as the light side player? What’s the correct play in this scenario where your opponent definitely has control of the board? Your answer provides some strong insight into your view of control!
Here are the top two options, as I see it.
The Quick and Easy Path
 The first option is to play the Millennium Falcon. With enough resources in play for the dark side player to pay for a Force Lightning (Core Set, 60), you attack Counsel of the Sith first and destroy it. You can then trigger the Reaction on the Millennium Falcon and bring a different unit into play.
If you decide to put Chewbacca into play, you probably need to attack because Mara Jade with her Lightsaber attached has enough unit damage to clear Chewbacca from the board without him triggering his Reaction. With Chewbacca, you probably want to attack Fall of the Jedi, hopefully bringing it to four damage. The only other real option for bringing a Character into play with the Millennium Falcon is the Hired Hands. Playing the Millennium Falcon and bringing in Chewbacca or the Hired Hands might be tempting if you’re focusing purely on dealing maximum damage, but it abdicates any chance of regaining control of the board. Whether you put Chewbacca or the Hired Hands into play, either unit will be destroyed by your opponent before the beginning of your next turn.
The Path to Control
The option that, in my opinion, allows you to start moving back towards control is as follows:
Play the Wookiee Warrior, the Saboteur, and the Hired Hands, in that order. You’ll need to use the Saboteur to destroy Mara Jade’s Lightsaber if you want to have a chance at having units on the board next turn.
 The key rule during the conflict phase is that you don’t want to attack with the Wookiee Warrior, but keep it safe from a potential Force Lightning. The protect keyword that Wookiee Life Debt grants to your Wookiee Warrior is the only thing that might maintain your board and give you better options next turn. The best attack in this case is to send the Hired Hands against Counsel of the Sith. Your opponent may block with the Imperial Shadow Guard or not, but the Wookiee Warrior’s protection can ensure that the Hired Hands destroys the objective. If you win the edge or your opponent doesn’t block, you can use the Hired Hands’s tactics icons to focus Mara Jade, who is no longer elite.
Depending on whether your opponent blocked or not, you can either attack with the Saboteur or hold it back for the Force struggle. In the Force phase, you trigger Along the Gamor Run and commit the Wookiee Warrior and the Saboteur, keeping the Force and drawing a card from Along the Gamor Run. The dial goes to six, and you have two pretty annoying blockers on the board with a four-card hand. You also have Along the Gamor Run in play, so if your opponent decides to attack with Darth Vader, you stand a good chance of keeping the Force again.
Regaining Control
 In the above example, instead of focusing completely on dealing objective damage and ending up with no units on your next turn, you can destroy an objective, keep the Force, and still have units on the board at the end of your opponent’s turn. You also still have the Millennium Falcon and Chewbacca for your next turn, leaving you with a very strong counterattack on your next turn. If you’re fortunate enough to still have the Wookiee Warrior in play on your next turn, the option of playing Millennium Falcon and Chewbacca becomes extremely viable.
It’s easy, particularly in Star Wars: The Card Game, to get in the habit of seeing combos like the Millennium Falcon and Chewbacca and assuming they are the best play. Where that decision is going to leave you and your board, however, is often more important than the amount of damage you can deal on your current turn. This LCG isn’t a long game, but it’s made much shorter when one or both players neglect the principles of board control.
Keep your eyes and mind open to maintaining board control and I expect your win percentage will increase pretty dramatically. Until next time, may the Force be with you.
Zach
Reclaim Control
Thanks, Zach!
Zach Bunn is a Star Wars fanatic, a lead member of Team Covenant, and a member of the winning team from the Star Wars multiplayer tournament held at Worlds. In coming weeks, stay tuned for more Star Wars guest articles from Zach and other writers!
…