Battle Report: Rorke’s Drift
Following on from last week’s account of how he assembled the forces and battlefield, Richard Caldwell relates how his re-enactment of the Battle of Rorke’s Drift played out:

Extra Rules
Since there were so many Zulus involved, (about 4000) it is easy for the Zulu players to overrun the Brits by sheer weight of numbers. To create a more realistic simulation using Black Powder rules, a couple of special rules were created. First, the Brits were given the ability to have closing fire on all Zulu warbands that had declared charges. This would effectively stop incoming assaults if three casualties were sustained or the warband was disordered. If three casualties were sustained then the warband was removed and recycled back into the action. If British dice rolls were bad, the Zulus had a good chance of winning the assault and driving the Brits back from the barricades.
Secondly, Chard, Bromhead and Bourne were given the ability to reduce casualties on the Brits while units were not in melee.

In the hospital, the Brits and Zulus fought as if they were tiny units representing one on one combats. The loser of the combat would be removed as a casualty unless they were a VC or DCM medal recipient. The VC or DCM who lost the melee simply withdrew to the next room. Since the British Army did not award medals posthumously during that period in history, our miniature medal winners had to survive somehow!
These simple additions to the basic Black Powder rules allowed the action to very closely follow the historical events. To simulate the time duration of the battle which began at 4:30PM and continued almost unabated until 10PM, the turns were limited to ten. If the Brits still held the position at the end of Zulu turn ten, then the Brits won because the Zulus had given up. If the Zulus lost 32 warbands, the Zulus would withdraw having suffered sufficiently to break their morale.

During the game the Brits and Zulu commanders carefully kept the tally of warbands lost. While ideally the Brits should not know how many warbands have been lost, the team spirit on the Brit side was such that players actively exchanged information on the numbers out of action. If you decide to play the scenario, don’t divulge the number of warbands lost criteria to the British players otherwise they will adjust their strategy to eliminating warbands as opposed to fighting the scenario like the real event.
The Players
For the game there were 5 players on each side. The 150 Brits were divided into 5 commands as follows:
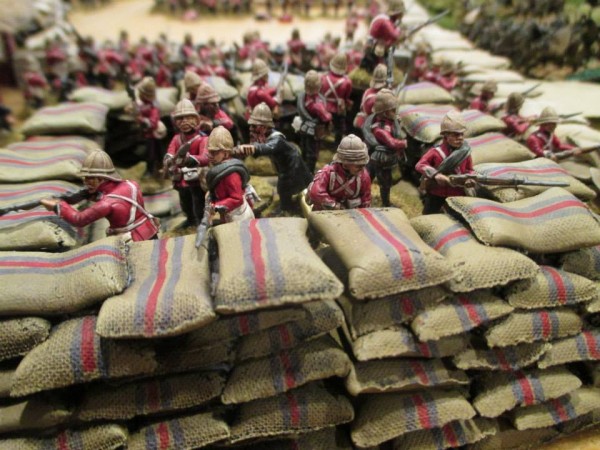
hospital, hospital exterior front, north wall, south wall and kraal. With roughly 30 figures per command, the game ran very smoothly for the British players. Since one of the group wanted to be Bromhead as portrayed by Michael Caine, I insisted that he wear the blue eye liner and speak with a British accent. Throughout the game we heard the command “Hold them!” as uttered by Michael Caine during the movie.

On the Zulu side we had some 800 figures on the table with a ratio of 5:1. So the initial attack on the position was actually 1:1. The numbers of figures on the 8 x 4 table gave a very realistic feel to the game. The British players suddenly realized that they had to kill very large numbers of Zulus to stall their attacks. Their initial bravado gave way to some serious lip biting! Prince Dabulamanzi was supported by four regimental commanders. Zulu commanders had to declare orders and roll to see if commands rolls were successful.
The Battle
The Zulu warriors fought their way into the hospital and into the area in front of the hospital with ferocity and tenacity while other regiments attacked the front of the hospital. Two other Zulu Ibuthos worked their way through the bush below the north wall to launch attacks on the kraal. As the Brits withdrew under pressure from the Zulus surging over the Hospital barricade, the redoubt was filled with soldiers firing down on every warband which appeared out of the bush. Time was against the Zulus since they reached the 32 warbands eliminated criterion at the end of the British tenth turn.

The recycling of warbands reflected the constant attacks made throughout the fight in the actual battle. In the play testing the British losses were around 40 each time. In the multiplayer game the British losses were only 21, only 4 more than the actual battle. The Zulus can win if they hold off their attacks until they can challenge the north wall along its entire length by approaching the north wall under cover of the brush in front of the position. The odds are against the Brits being able the win every shooting die roll in that situation.

The additional rules worked really well and provided a satisfying and enjoyable game that could be played in an evening or afternoon, even with ten players around the table. The scenario is ideal for club or convention play. My group is ready for the rematch with players swapping roles. Our Michael Caine impersonator was awarded the prize for best sportsmanship by the other players and presented with a small diorama to commemorate the day.


