Riot Quest: Painting Orsus the Chained
by Charles Foster III
Orsus the Chained
After surviving a little bit of COVID, we’re back with another Insider tackling the ACTUAL important matters in life… like, how to paint this and what color should that be?
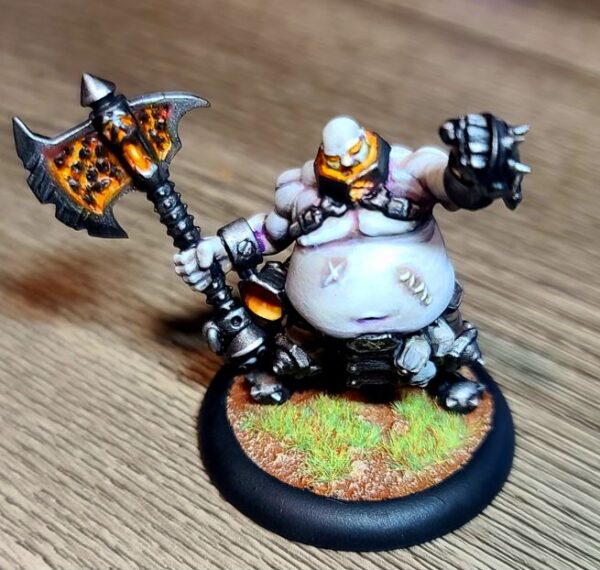
This week, I’ll be tackling Orsus the Chained as we continue to paint up the entire Riot Quest line in alternate paint schemes. Coming up with an alternate scheme was difficult for this guy; I had what felt like 100 ideas for Orsus before finally deciding on one. While looking through some of my favorite video game villains for inspiration, I came across Blackhand from World of Warcraft and figured if we pulled it off, this could be a great paint scheme for everyone’s favorite Butcher. So, let’s grab some paint and get unchained, shall we?
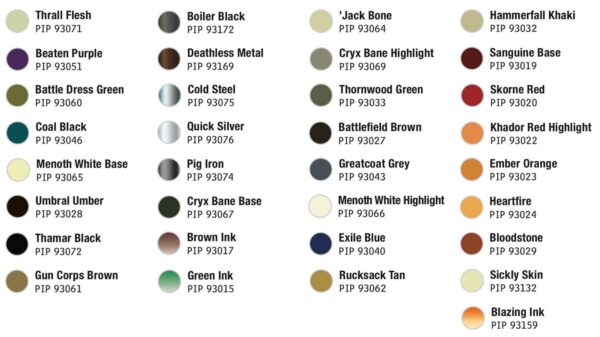
Colors Used
Skin
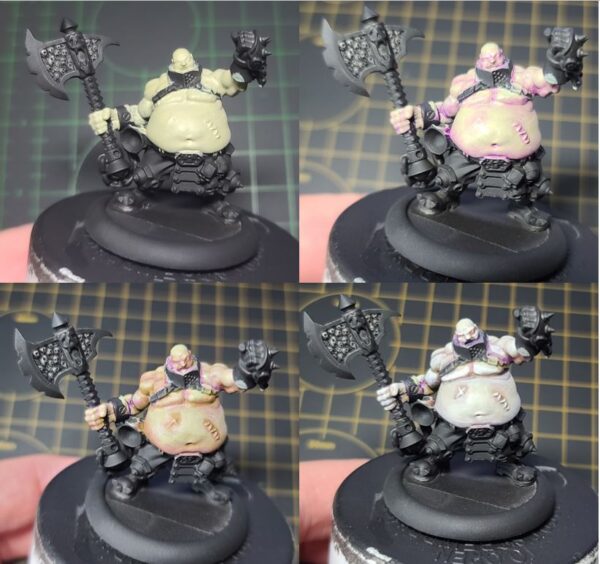
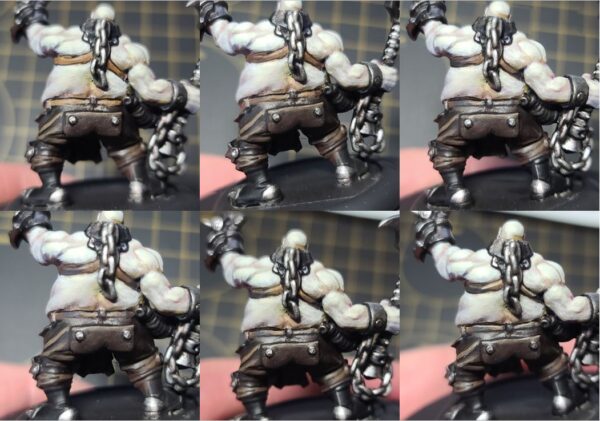
Step 1) I start off the skin by basecoating the area in a solid coat of Thrall Flesh.
Step 2) For the first layer of shade, I mix Beaten Purple with Mixing Medium and apply this as a wash to the flesh.
Step 3) Next, I want to offset the purple, so I apply a wash of Battledress Green mixed with Mixing Medium. The Mixing Medium will help control where the color goes for this part.
Step 4) I apply a final shade with a mixture of Beaten Purple and Coal Black.
Step 5) Finally, I highlight this color with Sickly Skin.
Pants
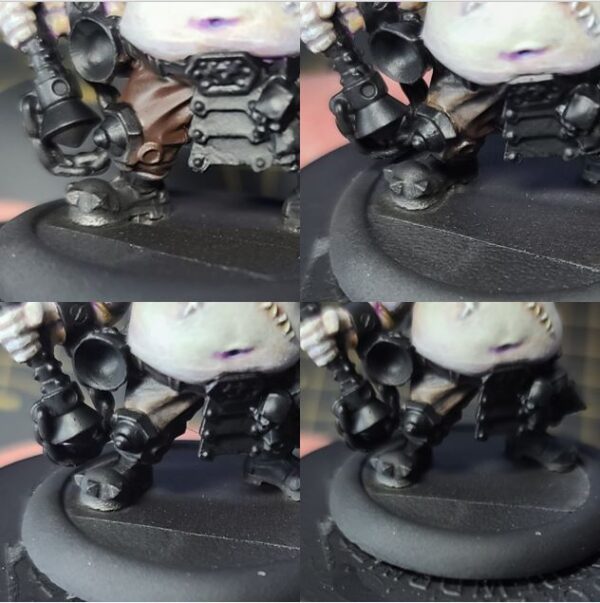
Step 1) For the pants, let’s use Umbral Umber to get a nice even basecoat.
Step 2) Blend in a little shade using some Thamar Black.
Step 3) To create our first highlight on the pants, mix Umbral Umber with Gun Corps Brown.
Step 4) Next, mix in a few drops of Menoth White Base to the previous mixture and apply as the final highlight on the pants.
Armor
Step 1) To re-create the dark armor, I’m going with a 75/25 mix of Boiler Black and Deathless Metal.
Step 2) I shade the previous color with a little Thamar Black.
Step 3) Then, I add a few drops Cold Steel to the previous mix and apply it in very small amounts as the first highlight.
Step 4) To add a few bits where the armor has been “chipped away,” I’ll place a few edge highlights with Quick Silver.
Silver Metals
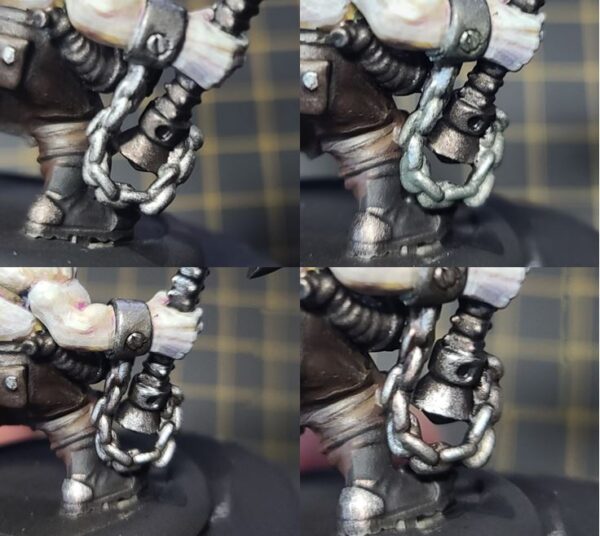
Step 1) First, lay down a nice basecoat to the area with multiple layers of Pig Iron to get solid coverage.
Step 2) Use a Cryx Bane Base get a nice first shade on the metal.
Step 3) Mix some Brown Ink with half as much Green Ink and a small dot of Thamar Black to get a deep shade mixture. Apply this as a second shade.
Step 4) Next, apply Cold Steel for a first round of highlights to the metallic areas.
Step 5) Once the rest of the model has been painted and protected with matte sealant, apply some final highlights of Quick Silver. Note that a small amount will go a long way on this step.
Skulls
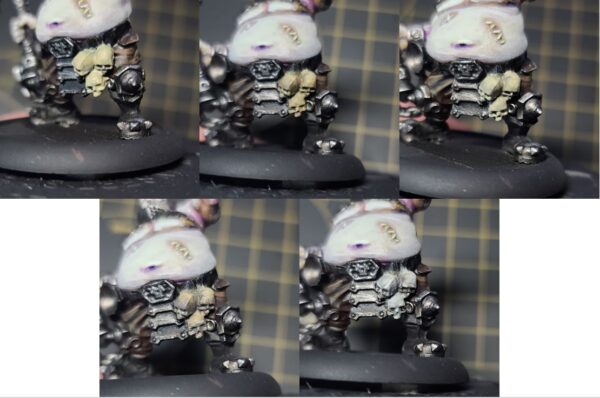
Step 1) Time to get our skulls on. Start with a solid basecoat of ’Jack Bone.
Step 2) Shade this area with a wash of Cryx Bane Highlight. Simply apply water to thin out the paint so it’s nearly translucent.
Step 3) Apply a second layer of shading with a mixture of Gun Corps Brown and Thornwood Green.
Step 4) Really get that bone look by darkening up the skulls with a final shade using a mixture of Battlefield Brown and Greatcoat Grey.
Step 5) Finally, apply sparse highlights with a mixture of Menoth White Highlight and ’Jack Bone.
Shades of Leather
Step 1) I start the leather with a nice basecoat of the areas in Gun Corps Brown.
Step 2) Next, I shade the area using a little two-brush blending with Battlefield Brown to create some shadows.
Step 3) I’ll add a second shade by adding Exile Blue to the Battlefield Brown from the previous step. Here, I gotta be careful not to go overboard when mixing in Exile Blue, as it can easily overpower the Battlefield Brown and shift the color tone to a heavy blue, which is not the goal.
Step 4) For a final shade, I add a few drops of Thamar Black to the previous mixture and apply this updated blend to the deepest areas of the leather.
Step 5) If you manage to go overboard (like I always do) in the shading steps, simply use a little water to thin out some Gun Corps Brown and then go back over your areas to reclaim some of that upper color.
Step 6) I start my highlights by mixing Rucksack Tan and Gun Corps Brown in a 2:3 ratio and applying this as the first highlight.
Step 7) For the last highlight, I use some Hammerfall Khaki and pick out the highest raised edges.
Step 8) Now, you can leave these areas like they are or, if you want to create some difference in colors, you can shift their tone by thinning out some glazes using Brown Ink or Battledress Green. For my model, I chose to simply thin Battledress Green with water and apply in even coats without letting too much of the paint build up in an area. If you do this, be sure to allow each layer to completely dry before you apply the next coat.
Glow on Axe, Eyes, and Armor
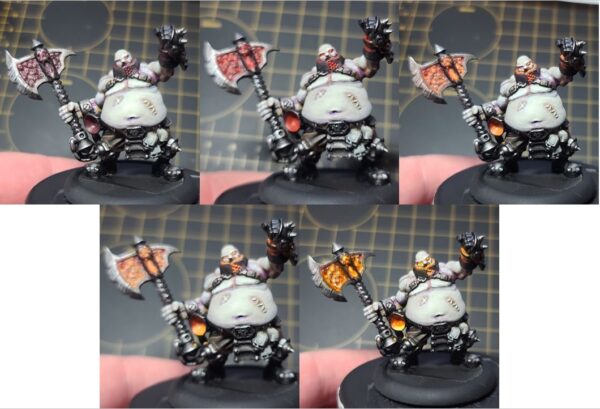
Step 1) Apply a little Sanguine Base to any area you would like to get the fiery glow on.
Step 2) We are going to start moving inward on the area using Skorne Red but leaving some Sanguine Base from the previous step showing.
Step 3) Repeat the same process and move inward, applying Khador Red Highlight
Step 4) To keep increasing the look of the heat, apply Ember Orange in the center of the previous step.
Step 5) Add a little Heartfire to continue highlighting the brighter flame areas.
Step 6) Finally, apply a very thin amount of Menoth White Highlight to the center areas (where they would be the hottest).
Step 7) To get that fresh kinda lava glow and bring the layers together, I thinned a little Blazing Ink and applied it as a glaze to the area. Now we’re cooking, all the puns intended!
Basing
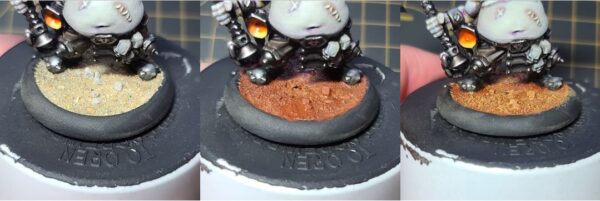
Step 1) Only one thing left to do: drop some basing on. Add in sand and ballast with Elmer’s white glue and let it dry completely.
Step 2) Water down a bit of Bloodstone and apply it across the base material to let it soak in. In most cases, I apply a bit of hair dryer to help this process along.
Step 3) Once it’s dry, I drybrush on a little bit of Rucksack Tan.
Step 4) For the final highlight, drybrush on a thin coat of Menoth White Base.
Step 5) Glue on some static grass.
Oh yeah—this Orsus is ready to jump into my next game of Riot Quest and claim some souls! Next time, join me when I take on another model from the Riot—
(door to my office opens)
Oh hey, Matt, what’s going on? Oh… Whatcha got there? Is that some Storm Legion!?… Wait, is that Orgoth, too!?!? Gen Con!? But that’s only a few weeks away! But yeah, I’m sure we can pull it off.
So, wait. Where was I? Oh right.
Join me next time when I do a quick introduction and…
…throw some paint on Orgoth and Storm Legion!
The post Riot Quest: Painting Orsus the Chained appeared first on Privateer Press.

