
Riot Quest: Painting Flugwug
by Charles Foster III
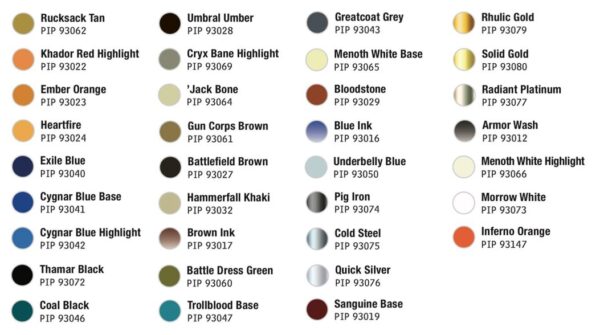
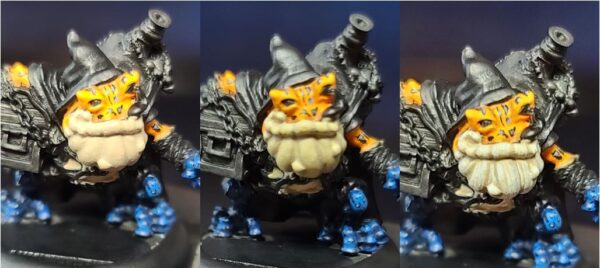
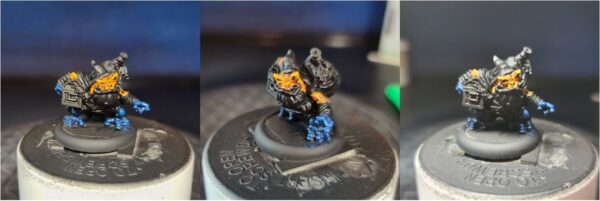
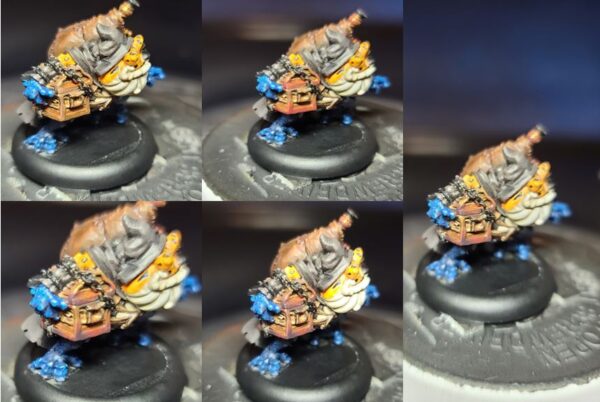
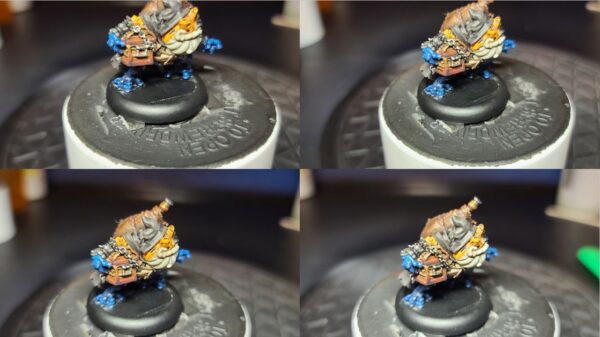
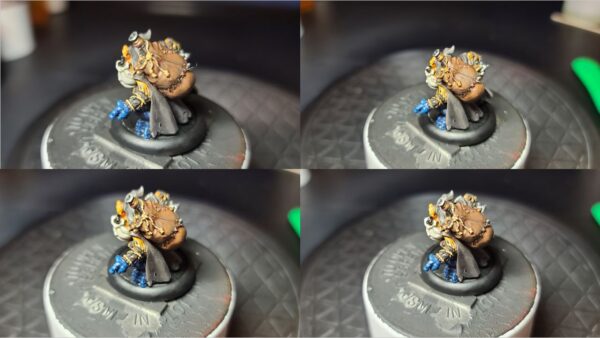
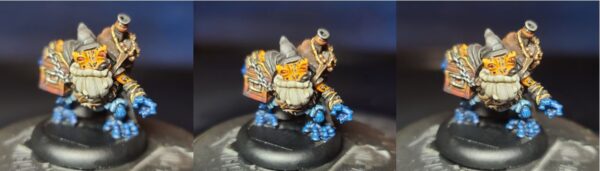
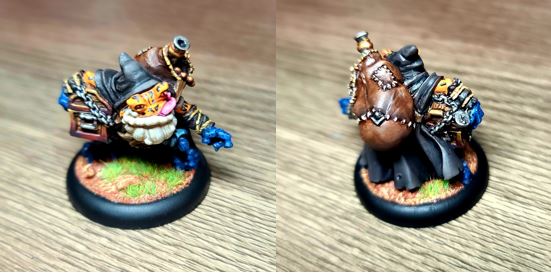
Frog time! I’ve been very excited to get some paint on my Flugwug for a while now, and it’s finally time. In this week’s Insider, I will be tackling the master of treasure thieving itself, Flugwug the Filcher. With so many treasures to loot, there is no time to waste, so let’s get going!
Colors Used
Prep and Prime
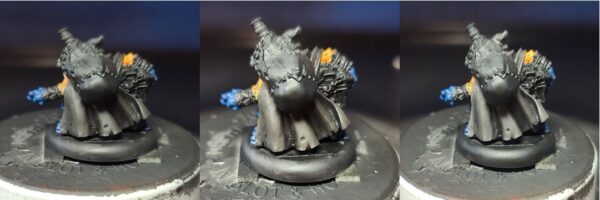
For this model, I’m going for the tried-and-true black primer, but I’ll be skipping all airbrushing on this one since a lot of it is detail that would be hard to work on with an airbrush.
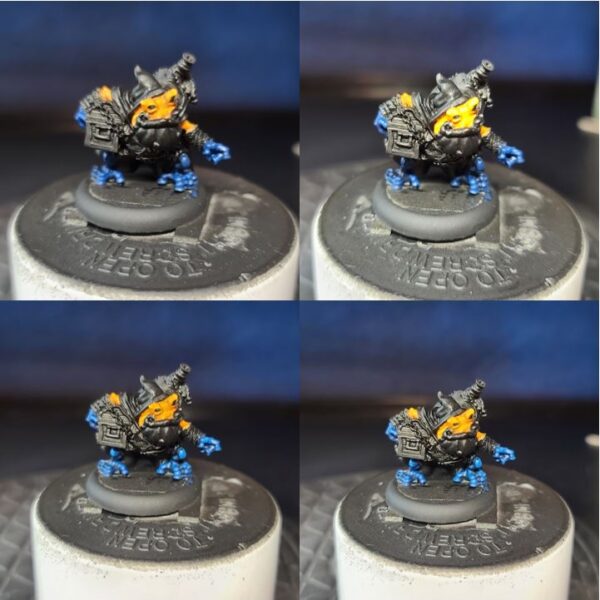
Orange Skin Tones
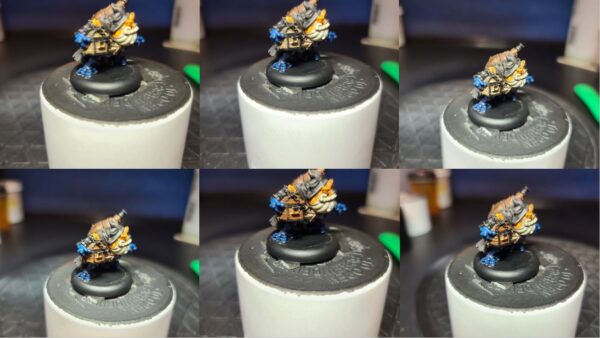
Let’s set the tone of this mini—er, rather, of the skin. I think to make this an alternate scheme, I’m going to have to do something other than green. Looking at some frogs, I’ve decided to go for broke and try for an orange-and-blue Poison Dart Frog.
Step 1) Start with a good layer of Khador Red Highlight. This may take a few layers as we’re going from black to orange. Be patient and use thin layers to get a good even coat.
Step 2) Next, add some shade by mixing up Rucksack Tan and Khador Red Highlight.
Step 3) Finally, add some quick highlights using Ember Orange.
Step 4) For the most raised areas, add Heartfire to get that vibrant orange look.
Blue Skin Tones
Step 1) For the feet and hands, let’s create some separation by dividing the two areas using Cygnar Blue Base. This may look a bit off, but fear not—we will smooth the transition in a few steps.
Step 2) Shade the blue skin tones using Exile Blue.
Step 3) Expand shading by adding a drop of Thamar Black to Exile Blue and applying in the darkest areas.
Step 4) For the first highlight, use Cygnar Blue Highlight.
Step 5) Mix in a little Frostbite to the previous step to add as a final highlight.
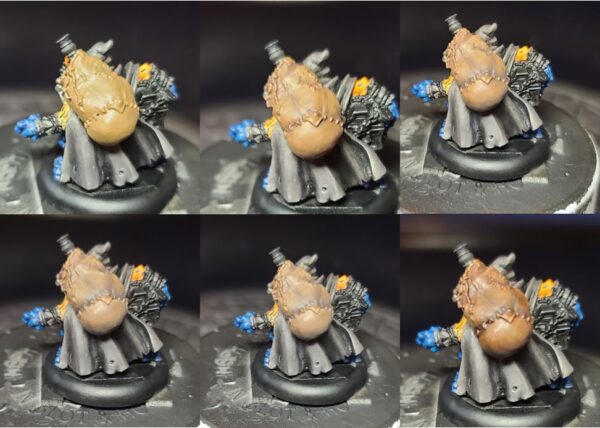
White Underbelly
Step 1) Time to tackle the white underbelly of Flugwug. I will be using some thin layers and glazes to get the desired look. Patience and thin coats here will go a long way. I start off by basecoating the area with Hammerfall Khaki.
Step 2) Next, let’s take Menoth White Base, thin it out with water, and apply it as a glaze. I will keep building these layers up very slowly to get the desired look I’m going for. Be patient and allow for each layer to completely dry before applying the next one. To speed this process up, I keep a hair dryer on hand.
Step 3) I add final edge highlights to the area using Menoth White Highlight.
Black Dots and Lines
Step 1) To divide the two colors, let’s add some dots and lines using Thamar Black.
St3p 2) To contribute a bit of highlight to these areas, add a little Coal Black to the Thamar Black.
Step 3) For a final highlight, mix in some Underbelly Blue to the previous mixture and apply to the higher regions or right along the edges of a dot to add some definition.
Cloak and Cloth on the Arms
Step 1) To hide the bright colors of an orange-and-blue dart Flugwug, we will need a standard-issue rogue cloak of dark colors. Start off with a solid black basecoat by painting the entire area with Thamar Black, even if you used a heavy black primer.
Step 2) For the first highlight, use a mixture of Coal Black and Umbral Umber. Apply this layer cautiously, making sure to leave the pure black shadows where appropriate.
Step 3) Next, add Cryx Bane Highlight to the mixture from the previous step and apply additional highlights.
Step 4) For the final highlight, add some ’Jack Bone to the previous mixture and apply this to the edges and highest raised areas of the cloak.
Leather Pouch
Step 1) There are a lot of leather areas on this model: his satchel on his back straps, his belts, you name it, this guy has it. So, we are going to need a few different styles of leather to bring some definition to the model. We can do this easily by adding different shades through glazes at the end of the process. Let’s go ahead and start by basecoating all of the areas in Gun Corps Brown.
Step 2) I shade the area using a little two-brush blending with Battlefield Brown.
Step 3) Next, I go for a second shade by adding in some Exile Blue to the Battlefield Brown from the previous step. Be careful not to go overboard when mixing, as Exile Blue can easily overpower the Battlefield Brown and shift the color tone to too heavy a blue.
Step 4) Finally, let’s add a few drops of Thamar Black to previous mixture and pick out any cuts or areas of separation to really define the definition.
Step 5) If you’re like me and got a little carried away during the shading, simply reclaim any of the areas using Gun Corps Brown.
Step 6) Add Rucksack Tan and Gun Corps Brown in a 2:3 ratio and apply as the first highlight.
Step 7) Finally, I add the last highlight using Hammerfall Khaki.
Step 8) You can leave these areas like they are, or if you want to create some difference in colors, you can shift their tone by thinning out some glazes using Brown Ink or Battledress Green. Simply thin with water and apply in even coats without letting too much of the paint build up in an area. Be patient and use multiple coats until you get the look you desire.
Treasure Chest Wood
With all of the leather taken care of, let’s knock out the wood grain on the treasure chest.
Step 1) Lay down a nice even basecoat of Gun Corps Brown.
Step 2) Using Menoth White Base, paint texture lines.
Step 3) To really add definition, add lines with Umbral Umber. Be sure not to go over any of the areas of Menoth White Base and to leave some areas of Gun Corps Brown showing.
Step 4) Mix Bloodstone, a drop of Yellow Ink, and Brown Ink in a 3:1:2 ratio. With this color, add a glaze across the woodgrain to make the colors pop.
Step 5) To bring the woodgrain to the best level, add a single, if not even a half, drop of Blue Ink to the previous color.
Step 6) Using a little Thamar Black, pick out any separation in the wood planks or blacklining needed to get a good definition on the wood.
Pants—Denim
Step 1) This frog has pants! Pants, I say! For this, I will steal a page out of the Cygnar MkII book and paint them in some denim. I start with a basecoat of Trollblood Base mixed with Greatcoat Grey.
Step 2) Next, I add Exile Blue to the basecoat mixture from the previous step and apply it as a shade.
Step 3) I add a final shade by adding Coal Black to the mixture and applying this to the deepest areas.
Step 4) To highlight, I start with a mix of the base color used in step 1 and add a little Underbelly Blue.
Step 5) For the final highlights, I use straight Underbelly Blue.
Gold Metals
Step 1) For the gold areas, begin by applying multiple thin layers of Rhulic Gold. Take your time and let these layers build up into a solid even coat.
Step 2) For the first shade, take Sanguine Base, Brown Ink, and a single drop of Mixing Medium and thin this with water to create a shade using a wash.
Step 3) Next add Exile Blue and Umbral Umber to the previous mixture and apply a second layer of shadows to the area.
Step 4) Use Solid Gold for the first highlight.
Step 5) to get the metal to its shiny desired look, mix Radiant Platinum and Solid Gold and apply to the highest areas and edges.
Step 6) After the model is sealed, repeat the previous step to get reclaim some of the shininess lost from the Dullcote.
Silver Metals
Step 1) On to the silver metals of the model! Start with a solid basecoat of Pig Iron.
Step 2) Next, mix Greatcoat Grey and Armor Wash with a small amount of water and use this to shade the steel.
Step 3) For a final shade, add Exile Blue and Umbral Umber to the previous mixture and apply it to the deepest areas.
Step 4) Add a highlight layer using some Cold Steel.
Step 5) For a final highlight, apply Quick Silver to the edges and raised areas.
Step 6) After the model is sealed, repeat the previous step to reclaim some of the shininess lost from the Dullcote.
Ropes
Step 1) Use Rucksack Tan to apply a solid basecoat.
Step 2) Next, thin out Brown Ink with some water and apply it as a wash.
Step 3) Once the model is dry, reclaim some of the upper areas of the rope using Rucksack Tan. Be sure to leave some of the darker areas showing from the previous step.
Step 4) Add some final highlights applying Menoth White Base to the most raised areas to make the ropes stand out.
Eyes
Step 1) I went back and forth on the eyes. Traditionally, most of the images I could find of poison dart frogs have blacked out eyes. I think to make this one stand out a bit, I’ll go for red eyes, like a tree frog. Start by using Thamar Black on the eyes.
Step 2) Next, using Skorne Red, let’s build out a cornea, making sure to leave some Thamar Black from the previous step.
Step 3) Highlight the eye using Infernal Orange.
Step 4) Add a pupil by placing a dot of Thamar Black.
Step 5) Using Morrow White, add a drop to the upper portion of the pupil to give it that reflective look.
Basing
Step 1) Add in some sand and ballast with some Elmer’s white glue and let it dry completely.
Step 2) Water down a little bit of Bloodstone and apply across the base material to let it soak in.
Step 3) Once dry, drybrush on a little bit of Rucksack Tan.
Step 4) Drybrush on one final highlight of Menoth White Base.
Step 5) Glue on some static grass.
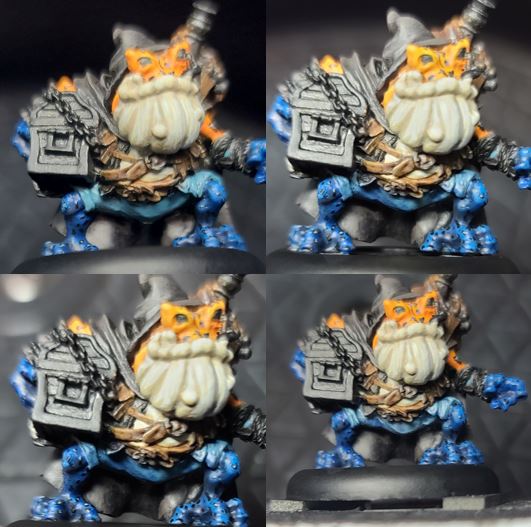
There you have it! A poisonous dart frog ready to plunder all the loot! Show me how you painted yours by dropping it in the comments section or replying on social media! And join me next time when I ask a Wolf with a No Name, What time is it?
The post Riot Quest: Painting Flugwug appeared first on Privateer Press.