
WARMACHINE MKIV: Painting Storm Legion
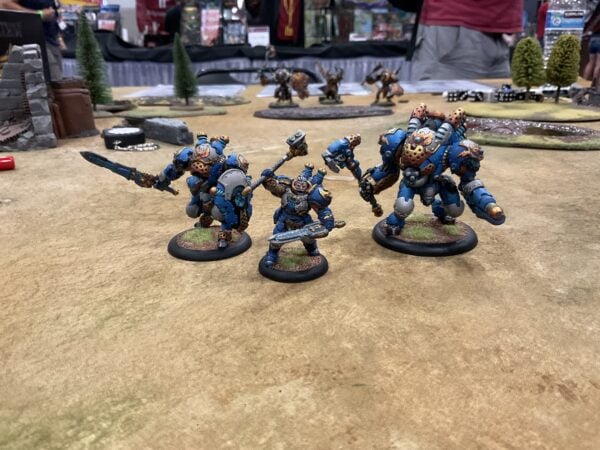
Well, another Gen Con is officially in the books. And as the roar of the crowd fades to the final few, I want to extend a huge thank you to everyone who came out, said hi, hung out the booth, or grabbed a MKIV Preview Battlegroup Box. It was absolutely great meeting everyone and chatting it up about the upcoming launch of MKIV. I could talk for hours about all of the awesome people we met and got to hang out with, and I was very happy to receive all the compliments about the paint jobs of the demo models; it was very humbling, and so I thank you again. But let’s remember: I only showed everyone how to paint one of the two sets so far. Since we’ve already covered the Orgoth, how about we get after the Cygnar?
This week we will be taking a look at how I painted up the demo models of the Storm Legion battlegroup.
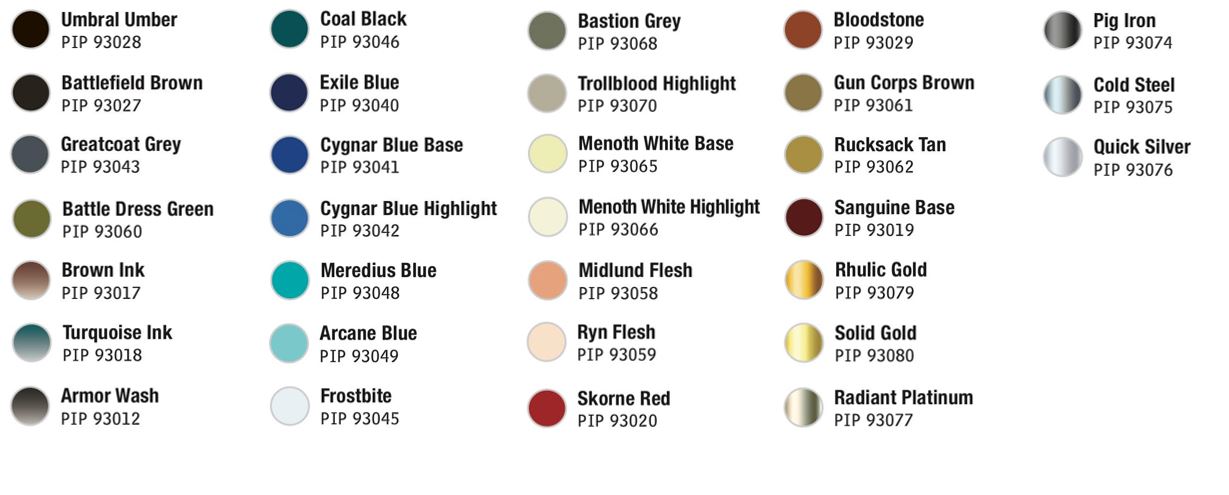
Colors Used
Steel
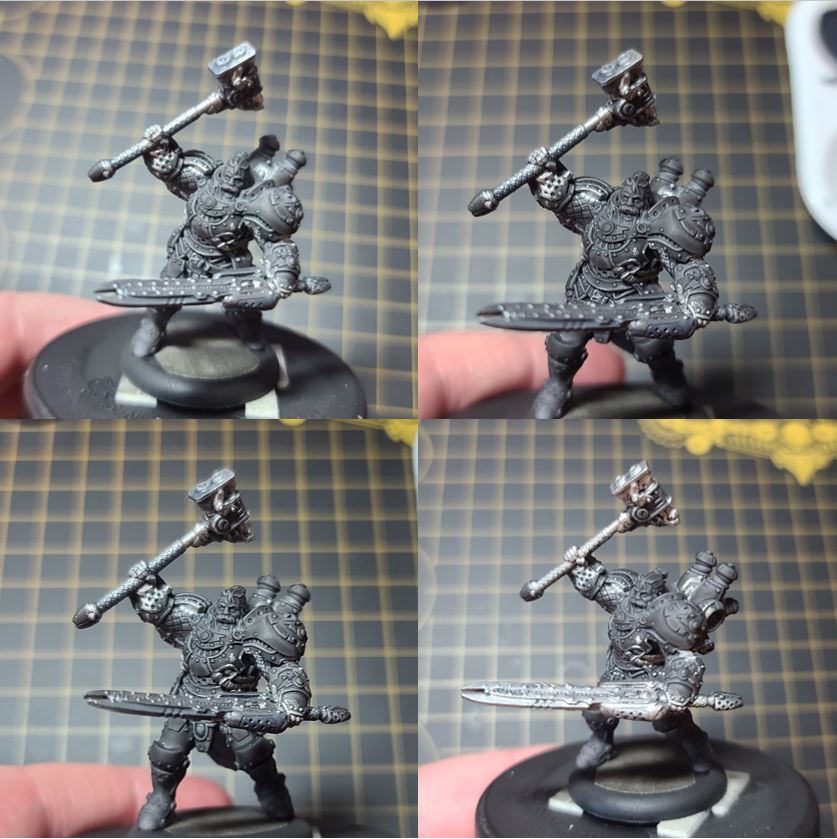
Step 1) I start off by working on the steel colors and lay down a solid basecoat of Pig Iron.
Step 2) To begin shading the steel area, I make a wash of Greatcoat Grey and Armor Wash mixed in a 50:50 ratio.
Step 3) For the final shade, I add a little Exile Blue and Umbral Umber to the previous mixture and apply to the darkest areas of shadow.
Step 4) For highlighting, I take Cold Steel and apply it to the upper and most raised of edges.
Step 5) Finally, after the model has been sealed with matte sealant, I return to the silver areas for a final highlight of Quick Silver.
Gold

Step 1) Next up, let’s go ahead get some golds on the models. Start by getting a good solid basecoat of Rhulic Gold.
Step 2) For shading, let’s start by mixing Sanguine Base and Brown Ink with a single drop of Mixing Medium. Add in a little bit of water to create a wash and apply this as your first shade. I’ve found that making multiple passes of thin amounts allows me to get the control and placement I want.
Step 3) Next, let’s get a final shade by adding in Exile Blue and Umbral Umber to the previous mixture. Apply this color as a second layer of shading to the areas that need to be the darkest.
Step 4) Next, grab some Solid Gold and use this as the first layer of highlighting.
Step 5). After the model has been sealed used a matte sealant, return to the area and apply a mix of Radiant Platinum and Solid Gold for the final highlight.
Face
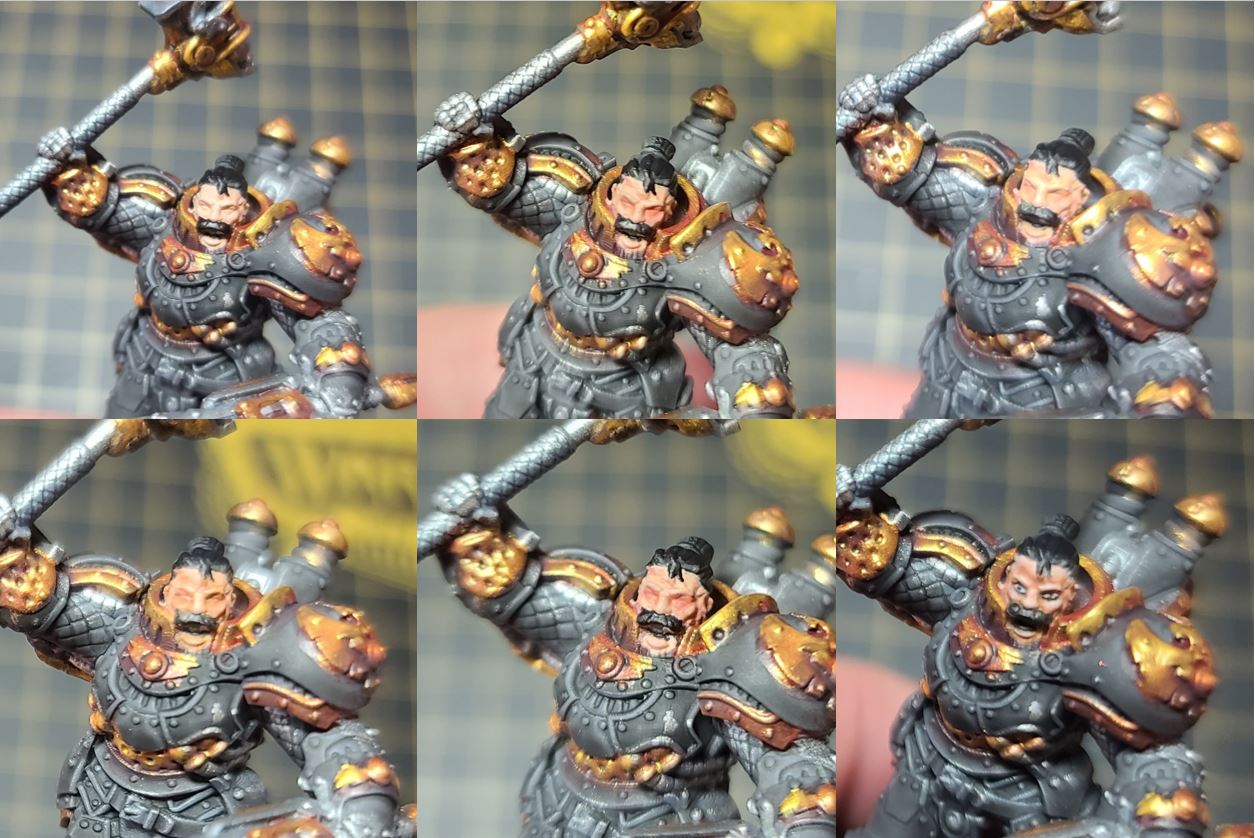
Step 1) For the face, start off with a nice basecoat of Midlund Flesh. Take your time and use thin coats, allowing each to dry fully before adding the next layer. Have patience until you have a solid coat with no patchiness.
Step 2) Start by shading the face with a thin coat of Midlund Flesh mixed with Skorne Red.
Step 3) To balance out this skin tone, apply a second shade to the same area using a mixture of Midlund Flesh and Battledress Green.
Step 4) To deepen the shade, add a final highlight of Skorne Red and Battledress Green. Apply this only to the extreme shadows on the face.
Step 5) To highlight, mix Midlund Flesh and Ryn Flesh and use it sparingly on raised areas to define the skin tones on Major Anson Wolfe.
Blue
Step 1) Let’s get some blue on that armor. Start by basecoating the areas using Cygnar Blue Base.
Step 2) Begin to define the shadows the armor by using Exile Blue as your first shade.
Step 3) To darken the shadows, mix Exile Blue with Battlefield Brown and apply as the second shade. Make sure Exile Blue dominates this mixture, as too much Battlefield Brown can make the model dirty.
Step 4) Begin highlighting the blue areas with a little Cygnar Blue Highlight.
Step 4) To really get that definition on the Cygnar armor, apply a final highlight with a mixture of Cygnar Blue Highlight and Frostbite. Apply this to the highest areas and raised edges on the model.
White

Step 1) On to the white armor plates! Start by laying down a solid basecoat of Trollblood Highlight.
Step 2) Shade this area using Bastion Grey. This will be the only shade for this area, so ensure you have a look that you’re happy with before moving on to the next step.
Step 3) Highlight the white by using a mixture of Trollblood Highlight and Menoth White Highlight.
Step 4) for the final highlights, thin down some Menoth White Highlight and apply some sparingly to the model.
Tan

Step 1) A common color to find on Cygnar warcaster and troop models is the tan found on their fatigues. Major Anson Wolfe is no exception. Start the tan color with a basecoat of Rucksack Tan.
Step 2) For the first shade, I begin by shading the area using Gun Corps Brown.
Step 3) Add a second layer of shading using Battlefield Brown to really define the shadows.
Step 4) For highlighting, I start by mixing Rucksack Tan with a little Menoth White Base.
Step 5) Last, simply add some Menoth White Highlight to the previous mixture for the final highlights. Apply this to any upper or raised areas to really define the colors of the tan.
Arcane Glow

Step 1) Time make some arcane energy on the model. Start, you guessed it, by using Arcane Blue as your basecoat.
Step 2) Using some water thin out some Meredius Blue and apply this as a wash to the previous step.
Step 3) Next, take a few drops of Turquoise Ink and mix with some Coal Black for the next shade. Apply this to the heaviest shadowed areas on the model.
Step 4) To begin highlighting, mix Arcane Blue and Menoth White Highlight and begin applying to the areas in thin layers.
Step 5) Finally, add more Menoth White Highlight to the previous mixture. Carefully apply small dots to the highest raised areas to finalize the look of arcane energy flowing through your model.
Basing

Step 1) To finish off the model, let’s get some basing on it. Add in sand and ballast with Elmer’s white glue and let it dry completely.
Step 2) Water down a bit of Bloodstone and apply across the base material to let it soak in. In most cases, you can apply a bit of hair dryer to help this process along.
Step 3) Once it’s dry, drybrush on a little bit of Rucksack Tan.
Step 4) For the final highlight, drybrush on a thin coat of Menoth White Base.
Step 5) Finally, glue on some static grass.
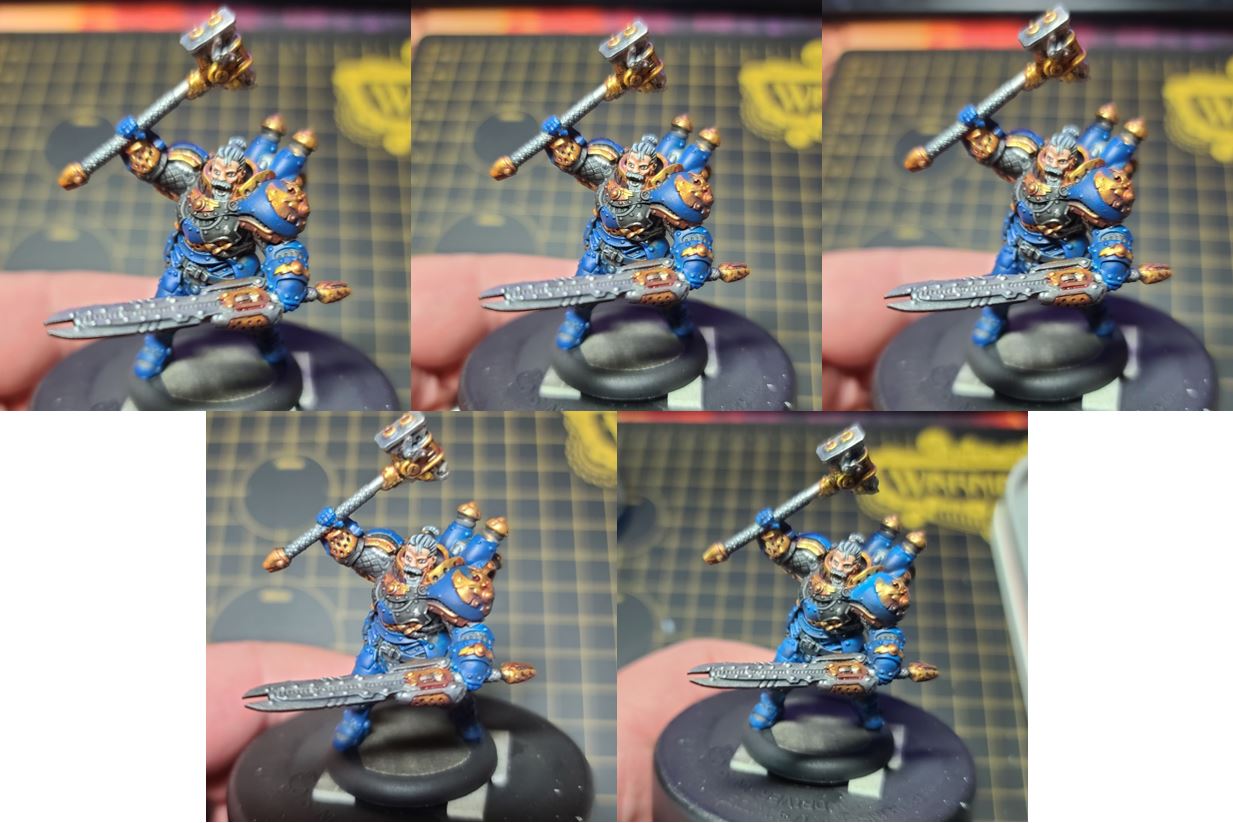
Major Anson Wolfe is looking pretty good! And now, to finish the battlegroup, apply the same painting techniques to the warjacks.

And with that, our Cygnar battlegroup is complete!
I can hardly believe how quickly Gen Con came and went this year. Thank you again to everyone that stopped by and joined. I’ve got quite a few pokers in the fire for some upcoming hobby articles, and I’m hoping to share with you soon. Until next time!
The post WARMACHINE MKIV: Painting Storm Legion appeared first on Privateer Press.