
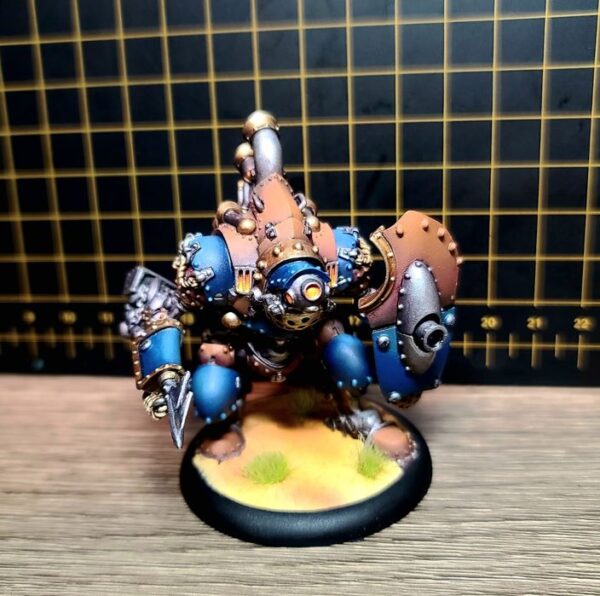
Painting Swabbers
by Charles Foster III
I’m back with another painting Insider! Last time, we raised the colors high and added Captain Bartolo Montador to the painted Legacy Prime warcasters ready for my Privateer MKIV army. This week, it’s time to finally add metal in the arsenal with a few Swabber warjacks. Grab your brushes and paint and let’s climb aboard!
Colors Used
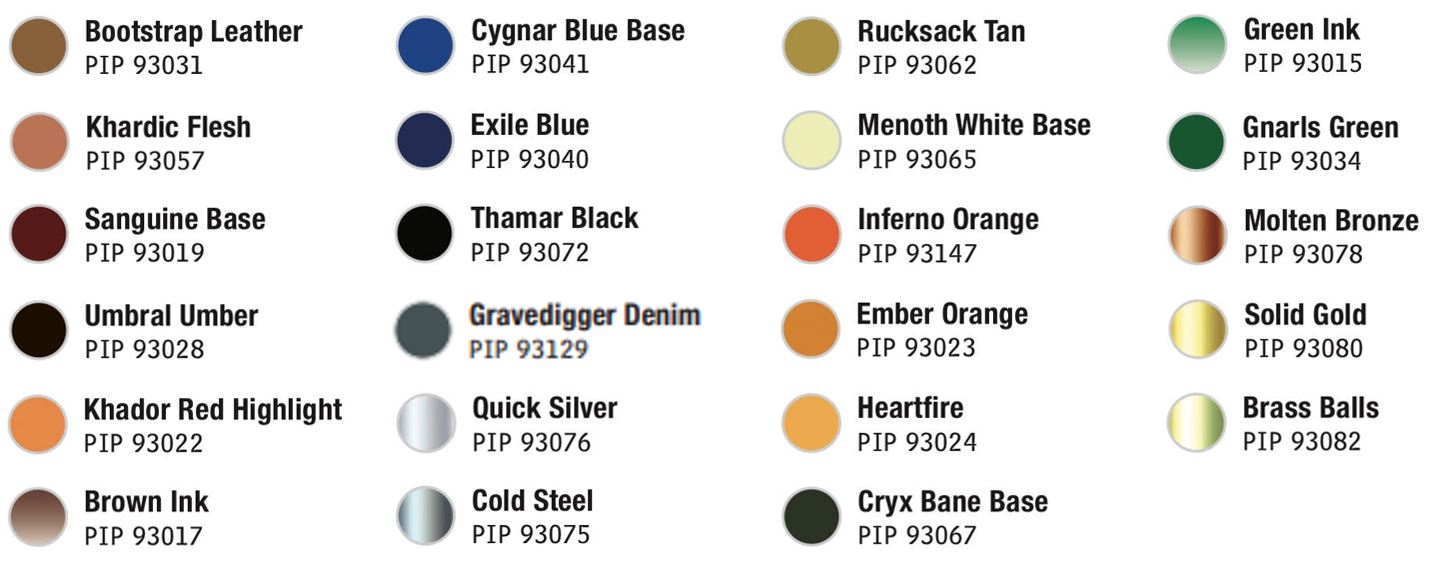
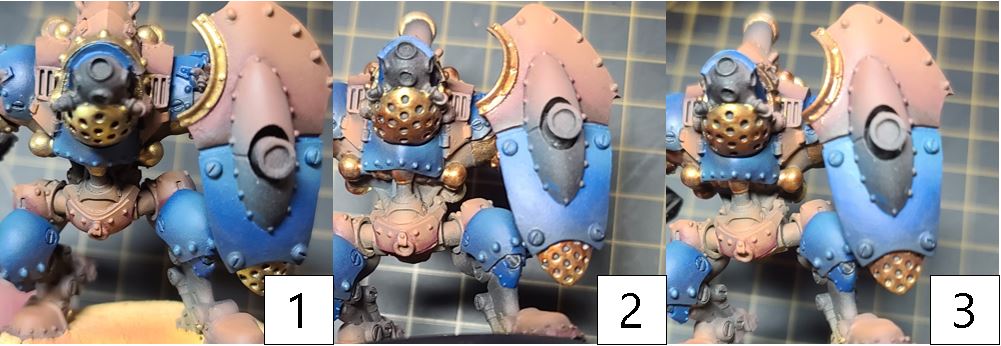
Faded Red Armor
Step 1) With so much still to paint before Warfaire Weekend, I need to speed up the process. I’ll start by airbrushing a basecoat over the areas in a 50/50 mix of Bootstrap Leather/Khardic Flesh. If you don’t have an airbrush on hand, no worries—this can all be painted traditionally. I’m just cutting a corner to save a little time!
Step 2) I blend my first shade into the color with Sanguine Base. This should give the area an almost brick-like color.
Step 3) To balance out the palate and create more depth, I put a final shade of Umbral Umber in the deepest areas.
Step 4) I create my first highlight by mixing the base mixture of Bootstrap Leather/Khardic Flesh with a few drops of Khador Red Highlight.
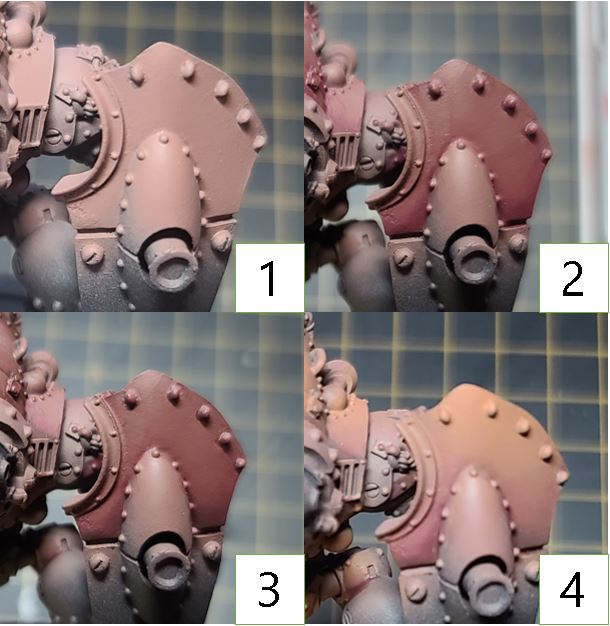
Blues
Step 1) To get the blue armor going, grab Cygnar Blue Base and apply this as your basecoat.
Step 2) Shade your basecoat by blending Exile Blue into the recesses and areas that provide definition.
Step 3) For the final shade, use Thamar Black and apply this to the deepest recesses and areas with the most extreme shading.
Step 4) To highlight your armor, use a little Gravedigger Denim and blend it over the top.
Brass
Step 1) For the metal yellows on our model, a good brass tone would probably be the best. We start by applying a solid basecoat of Brass Balls.
Step 2) For our first shade, thin out Molten Bronze with a little bit of water and apply this to the Brass Balls. Make sure to leave visibility to the basecoat from the previous step.
Step 3) For the final shade on our brass, mix Molten Bronze with Brown Ink and a drop of Gnarls Green and apply this to the darkest areas.
Step 4) After we have sealed the model, return to the area to apply our highlight. Mix Cold Steel and Solid Gold and apply this to the highest raised areas and edges.
Silver Metals
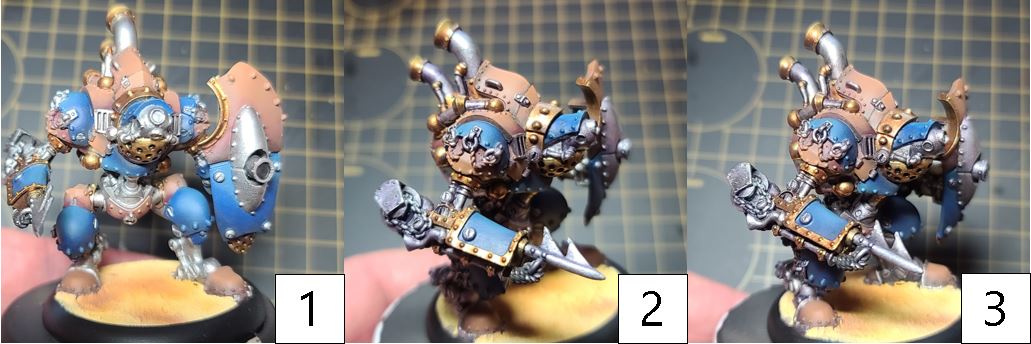
Step 1) To get the look of steel for the warjacks, I start by basecoating the model in Cold Steel, being sure to get a nice solid and even basecoat.
Step 2) I shade the metal with a mixture of Brown Ink and Exile Blue.
Step 3) I apply a second layer of shading using a mixture of Green Ink and Brown Ink with a small dot of Cryx Bane Base. I apply this color to the deepest recesses of the area.
Step4) Once the model has been sealed with a matte sealant, I return to apply final highlights using Quick Silver on the highest areas and raised edges.
Rope
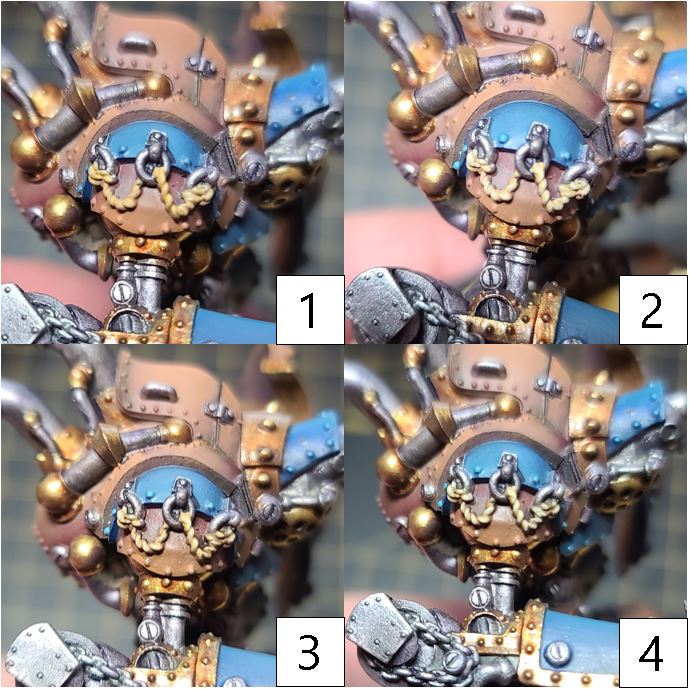
Step 1) Next up, let’s tackle the ropes on the model. Start by basecoating the areas in Rucksack Tan.
Step 2) Highlight the previous step with a layer of Menoth White Base.
Step 3) Create a nice wash for the area using water and thinned-out Brown Ink. Apply this over the ropes in thin layers.
Step 4) Finally, bring it all back together with a final layer of Menoth White Base.
Glow
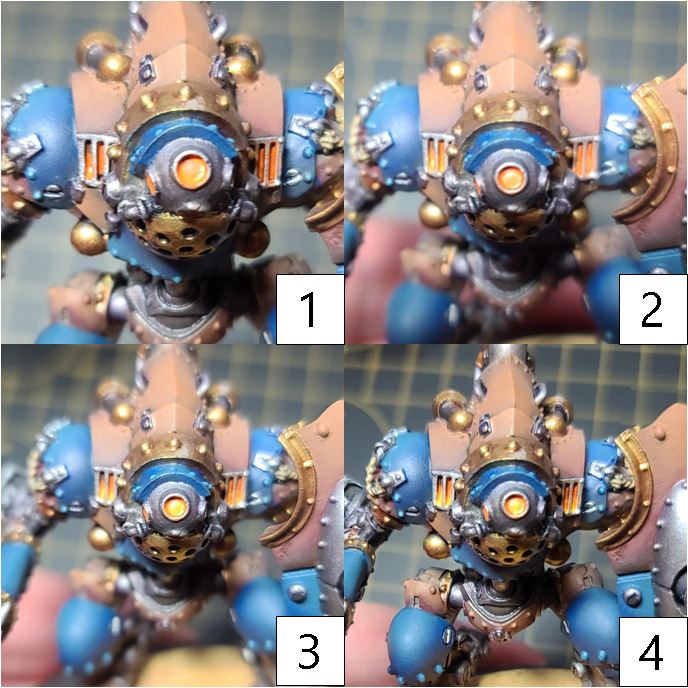
Step 1) Time to wrap it all up with a nice bright orange glow. I start my glow off by basecoating any area of glow with Inferno Orange.
Step 2) I build the layer up by adding a highlight of Khador Red Highlight, being sure to leave small amounts of the previous steps showing through to give the nice transition I’m looking for as I build up the colors.
Step 3) For my next highlight, I use Ember Orange.
Step 4) To really make it glow in the center, I use a final highlight of Heartfire.

With the glow now complete, the Swabber be now ready to take the table by storm!
There is still so much left to paint, and Warfaire Weekend is coming up fast, so with time limited, let me know in the poll below what you want to see for my next painting Insider:
Poll
Click here to vote if error message appears below.
See you next time!
The post Painting Swabbers appeared first on Privateer Press.