
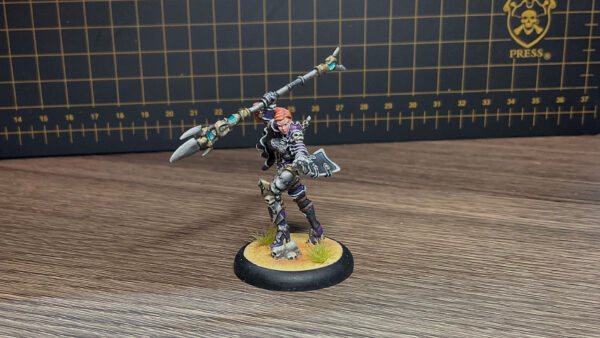
Painting Fiona the Black
The day of this writing is August 29, 2022, which means there are only 66 days until Warfaire Weekend (NOVEMBER 4-6, 2022). Sixty-six days (57 now)! But because we got to do a little of the new hotness last week by painting the Orgoth warcaster Horruskh, the Thousand Wraths, I thought this week I would turn my attention to my legacy prime army: The Talion Charter. Pirates have always been one of those armies where I say, Oh, sure, I’ll paint this up next. Sadly, though, it just kept getting pushed back and back in my queue of projects. No more, though: today, we start down the road to a painted MK4 Prime Legacy army and, at long last, some painted pirates. Warfaire Weekend is coming! So, for this insider, I’ll be focusing on my first pirate warcaster, Fiona the Black. Let’s grab some brushes and paint and get to it!
Colors Used
Face

Step 1) I decide to start the model by painting the face. I begin with a basecoat of Midlund Flesh. Use thin coats and let them build up to remove any patchiness.
Step 2) Next, I apply a thin shade of Midlund Flesh mixed with Skorne Red.
Step 3) To help dilute the over-flushed skin tone, I apply another shade of Midlund Flesh mixed with Battledress Green.
Step 4) For a final shade, I mix Skorne Red with Battledress Green to make a dark brown color. Apply this to the deepest shadows sparingly.
Step 5) Lastly, I carefully apply some highlights with a mixture of Midlund Flesh and Ryn Flesh.
Hair
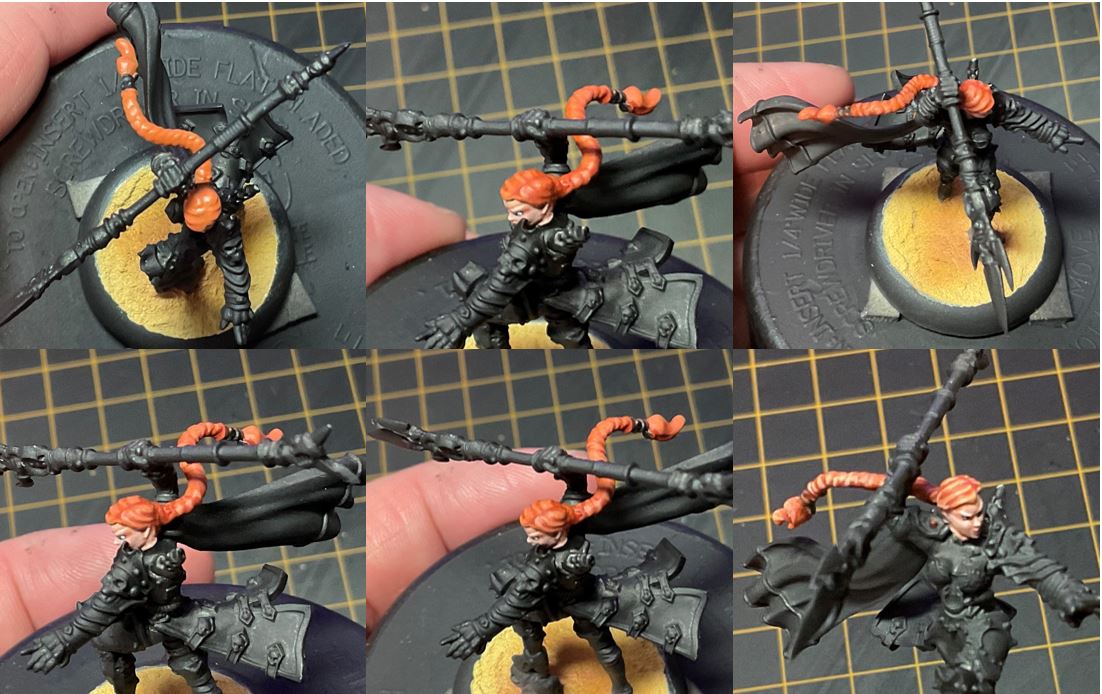
Step 1) Next up, let’s tackle Fiona’s hair. Basecoat the hair in a three-part mixture of Khador Red Highlight, Rucksack Tan, and Menoth White Base.
Step 2) Let’s shade this color by applying a wash made by thinning Bloodstone with a good amount of water.
Step 3) Continue shading further by mixing Skorne Red with Bloodstone and applying as a second shade.
Step 4) To create the first highlight, mix Khador Red Highlight, Rucksack Tan, and Menoth White Base in an even mixture like you did with the basecoat and apply it to the raised portions of the hair.
Step 5) For a second highlight, use Khador Red Highlight mixed with Menoth White Highlight in a 50:50 mix.
Step 6) Finally to really make the hair “pop,” use Ember Orange mixed with Menoth White Highlight as a final highlight on the highest point.
Purple Armor
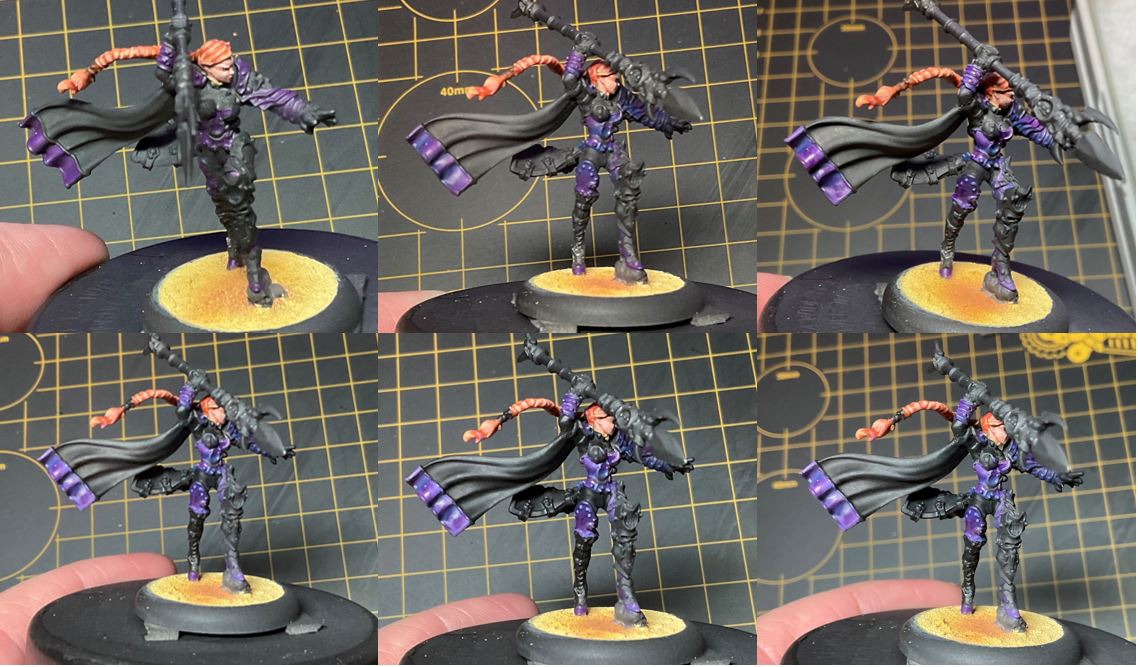
Step 1) Next up: time to tackle the purple armor. I basecoat this area in Beaten Purple.
Step 2) For my first shade, I use a little Bad Bruise and blend it into the shadows.
Step 3) Exile Blue makes a perfect final highlight for the armor, so I apply this color to the deepest shadows.
Step 4) To highlight this area, I mix Beaten Purple and Menoth White Base. My go-to ratio was 2:1 Beaten Purple to Menoth White Base.
Step 5) For my final highlight on the purple armor, I add Menoth White Highlight to previous step’s mixture and apply to the tips of the area.
Black Cloth

Step 1) To ensure a smooth black coating, lay down a basecoat of Thamar Black.
Step 2) Mix Coal Black and Exile Blue with a small amount of Thamar Black to apply your first set of highlights.
Step 3) Next, add a small drop or two of Underbelly Blue to the previous mixture and add a second highlight to your model.
Step 4) Finally, mix in a drop of Frostbite into the previous mixture and carefully apply this as your final highlight to the uppermost edges of the cloth.
Skulls
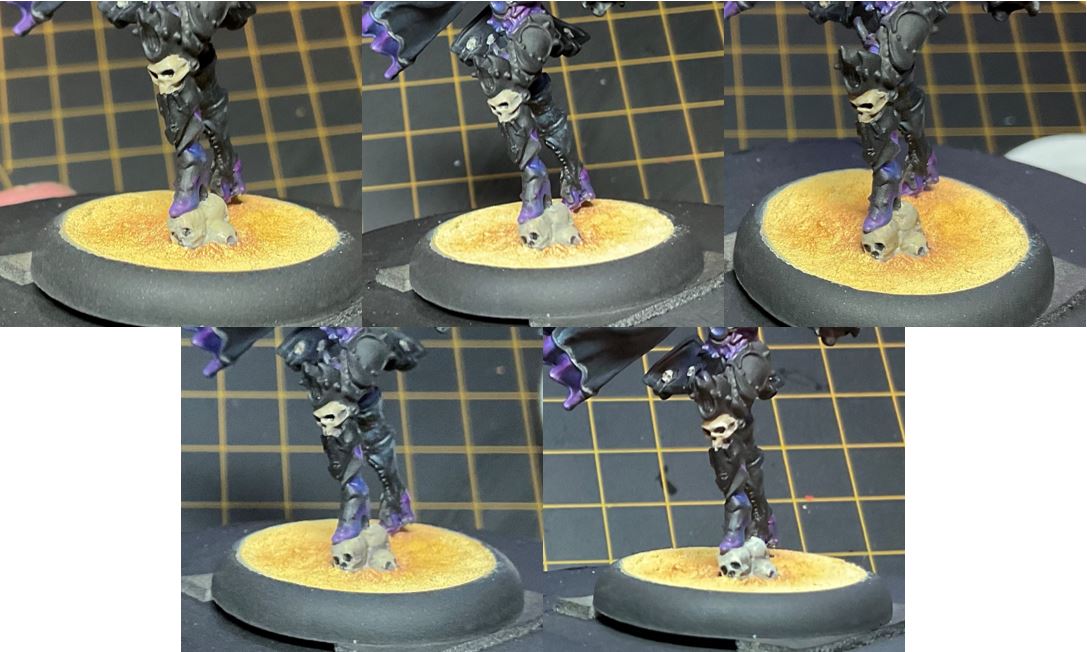
Step 1) With the cloth done, it’s time to tackle the skulls all over the model. To do this, start with a nice basecoat of ’Jack Bone.
Step 2) Continue by shading the area with a wash of Cryx Bane Highlight thinned out using water.
Step 3) Next, apply a second layer of shading with a mixture of Gun Corps Brown and Thornwood Green.
Step 4) For a final shade, mix Battlefield Brown with Greatcoat Grey and apply sparingly to the deepest areas.
Step 5) To highlight the bone, mix Menoth White Highlight and ’Jack Bone together and apply this color to any raised edges or areas you would like to draw attention to.
Leather

Step 1) With the skulls painted, I want to start in on the leather areas. I paint the basecoat on the leather straps with Bootstrap Leather.
Step 2) Next, I mix Brown Ink with Bootstrap Leather and apply this as a wash for my first layer of shading.
Step 3) For my final shade, I use Brown Ink with a small amount of Thamar Black. Apply this to the areas where the leather separates as well as in the deepest shadows.
Step 4) I begin my highlights with a mix of Bootstrap Leather and Beast Hide. Make sure to not to cover up any of the areas just shaded.
Step 5) Finally, to bring it all together, I add ’Jack Bone to the previous mix and use this to add line highlights to the edges of the straps.
Golds
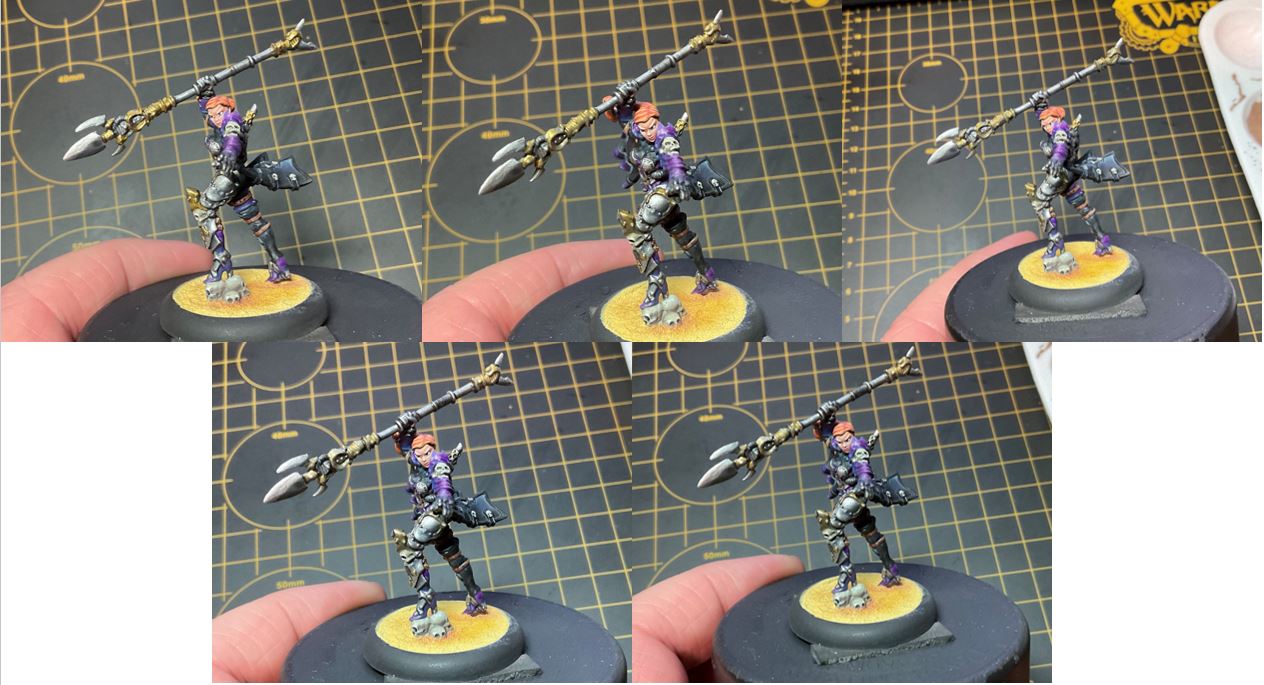
Step 1) Next up, let’s tackle the golds on the model. Start your basecoat with Brass Balls.
Step 2) Apply your first shade over the Brass Balls using Thornwood Green.
Step 3) To darken this color and create more depth, apply a second shade using Cryx Bane Base.
Step 4) At this point, if you need to reclaim any of the areas, you can apply a smooth blend of Brass Balls over the top as a soft highlight.
Step 5) Finish your highlights off by using a mixture of Brass Balls and Radiant Platinum. Apply this color to the highest points and raised edges.
Silver Metals

Step 1) On to the silver metals of Fiona! First, I apply a solid basecoat of Pig Iron.
Step 2) Next, I make a wash using Greatcoat Grey and Armor Wash. I apply this as my first shade to the steel areas.
Step 3) For my final shade, I add Exile Blue and Umbral Umber to the mixture and apply this color to the darkest areas of my shadows.
Step 4) I start my highlights using Cold Steel, making sure to leave a nice smooth transition to the previous layers.
Step 5) Finally, after the model has been sealed with some matte sealant, I will return for one final highlight of Quick Silver.
White Cloth and Armor Outline

Step 1) Next, it’s time to tackle the white trim that goes around the armor and cloth pieces. This was the one step that took the longest and definitely required the most amount of patience. Take a little Trollblood Highlight and mix with Underbelly Blue to apply this color as your basecoat.
Step 2) To lighten the area, take a few drops of Menoth White Highlight and add it to the mixture from the previous step. Apply this as your first layer of highlights. Make sure to leave areas showing from the color below.
Step 3) Next, add a drop of Morrow White Highlight to the mix and proceed with the next layer of highlights.
Step 4) Finally, to get that stark white, use Morrow White to highlight the highest raised areas and edges.
Arcane Glow
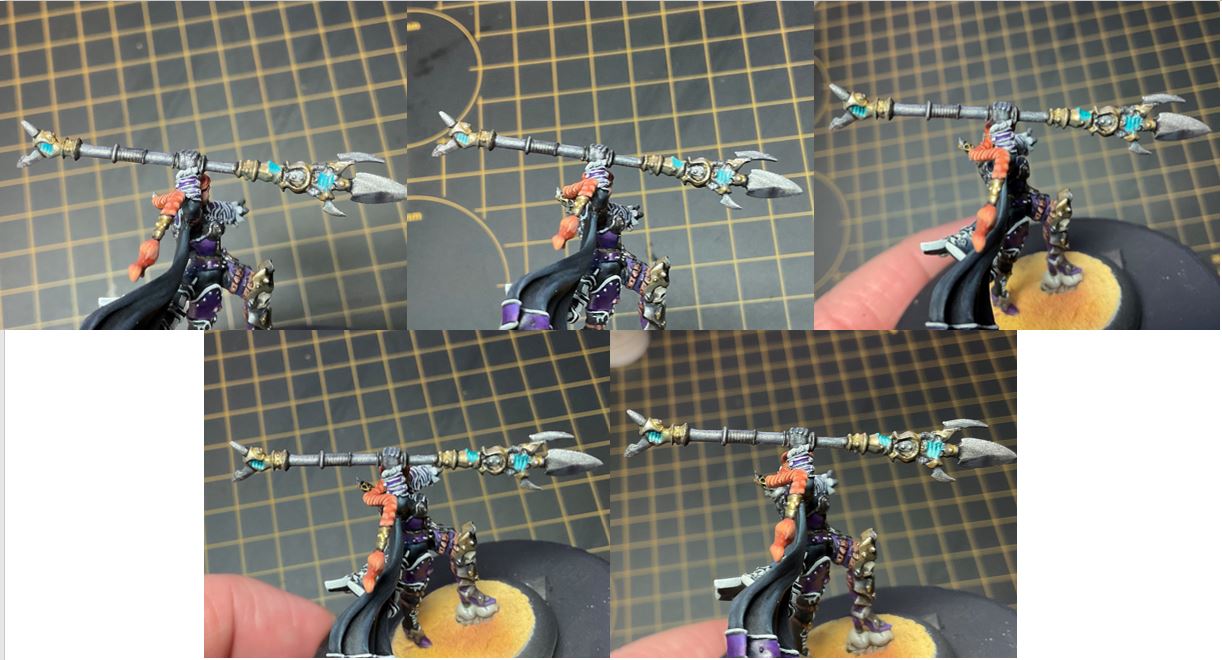
Step 1) Time to wrap up Fiona by adding in the arcane glow to her weapon. I start this process by putting down a basecoat of Arcane Blue in the recesses.
Step 2) I start my shade by applying a wash of thinned-out Meredius Blue.
Step3) Next, I mix some Turquoise Ink and Coal Black and apply this sparingly to the deepest shadows of the area.
Step 4) I start my highlights by using a mix of Arcane Blue and Menoth White Highlight for the first layer. I apply this to the area where the glow originates from, making sure not to go over the previous areas.
Step 5) Finally, I add little more Menoth White Highlight to the previous mixture and apply my final highlights.
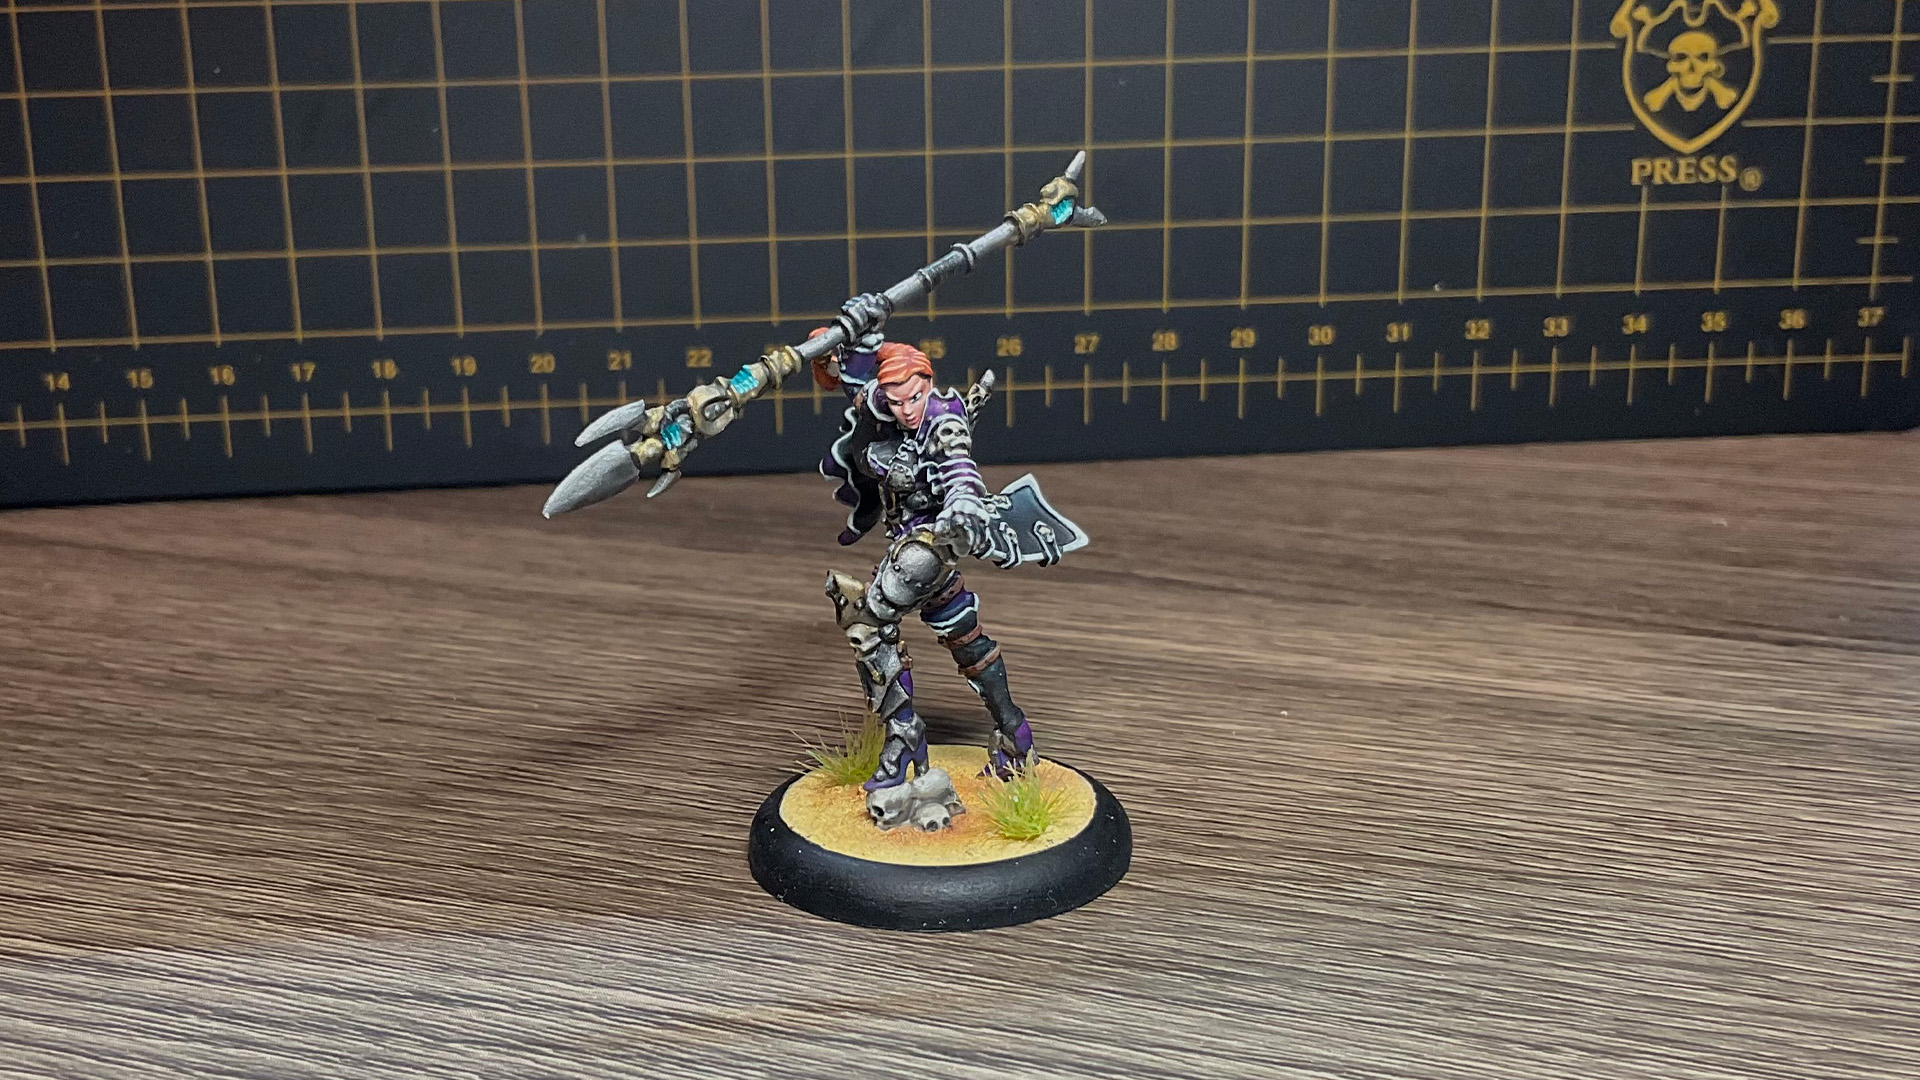
With that, Fiona the Black is ready to take her army into battle!
I’m getting so excited to get a fully painted pirate army on the table by Warfaire Weekend! Join me next time when I tackle another of my warcasters for my Talion Charter army, Bartolo Montador. See you then!
The post Painting Fiona the Black appeared first on Privateer Press.