Inside the Infernal Tower
Hey, all! Danny here! I am the Hobby and Terrain Specialist at Privateer Press. Today, I want to take you inside my process for creating the Infernal Tower for this year’s Iron Gauntlet final at Lock & Load GameFest 2019. This project was a big undertaking and might be the tallest piece ever made at Privateer Press!
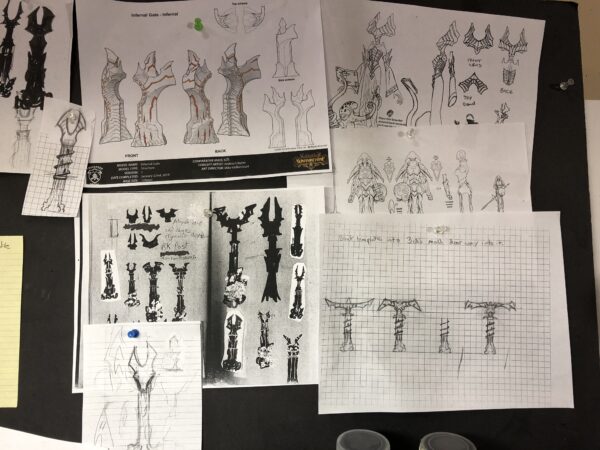
I began by creating sketches, designs, and small-scale mockups. We knew we wanted something tall and monumental blowing out of the table, so we decided to create a huge tower forming out of the ground in the middle of an unsuspecting town. We wanted to show the tower warping reality around it and pulling the buildings into both the pit and the tower. Creating striking shape and silhouette was very important at this point since we wanted something that would be very eye-catching from across the room. I had to keep in mind, however, that this piece might have to travel to other conventions as well, so it had to be designed in a way that could break apart and be packed.

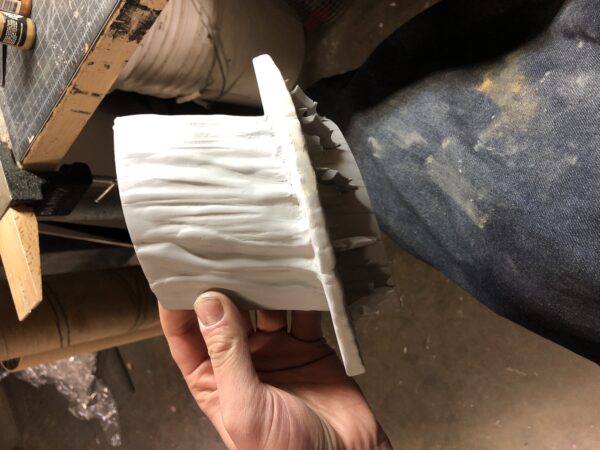
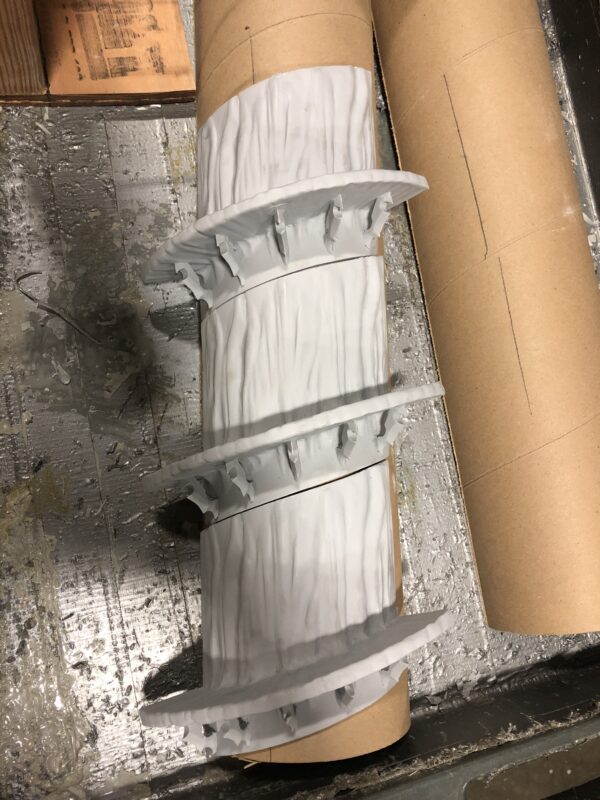
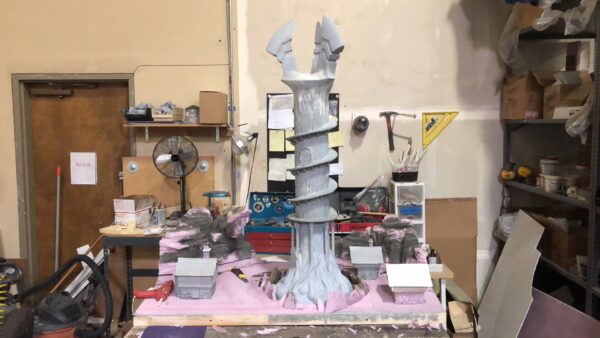
I decided to use a large cardboard tube as a base form to work around. We wanted a corkscrew type of platform following all the way up the tower, and the tube turned out to be perfect, as it naturally had lines for me to follow. I started to create a form that I could cast and repeat all the way up the tower. This would save me time and material and would allow me to keep the tower hollow and somewhat light.
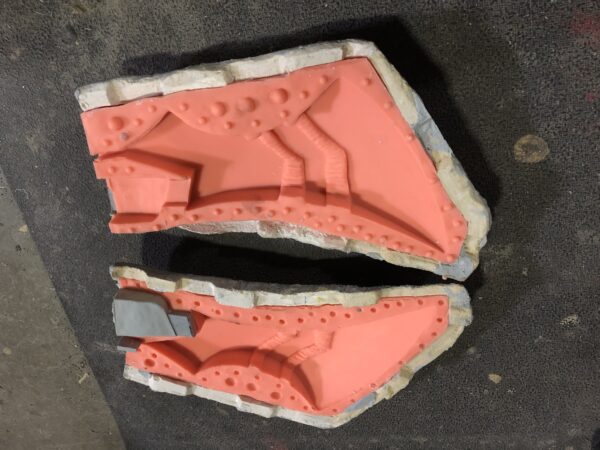
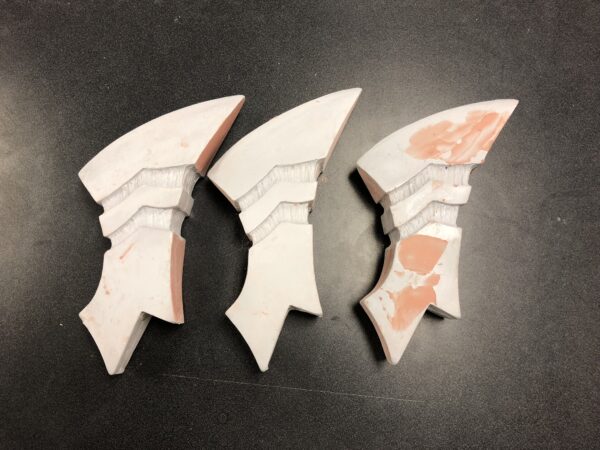
After these parts were cast, I began to glue them along the tube, working my way up. I then began sculpting the horn shape for the top. I carved the first one out of foam then finished it and polished it with wood filler and epoxy putty. I then made a large mold—I only needed three castings, so it could be quick and dirty. I ended up hand roto-casting these. It’s a messy and painful process, as the mold weighed over 10 pounds, and I had to spin it around by hand for ten minutes each. But this allowed me to create hollow castings, which, in the long run, made things light and durable.
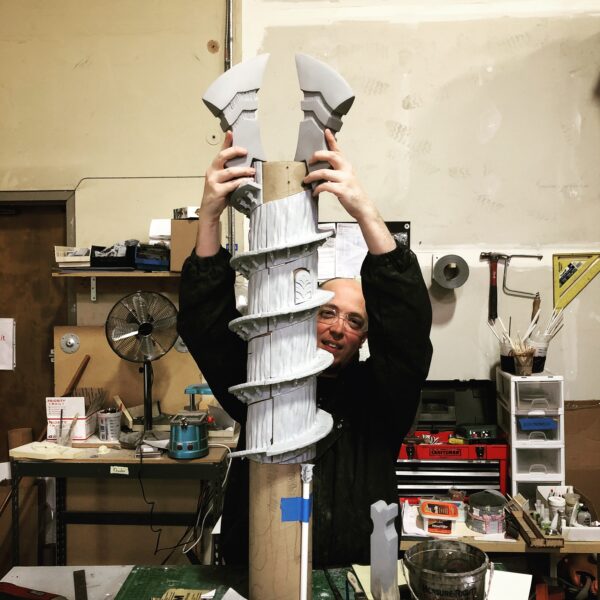
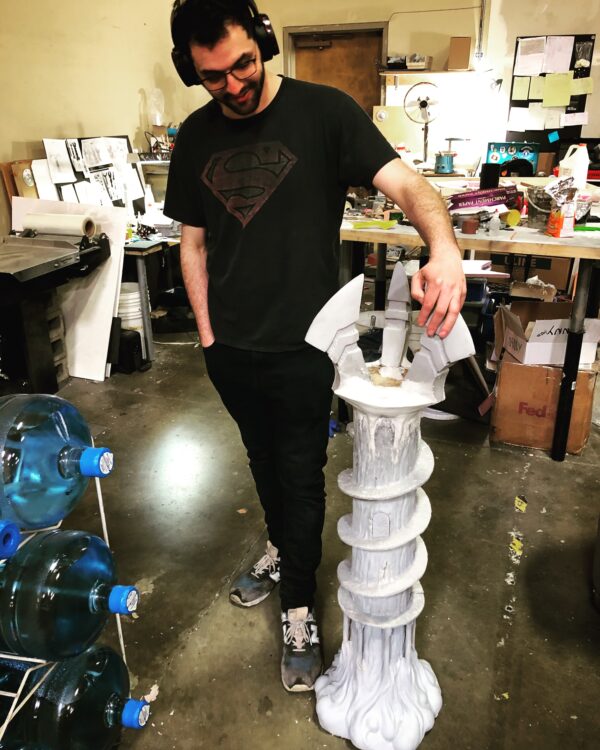
I continued to assemble the tower at this point. You can see our beautiful model Jeff Handley, our social media coordinator, helping me with the placement of the horns.
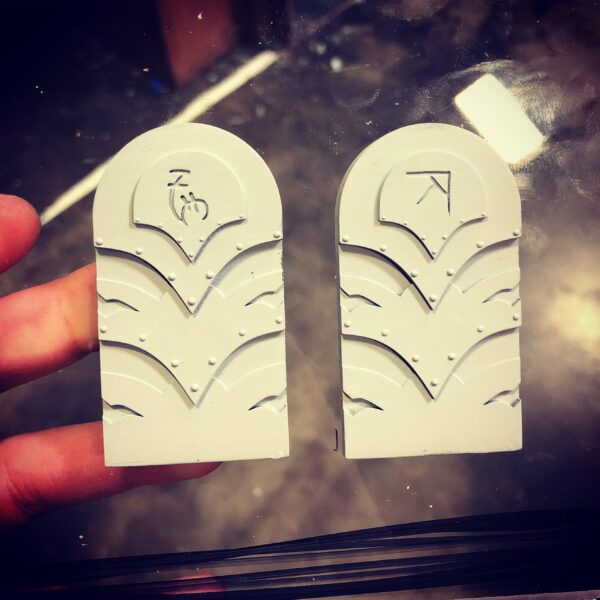
I also ended up 3D printing and molding some doors that I sculpted digitally. I made sure to add some runes from the infernal alphabet here as well to help sell the story a bit more.
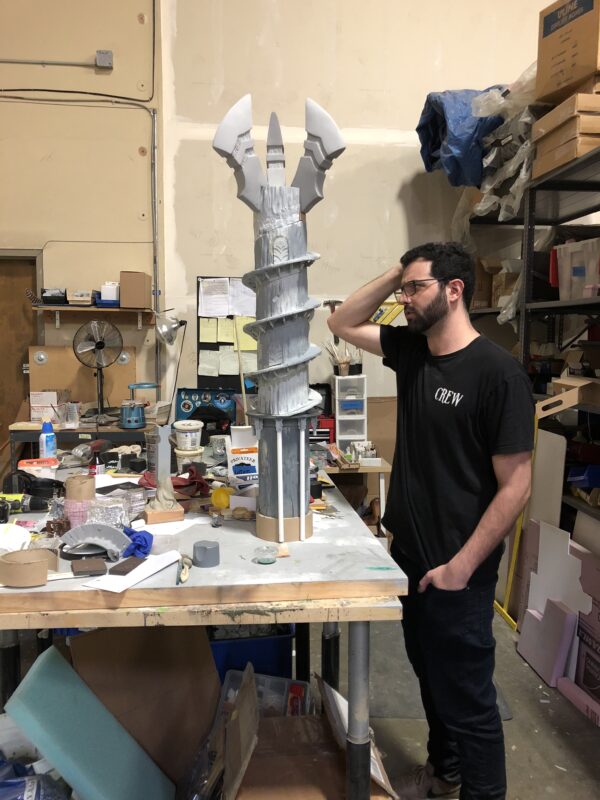
I continued to assemble the tower by making sure to clean the castings and fill gaps along the way while adding more detail.
At one point I had to pause to determine about what to do next. I decided it was time to start sculpting smoke and the top of the tower.
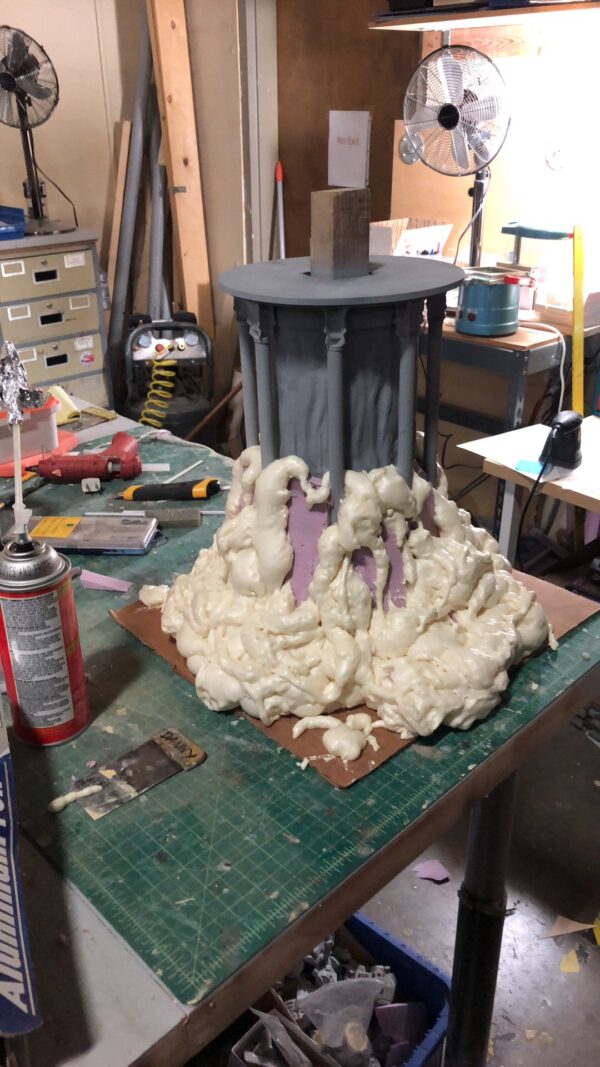
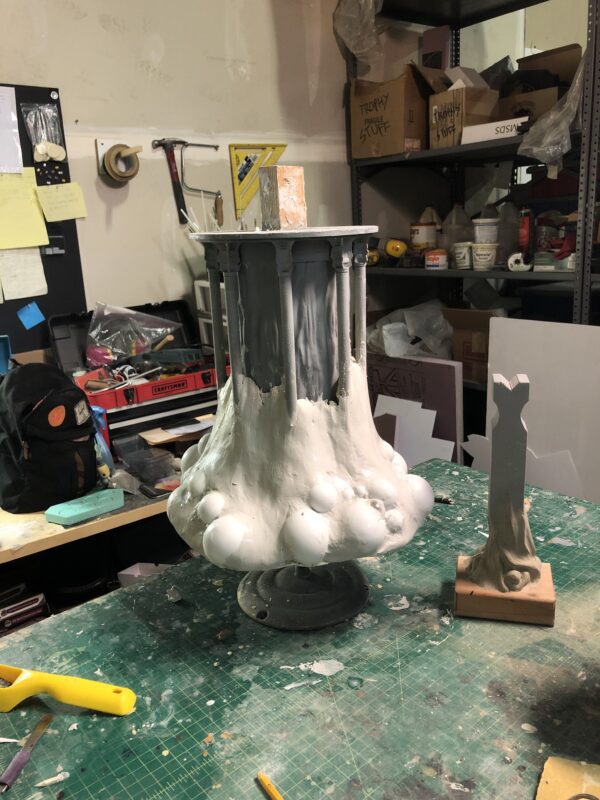
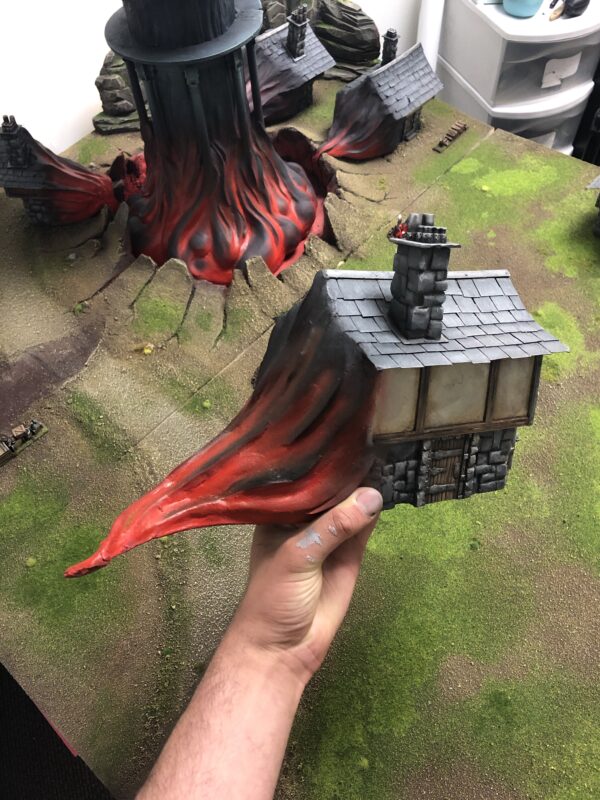
Using a combination of foam, vacuum-formed plastic domes, and lightweight epoxy putty, I sculpted the evil smoke formation on the bottom section of the tower, which I made sure to make removable for ease of shipping.
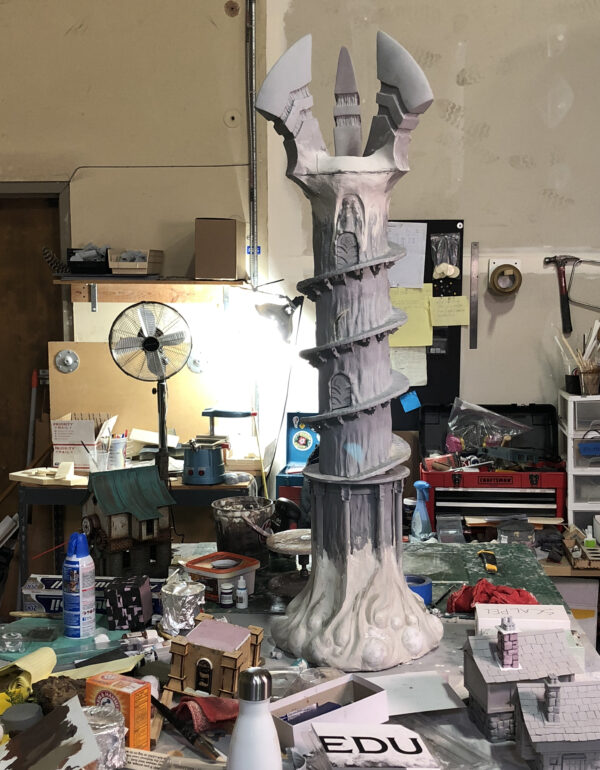
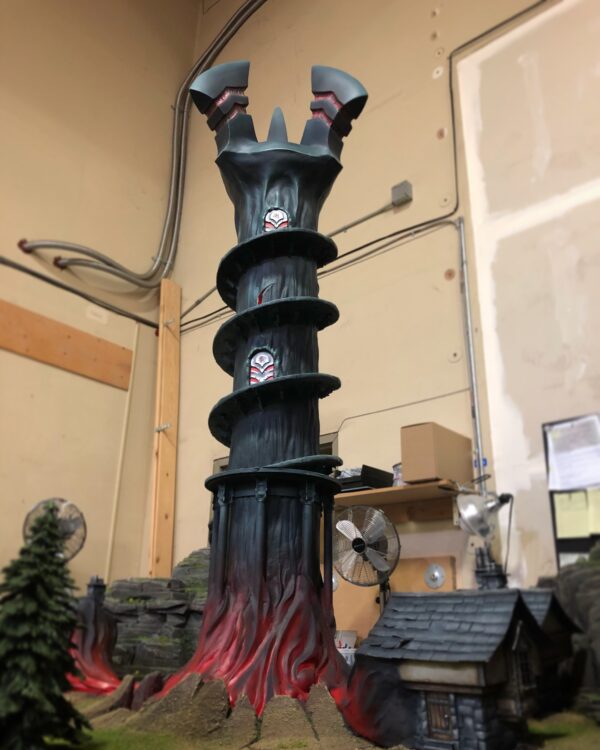
At this point the tower was really coming together! Look at the size of this thing!
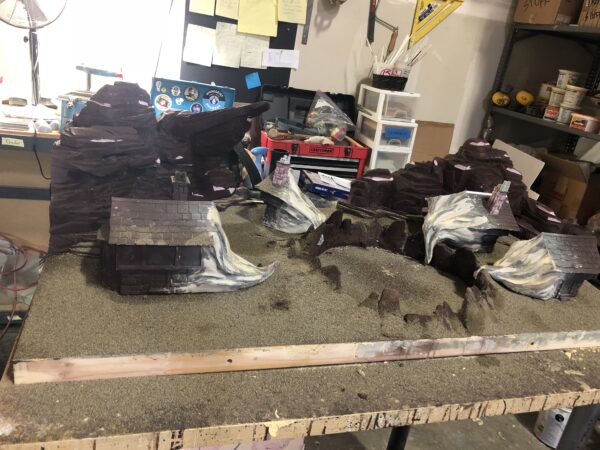
I then began to lay out the table to see how it would look once it was composed of buildings, mountains, and other elements.
I used the same technique as I did with the tower to turn the buildings into smoke as well. Be sure to stay tuned in the next month or so for a more detailed Insider on the process for making these buildings!
Now it was time to add details and paint! As you can see, the paint really helps this table pop!
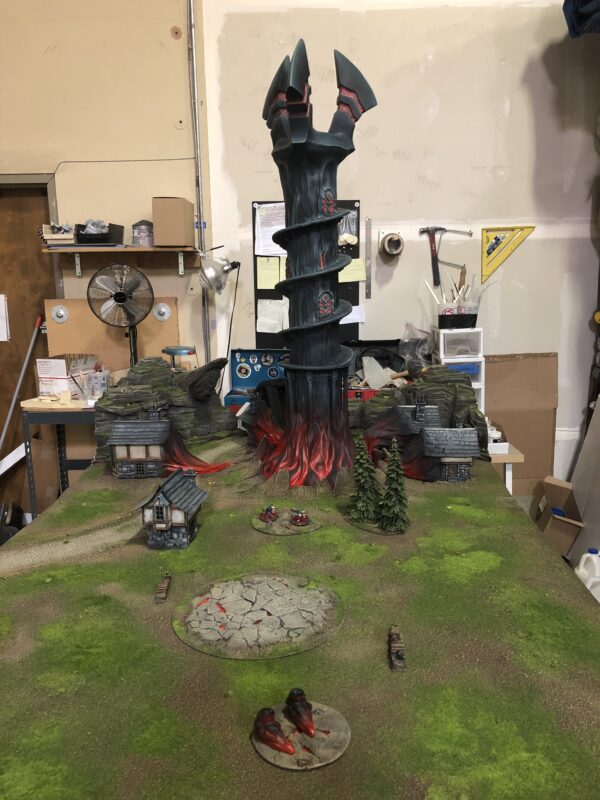
And there you have it! That’s how our Infernal Tower came together. I look forward to seeing you all at Lock & Load! Please come by and check this sucker out! And be sure to follow our Terrain and Hobby Instagram page!